


 Beetle
 T2 Bay
 T2 Split
 T25
T25
 Transporter T4
 Transporter T5
 Golf Mk1
 Golf Mk2


 911
911
 996
996
 997
997
 986 Boxster
 987 Boxster
 912
912
 944
944
 924
924


 Defender
 Discovery Series 1
 Discovery 2
 Series 1, 2 & 3
 Freelander
 Freelander 2


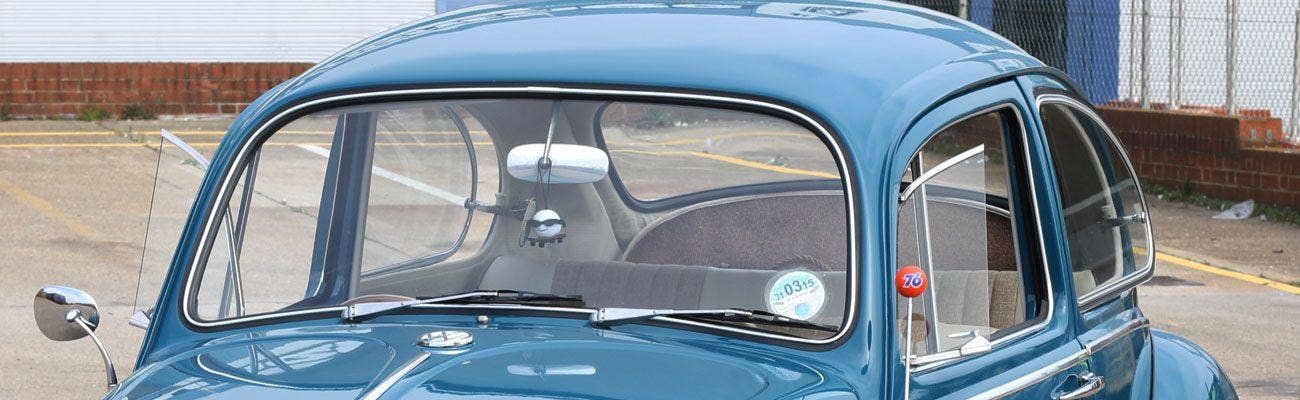
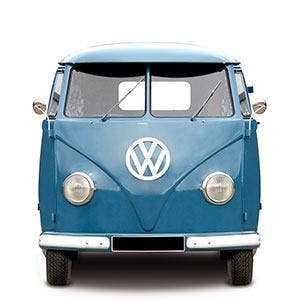
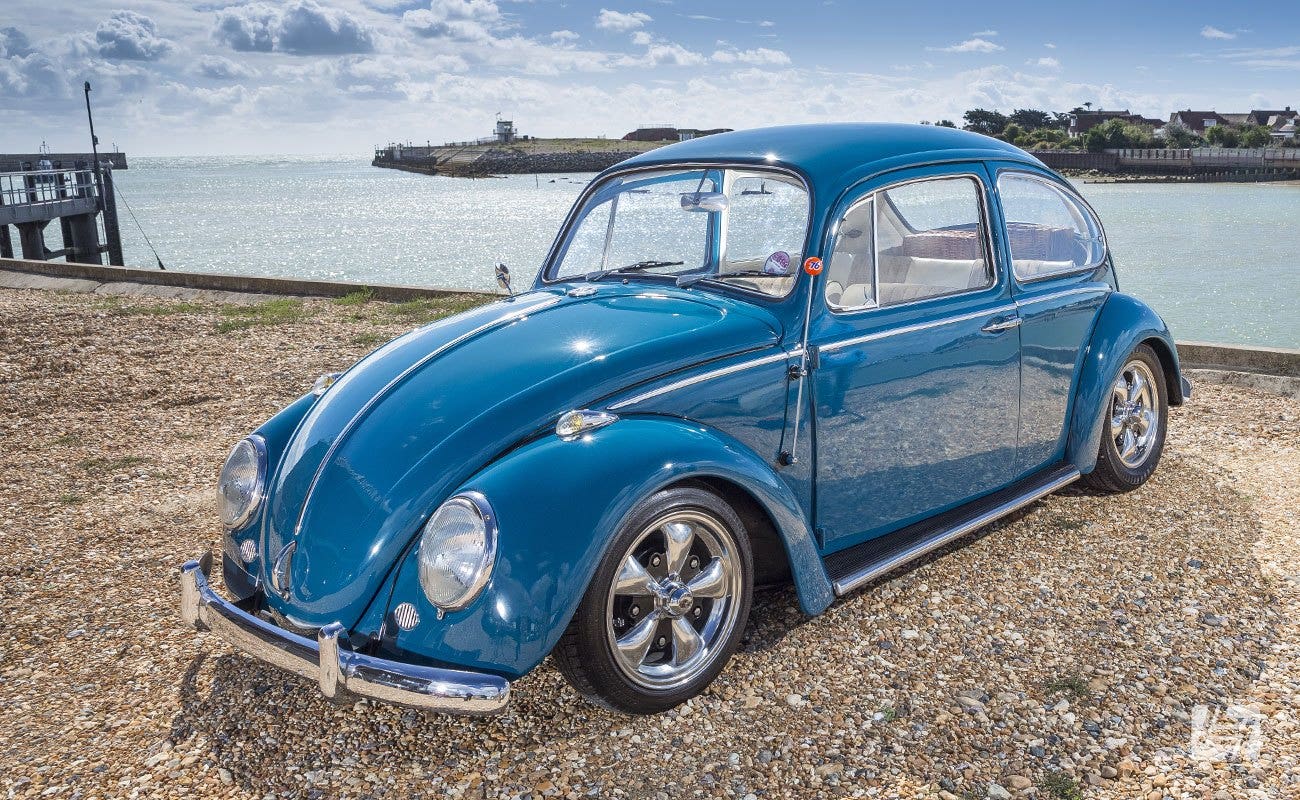
VW Beetle Window Seal Replacement
So your windscreen has been shattered, or maybe it’s just so old and scratched that it’s getting hard to see through it at night? Perhaps you’re sick of water creeping into the car through rotten old window seals, or maybe you’ve had to pop the windows out to replace the headliner fabric? In any event, it’s time to replace your VWs windows and fit some new seals. This article discusses fixed glass seals – in other words front and rear windscreens and fixed side windows. This is a job that any competent home mechanic should be able to do with minimal hand tools (although it’s certainly a good workout for your fingers). We use the classic Beetle as an example, though the same technique will work just as well on a Splitscreen van, Bay Window bus or a Karmann Ghia and is similar for many cars of this age (1940s - 1980s).

Beetle Windscreen
If you aren‘t refitting your original windows, then make sure you have the correct glass for your car. Due to changes to the cars over the years, there are four different sizes of Beetle windscreen, five different types of VW Beetle rear window glass, as well as two sizes of side windows. Heated front and rear windows are also available for some applications, as well as tinted glass in green or grey.

VW Window Seals
Since they match the glass, there are a fair few different-sized seals available. Naturally, it’s important to make sure you order the correct ones for your car, so you’ll need to be 100% sure what year your car is. The next thing to decide is which style of seals you want. Early VW Beetle window seals were supplied with an inserted trim on Deluxe or Export models, which helps lock the seal in place on the glass. On the earlier cars, these trims were aluminium though later this was replaced with plastic window trims. Be aware that the actual seals are different between metal and plastic trim types. Base model Beetles – later 1200s and Standard models – were originally fitted with plain (ie. no trim) window seals to save on costs, and this style is now available for many fitments, usually sold as ‘Cal-Look’ style, smooth seals. These also have the advantage of being a little easier to fit.
What you'll need
Naturally, you’ll need the correct glass and matching seal. If you’re doing any headliner work, then that needs to be completed before you fit the glass. There is a special window trim tool to help fit the trim into the seal, which would doubtless have made life easier for me, although I found a plastic bicycle tyre lever worked pretty well, as it has a slightly hooked over end. You will also be needing some sort of lubricant. Liquid soap will work, perhaps WD40, though other types of lube are available – in any case, the more slippery it is, the better. Lastly, you’ll need some decently strong cord or string. Best to use some cord that isn’t too thin, as it may cut into the rubber if you aren't careful, but it does need to be strong.
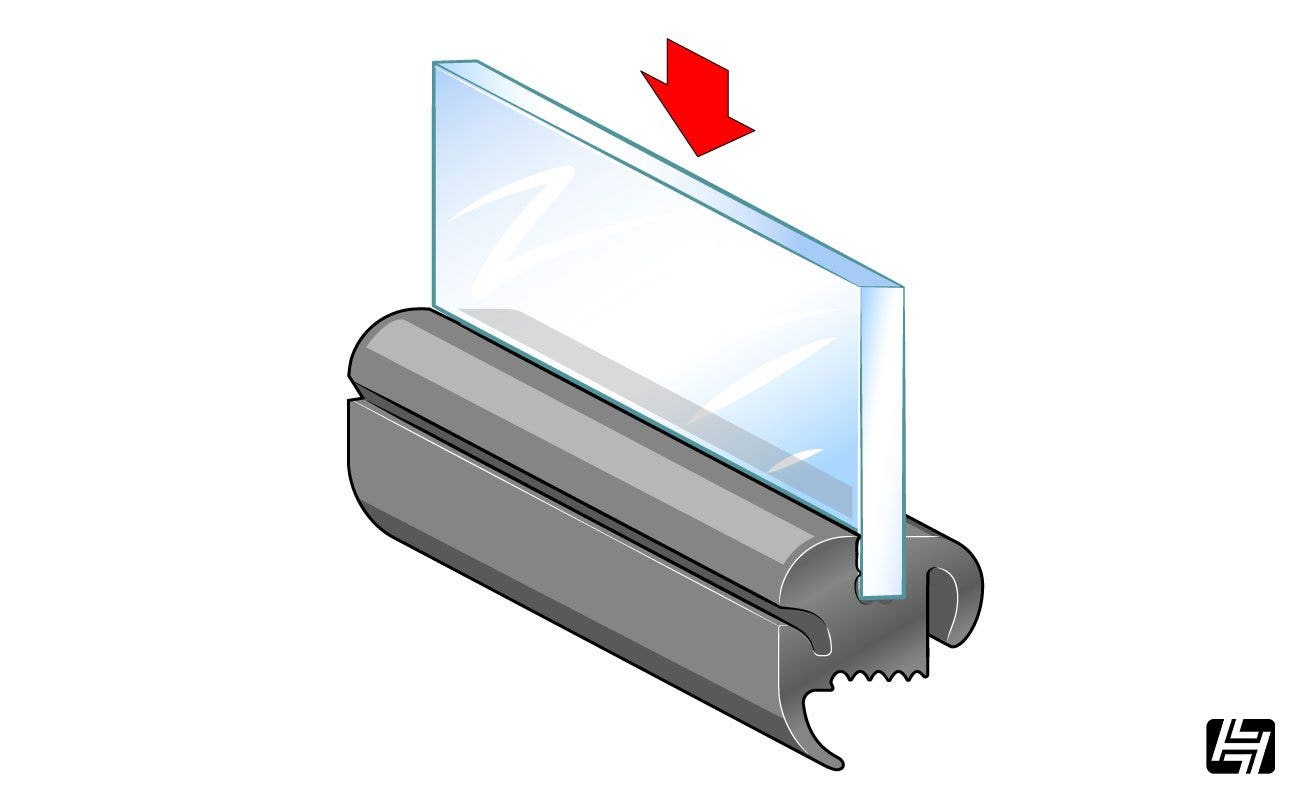
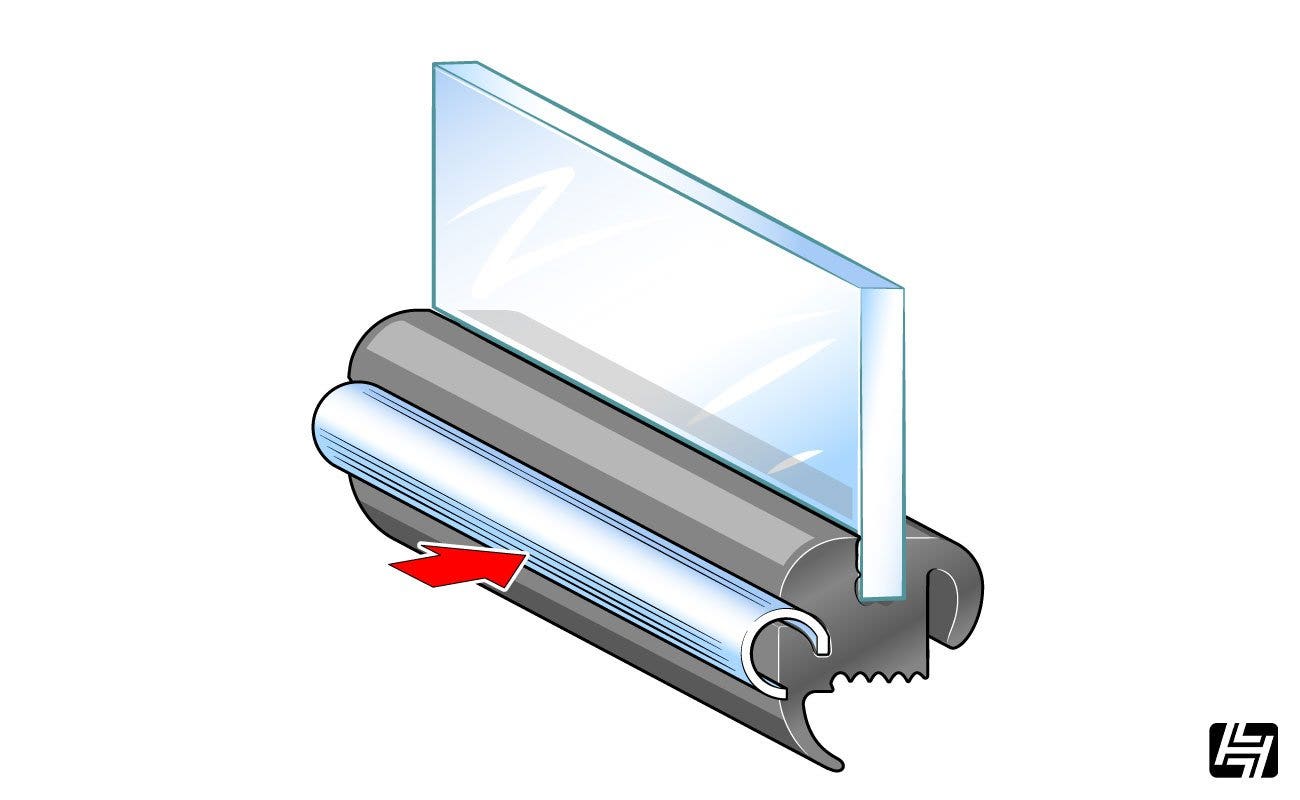
How to fit your glass to the windscreen seal
To spare you a lot of pain, there’s only one correct order of assembly for window seals with chrome or plastic trims – 1. seal onto glass, 2. trim into seal, 3. window into car. Trying to do it any other way will not end well.
Set the window down somewhere where it’s easy to work. Take the seal and have a good look at it. You’ll need to identify which slot is which and find the correct slot for the glass to go into. Take another look at the seal and you’ll see a joint, where the rubber profile is bonded together. For the sake of neatness, it’s usually best to put this at the top, in the middle of the glass. Open up the seal and start to work it onto the edge of the glass. On a Beetle windscreen, where it curves upwards along the lower edge, it’s probably a good idea to start in the middle, at the bottom. This is to make sure that you aren’t left trying to force the seal to stick to the bottom of an up-curve, after you’ve pulled it tight around the rest of the glass. Do this dry, as the seal needs to stay put on the glass and not slide off. Make sure the seal is seated properly and pushed all the way on. Take care not to pull the seal too tightly around the corners of the window, as this can leave you with gaps when it’s fitted, where water could get in.
How to fit the windscreen seal trim
Once you have the seal seated down evenly and securely on the glass, it’s time to fit the trim to the seal. As already mentioned, these come in aluminium or chrome plastic versions. On first glance, you may find yourself wondering if you shouldn’t have fitted the trim first, but don’t worry - this is the way. This is where you will absolutely need some of the soap to get things to go together. Put some on the end of your spatula of choice and work it into the groove for the trim, the whole way around the seal. Wipe off any excess and try to avoid getting it all over the place as it will make things difficult. Now take the trim and start at one corner. This is the most difficult part and it can be tricky to get started, but pull the lip of the seal back, to open up the slot and you should be able to hook the trim into it. With one hand on the fitted part, to make sure it doesn’t pop out again, work your way along the seal. It should be quite obvious when the trim is properly seated, as it will really pull down into the seal. Keep an eye on the rest of the seal, as it will most likely try and jump off the edge of the glass when you aren’t looking. Once you have the first couple of corners in place, the trim should be less inclined to try and pop out of the seal, though a couple of bits of tape will make sure it stays put. Before you’re fully done and go to push the loose ends of the trim into the seal, don’t forget to add the connecting clip that covers the joints. Be aware that these clips differ, depending on if you are using plastic or aluminium trims. They also have a correct ‘way round’, with the flat edge matching the flat on the trim. Once both ends of the seal are in place, tap the clip across to cover the gap. The window seal should feel a lot more securely locked onto the glass at this point.
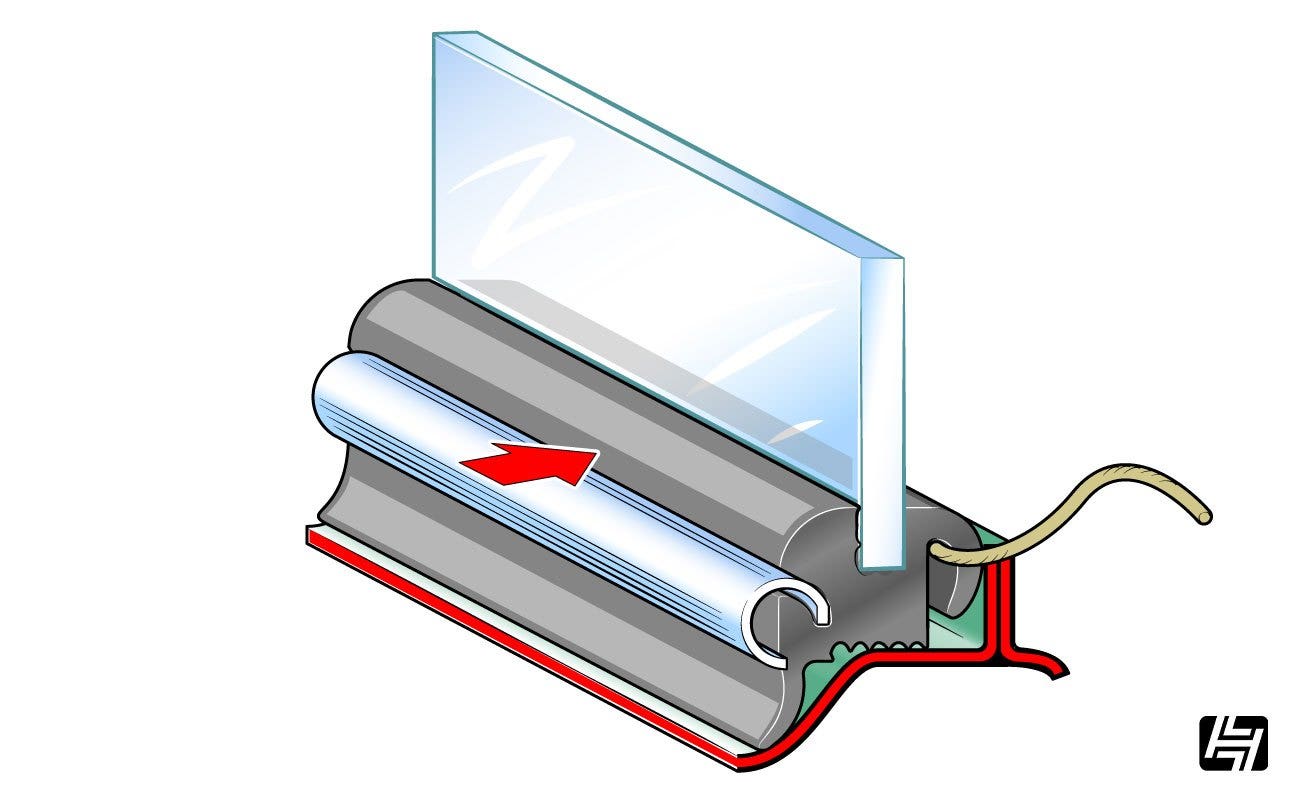
How to fit a new windscreen to your car
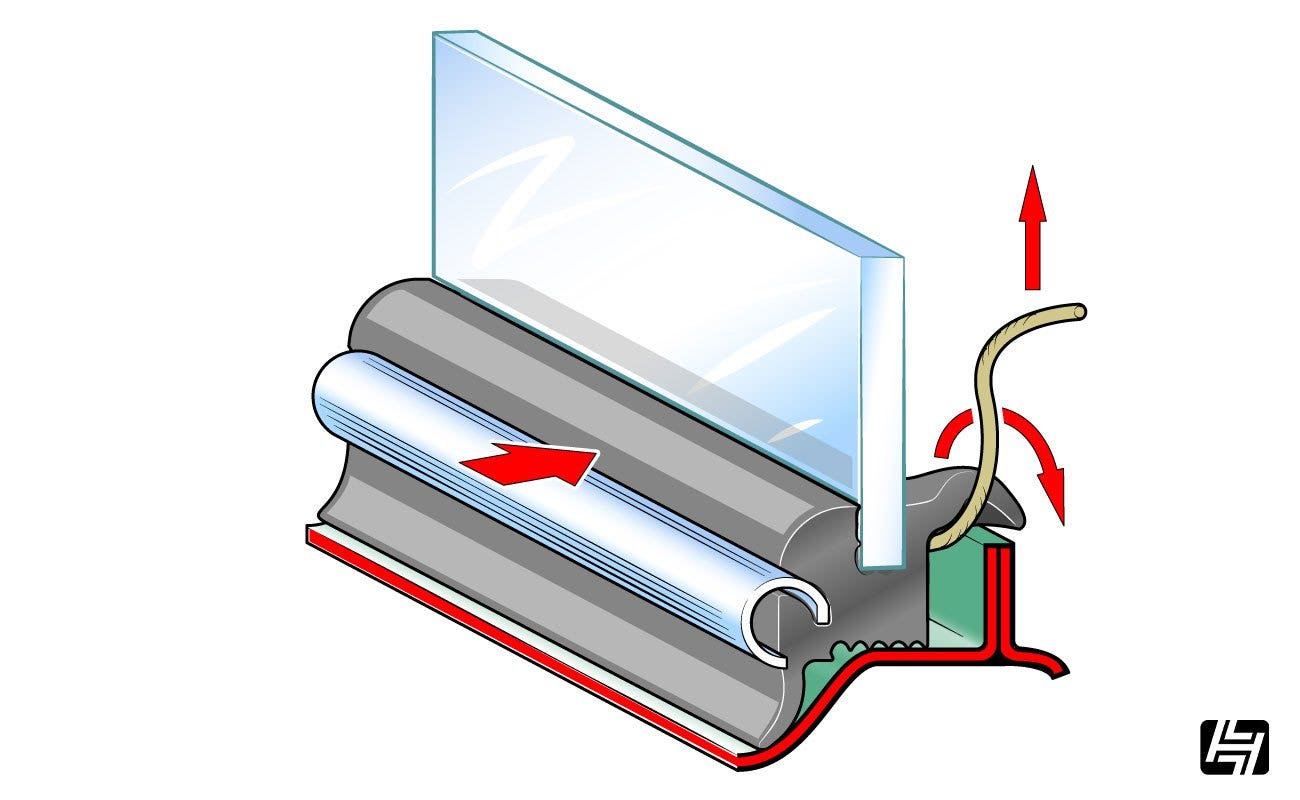
Take the cord and push it into the last remaining groove on the seal and wrap it the whole way around the window. The last time I did this, I wrapped the cord around twice, for reasons that will become clear. Obviously, this will only work if the cord is thin enough to easily fit in the groove. At this point it might help to add some soap to the metal lip on the car too. From outside the car, place the glass up against the car body, making sure the outer lip of the seal hasn’t rolled under itself. You’ll want to push the window as far in as you can, with the idea being to get the seal to nudge up against the lip on the bodywork. The ends of the cord need to be hanging free inside the car. At this point it might be useful to find an assistant, to help you keep some pressure on the window as you proceed. Pull on the cord carefully while keeping pressure on the glass. What you are trying to do, is to lift the seal over the lip on the body. Take care not to pull too hard or too quickly – you don’t want to cut into the seal, though you also need to make sure that the cord doesn’t slip out without lifting the seal. This is why – as previously mentioned - I wrapped the cord around twice, to get a second shot at it, if I missed a bit, or the seal slipped off the lip in a tight spot, like a corner. It’ll take a fair amount of pushing and shoving to really get the glass to seat properly and even after you have the seal hooked over the lip, you’ll want to give the glass another good thumping around the edges, to really make sure it’s really, properly in there.
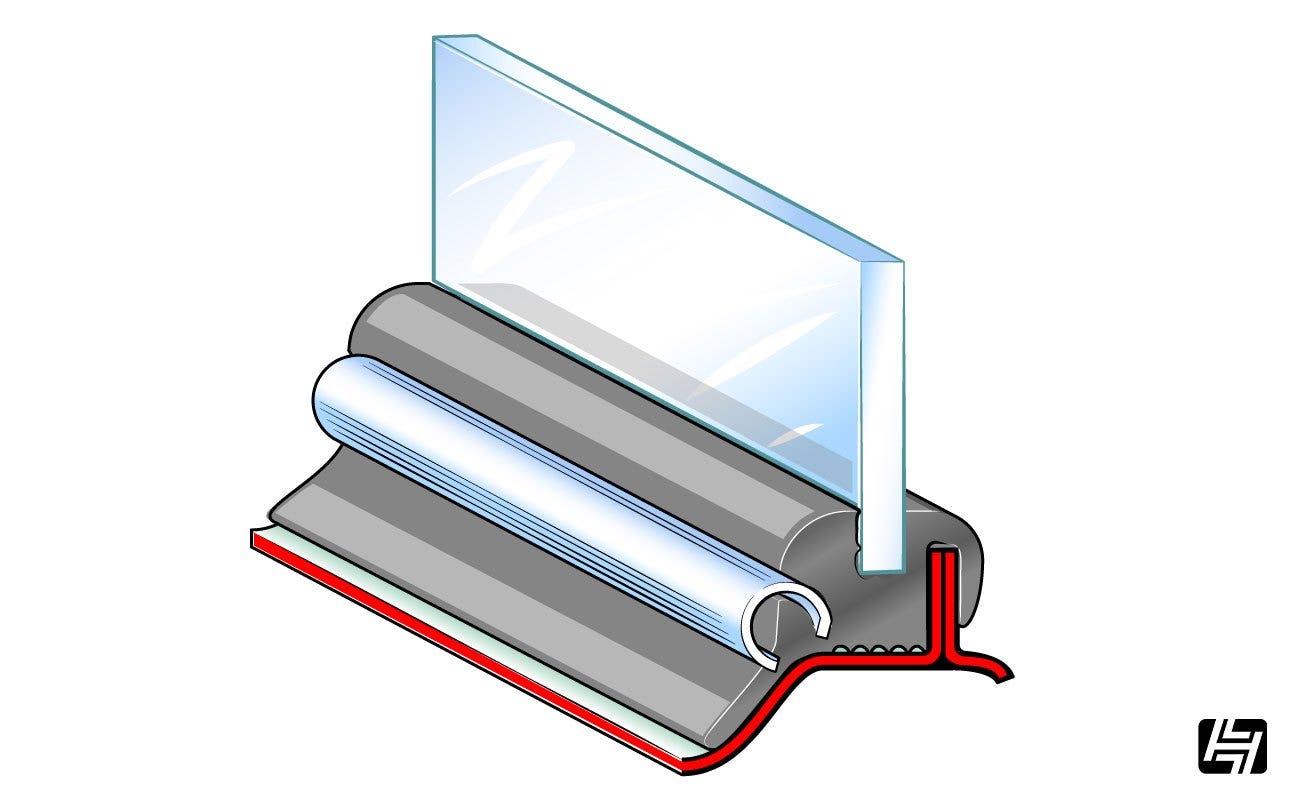
Job done
So there you go. Pat yourself on the back (once your no doubt sore hands have recovered) and enjoy leak free motoring and the view of the open road through your wonderfully clear new windscreen.
James