


 Beetle
 T2 Bay
 T2 Split
 T25
T25
 Transporter T4
 Transporter T5
 Golf Mk1
 Golf Mk2

 911
911
 996
996
 997
997
 986 Boxster
 987 Boxster
 912
912
 944
944
 924
924


 Defender
 Discovery Series 1
 Discovery 2
 Series 1, 2 & 3
 Freelander
 Freelander 2


Replacing Classic Car Body Panels
Regardless of whether you intend to carry out the work yourself or end up paying someone else to do it, a proper metal repair is always preferable to scoops of body filler or using fibreglass as a quick fix. We shine a light on the best practice when replacing classic car body panels.
What to do with Rust Bubbles?
Localised rust bubbles are created when moisture gets trapped under the paint, and sadly without picking the paint off, the moisture remains in place. Start with a small screwdriver and go gentle. Do remember that once you have opened a hole up, you will need to fix it!

Stripping the paint off your classic car
Working on a stripped-down body shell will make things easier, but this will probably mean having it chemically dipped or treated to a media blasting process to strip off all the old paint and corrosion. Media blasting will also reveal sections of the body that have become dangerously thin which will need replacing. Horrors are uncovered through this process, so prepare to be shocked when the shell comes back!

Staying safe in your workshop
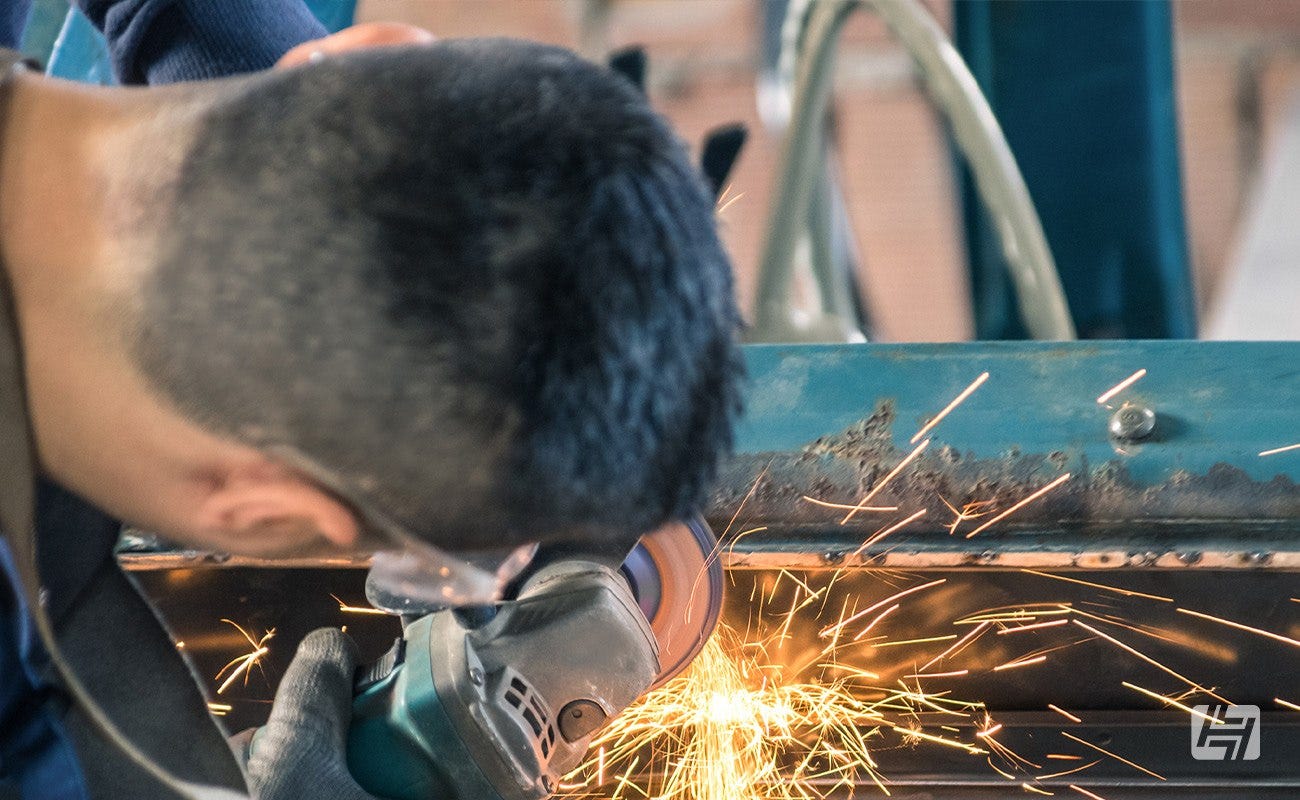
Fire is a real risk when cutting and welding so a fire extinguisher is an essential purchase. Sparks can hurt, burn holes in your clothes, singe your hair and shouldn't go anywhere near your eyes. Wear suitable clothing, hand covering and of course have goggles for grinding and a welding mask, either handheld or on your head depending on your preference.

Brace yourself!
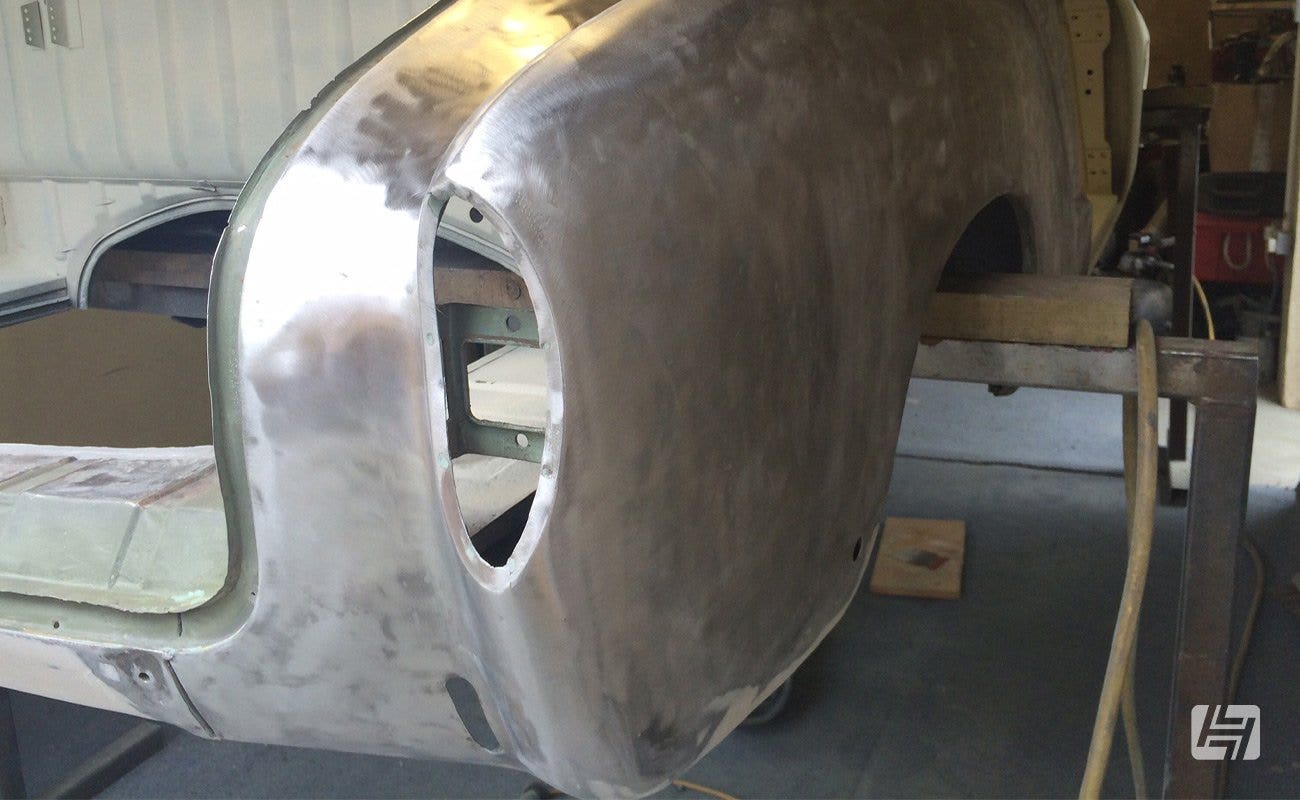
If you are removing a large structural section, such as a sill or floor pan it is common practice to brace up the body shell to maintain the rigidity of the vehicle. This doesn't have to be your finest fabrication work, just some cheap box section steel, tacked onto the pillars and ideally triangulated to avoid any twisting. This work in progress example from You Tuber Dan Chambers gives a good idea of where to start.

Cutting the rust out of your classic car
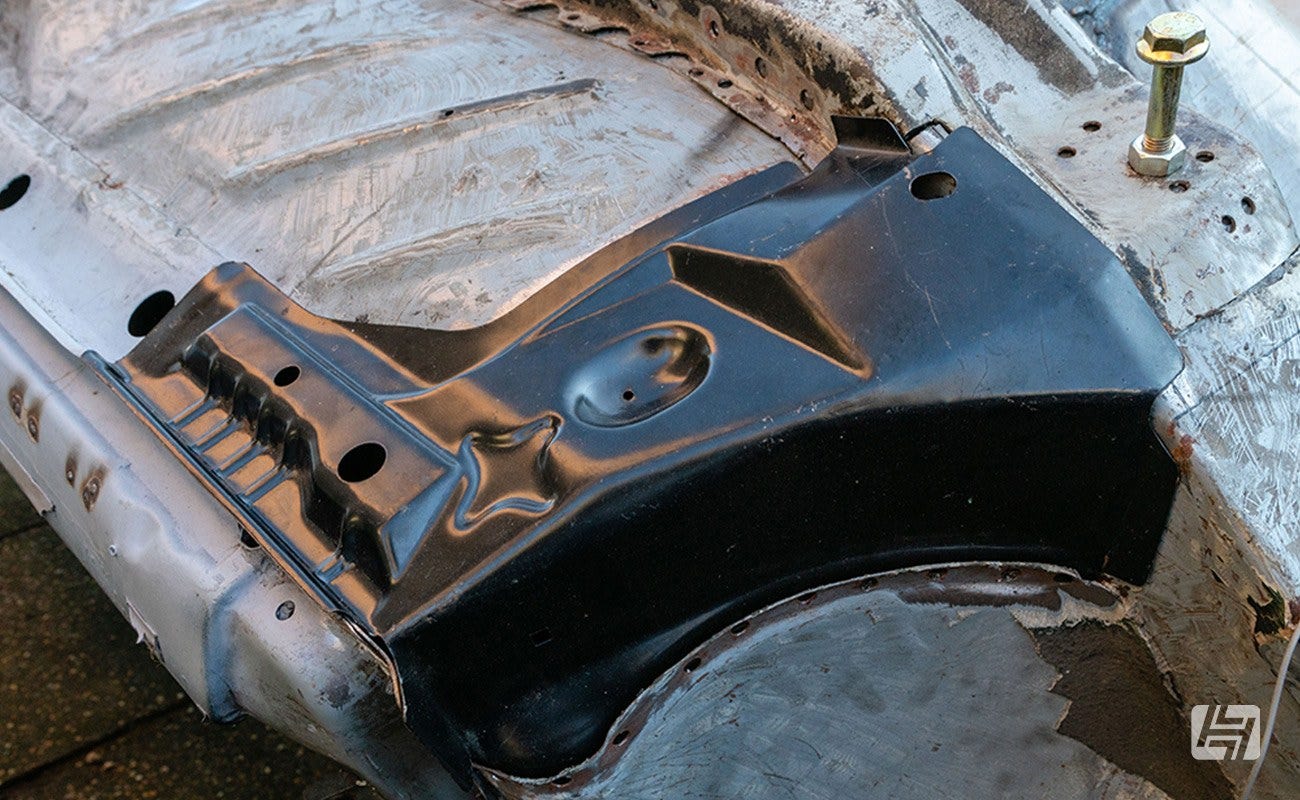
With the rusty areas exposed, you will need to remove the rot. Most professionals like to use air-powered tools to make a quick clean slice, however, an angle grinder with a 1mm cutting disc will work just as well. It’s a case of taking your time and letting the blade do the work. Try to keep your cuts as neat as possible, and offer the cutting wheel up to the metal with the power off first, to check for any residual damage that may be inflicted in the surrounding area. With the situation clean you can start to make a proper plan when it comes to repairing. The images below are before and after on a Golf Mk2 inner rear wheel arch.


What's on the other side?
Before breaking loose with the cutting tools, make sure any wires, fuel lines and other fragile components are well out of the way. The last thing you want to do is cut through one of them. Check what is on the other side of where you are; it’s all too easy to cut a hole in your carpet or worse still, set fire to it! Cover any glass to protect it from flying sparks and have a CO2 fire extinguisher at the ready should things get heated. Having a mate, or an understanding other-half to 'spot' for you can save a lot of panics, especially if you are under the car.

Which repair panels do you need?
There are a few things to consider when sourcing repair panels for your classic Volkswagen or Porsche. Is the repair structural? Is this repair going to be visible? What is my budget? Do I want this repair to be as close to the original as possible? Am I going to do this job myself? If you are new to the world of DIY welding do you feel confident tackling a repair that supports the suspension, or is part of the car's strength? Don't let us put you off, as everyone has to learn - but is this the part to start with?
Will your repair be seen from the outside of the vehicle? A replacement battery tray is unlikely to be seen by many, so the welding won't have to be as tidy as a new rear wheel arch which will be on show for all to see. Before you pick the repair panels you need, consider what your budget might be. In many cases, we offer a few different qualities of body panels that will do the same job. How will the cost of repair sit against the value of the vehicle? Are you going to keep the vehicle, or is it a quick "get it MOT'd and sell" project? If you are building a higher value car, or have your heart set on panel perfect restoration then OE gauge (metal thickness) panels, with the exact pressings will be important for you. We offer these in many cases, but they do carry a premium - hence the question above.

Reproduction Panels have their place
Some restorers will sniff at cheaper repair panels; citing poor fitment, less defined pressing and thinner gauge of metal. In some cases, these reproduction panels are all that is available. This is particularly the case with more niche models, such as the Karmann Ghia, Porsche 914 and Porsche 944 for example. The original tooling is long gone, and the demand doesn't warrant the high investment cost of tooling up to manufacture an OE quality product, nor will the market accept the high purchase price required to make it worthwhile. I tend to look at these panels and ask myself "Is it better than I could make?" Almost always the answer is yes...
Buying Genuine repair panels
If a Genuine VW or Original Porsche panel is available for your vehicle, should you buy that? This is a tricky one to answer, but I'll try. We are very honest about fitment and quality when we list our parts online. Some reproduction replacement panels fit great, others will take a few hours for a professional to fettle. Ask yourself would you rather pay your body shop to manipulate a cheaper panel, or supply a more expensive item but save on their labour bill? Your chosen restorer will advise on which way to go with that, based on their own experience I'm sure. There is a kudos to saying that your vehicle is fitted with genuine panels, and this might be important to you if you are repairing it to achieve a higher resale value in the future.

Proper panel preparation
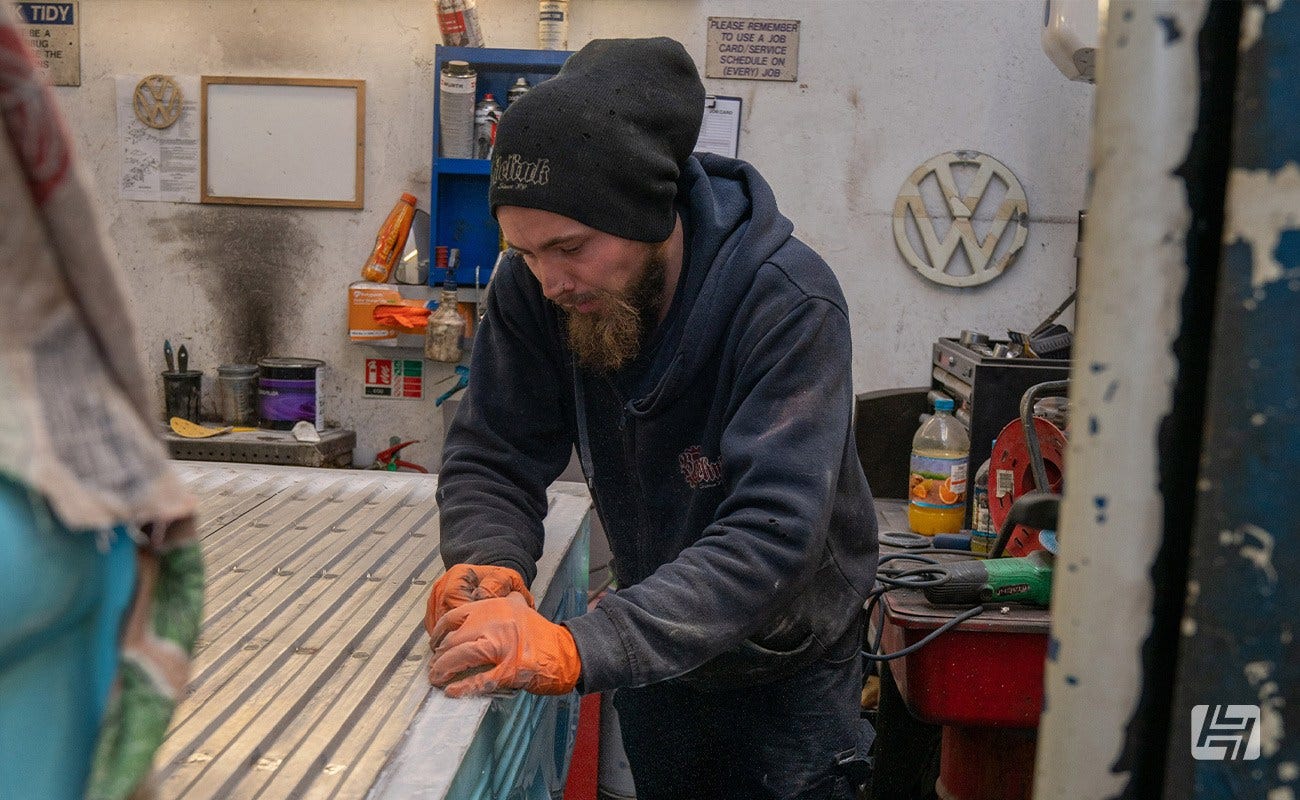
Always trial fit your replacement panels before making any cuts to the vehicle. Remove any surface corrosion, paint and underseal from the surrounding metal with a flap disc mounted in an angle grinder. You need bright, clean metal for the best welds. Once you know exactly what you are working with you can do the final trimming work to ensure a good fit. Personally I try to keep as much original metal as possible, so will trim a repair panel down to just what is required.

Prime position
Apply a light dusting of weld-through primer to all the bare metal surfaces, including the repair sections, to discourage rust. You may even choose to paint any hidden sections of metal with something more substantial, just be aware it could catch alight when the welding starts. Now, it’s just a matter of clamping the repair panel into position so it can be welded. If you don't have room to clamp, then some strong magnets are a great workshop addition. If you are feeling resourceful you could cut these off an old speaker, alternatively, specific angle magnets for the job aren't expensive and come in various designs and sizes.

Avoiding heat distortion
It is best practice with body panels to use short bursts of weld to avoid heat distortion of the surrounding metalwork. There are also products available to soak up this heat to help avoid any warping issues. The metal will be hot afterwards, don't touch it straight away, and make sure it is securely in place. I had a hot patch fall on my face once when the tack welds failed, it wasn't pleasant.

Dressing your welds
Unless you are a real star with the welding torch you'll have some tidying, or dressing, to do afterwards. This is commonly tackled with a grinding disc on an angle grinder. Go gently, you want to smooth the tops of them off, but not compromise any of their integrity. If the repair won't be seen again you may be happy enough with the result fresh out the torch, just be sure to protect it from corrosion; we can thoroughly recommend RAPTOR for his job. Take a look at our how to use RAPTOR guide here.

Finishing touches
With the hard bit done, a thin skim of body filler can be applied to blend the welds with the surrounding bodywork. Once this has been sanded down, the repair should be virtually invisible and you'll be ready for paint. If you’ve replaced a section where the inner wheel arch meets an out panel, for example, you will want to apply seam-sealer so prevent any risk of water getting into the sill cavity.
Painting your repair panels
I'm no expert in paintwork, but I do know you'll need to apply a primer to any bare metal. Once dry, this will benefit from a few rounds of wet flatting with sandpaper, and along the way, you may need to apply additional filler for any small dimples or pinholes. If you can see imperfection in primer it will be magnified after the paint goes on. As with all bodywork, the key is in the preparation. Last up is the topcoat. If you can hide any 'join' between old and new paint behind a trim moulding, you'll make life easier for yourself. If this isn't possible you'll need to blend the paint which can be tricky, especially when colour matching older or original paintwork.
If after all of this you'd rather find someone else to do it, then we don't blame you! On the plus side, you'll have a good idea of what you are paying for.
Ian / Andy