


 Beetle
 T2 Bay
 T2 Split
 T25
T25
 Transporter T4
 Transporter T5
 Golf Mk1
 Golf Mk2


 911
911
 996
996
 997
997
 986 Boxster
 987 Boxster
 912
912
 944
944
 924
924


 Defender
 Discovery Series 1
 Discovery 2
 Series 1, 2 & 3
 Freelander
 Freelander 2


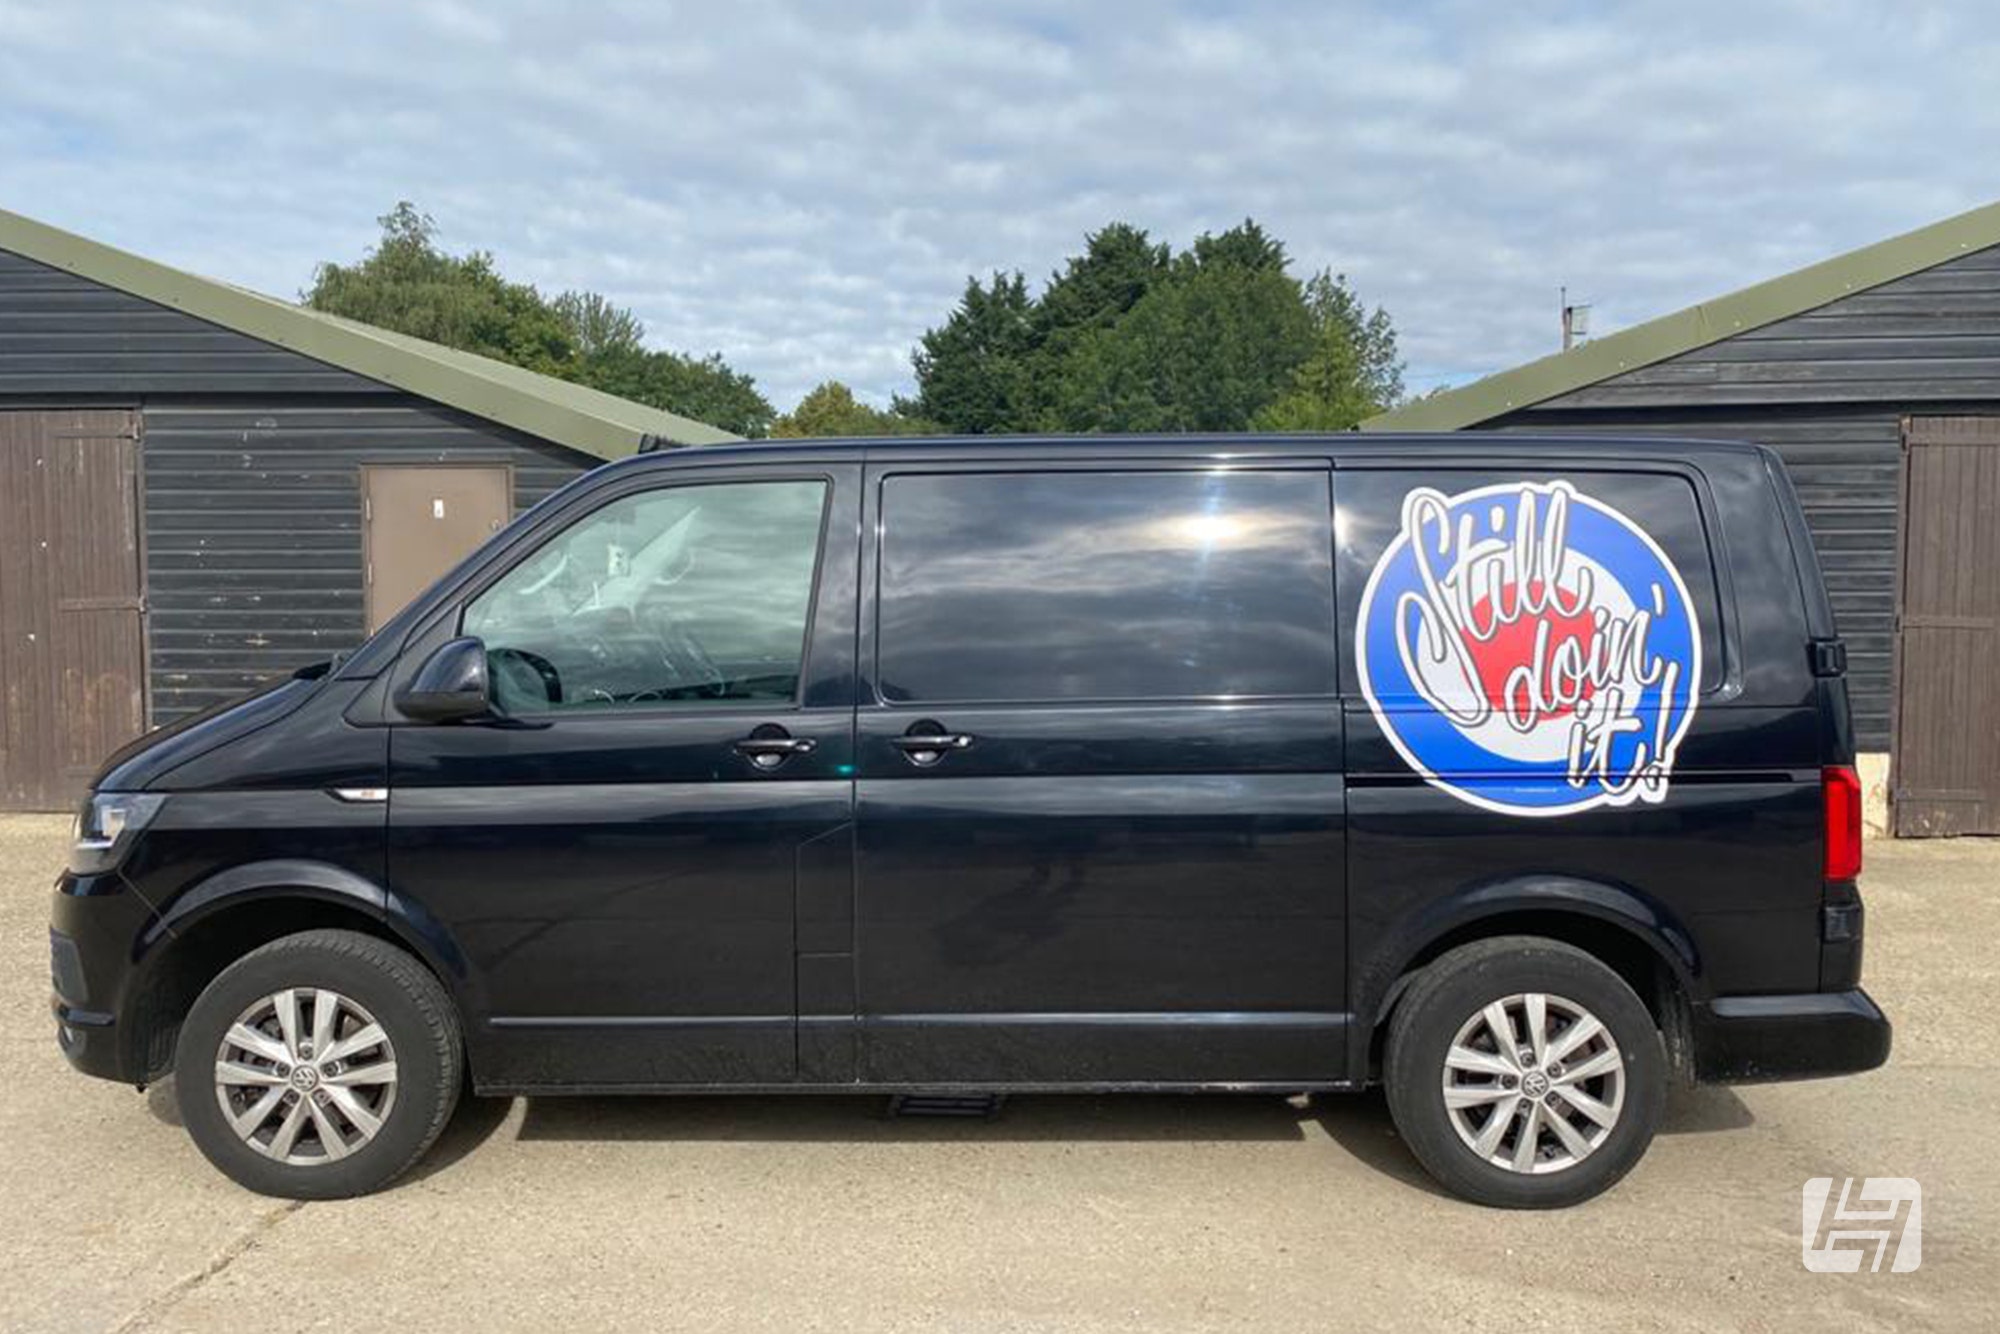
How To: Fitting VW T6 Coilovers
Looking to get your modern Transporter a little closer to terra firma, without losing its practicality or breaking numerous piggy banks? We recently supplied an SSP Coilover kit to our good friend Paul Knight and his pal Jolly Jim. They documented fitting VW T6 Coilovers for VWt magazine and kindly shared the process with us too. It is worth noting that this kit and the steps followed will also apply to fitting VW T5 coilovers. Thanks, guys - over to you Paul.
Dropping a T6 Panel Van
When my buddy, Jolly Jim, mentioned that he wanted to drop his T6 panel Van, my first thought was ‘awesome, let’s get chopping and sit this thing in the weeds. However, he was quick to add that he had some basic requirements, the first of which being that it couldn’t be ‘Knighty’s chop-shop low’ as he needed to use it for work on a daily basis. Jim’s work involves the occasional heavy load of building supplies and, more often than not, traversing building sites and bumping up kerbs (to stop at the chip shop) hence he was adamant that a static drop of maybe 60-70mm would be ideal.
SSP Coilover kit for VW T6
Now, it is possible to pick up good value T5/T6 suspension kits that will achieve a reasonable drop however, they don’t all cope well with heavy loads (and some of the heavier-duty options can feel quite harsh when driven daily). Of course, we could have opted for a professional air-lift system but, in reality, Jim was after simplicity and was working on a budget. The answer was a decent Coilover kit, which was designed to tackle loads while improving handling but without ruining the ride quality. Whilst there are many options available, we decided to try the recently launched SSP Coilover kit from Heritage Parts Centre (Available for T26, 28, 30 but also as a kit for T32). The kit includes adjustable front struts and rear spring platforms, which can be set anywhere between 40mm and 70mm lower than stock, which was ideal for Jim’s T6. Incidentally, we also ordered new top mounts and anti-roll bar drop links as it made sense to change these parts while we were at it. Drop links are generally considered to be a ‘consumable’ item as they rarely unbolt with ease, so there’s a good chance you’ll end up butchering them or even cutting them off.

Dropped by Dan
With everything loaded in the back of the T6, we set off to visit Danny Allen (Dubz by Dan in Rayne, Essex) to have things bolted up, adjusted and aligned. Dan works on both air- and water-cooled VWs and was happy for us to hang around and snap a few pics while he bolted up the SSP Coilover kit (which sounded far easier than doing it on the driveway with hand tools). The procedure is essentially the same on all T5 and T6 models but you just need to make sure you purchase the correct top mounts etc to fit your vehicle. One other point of note is that we decided to remove the rear bump stops as the Van would be running pretty much at the lowest setting (-70mm) and there would almost certainly be interference issues. However, if you were erring on the milder end of the adjustable drop, you may find the bump stops are not going to be an issue.
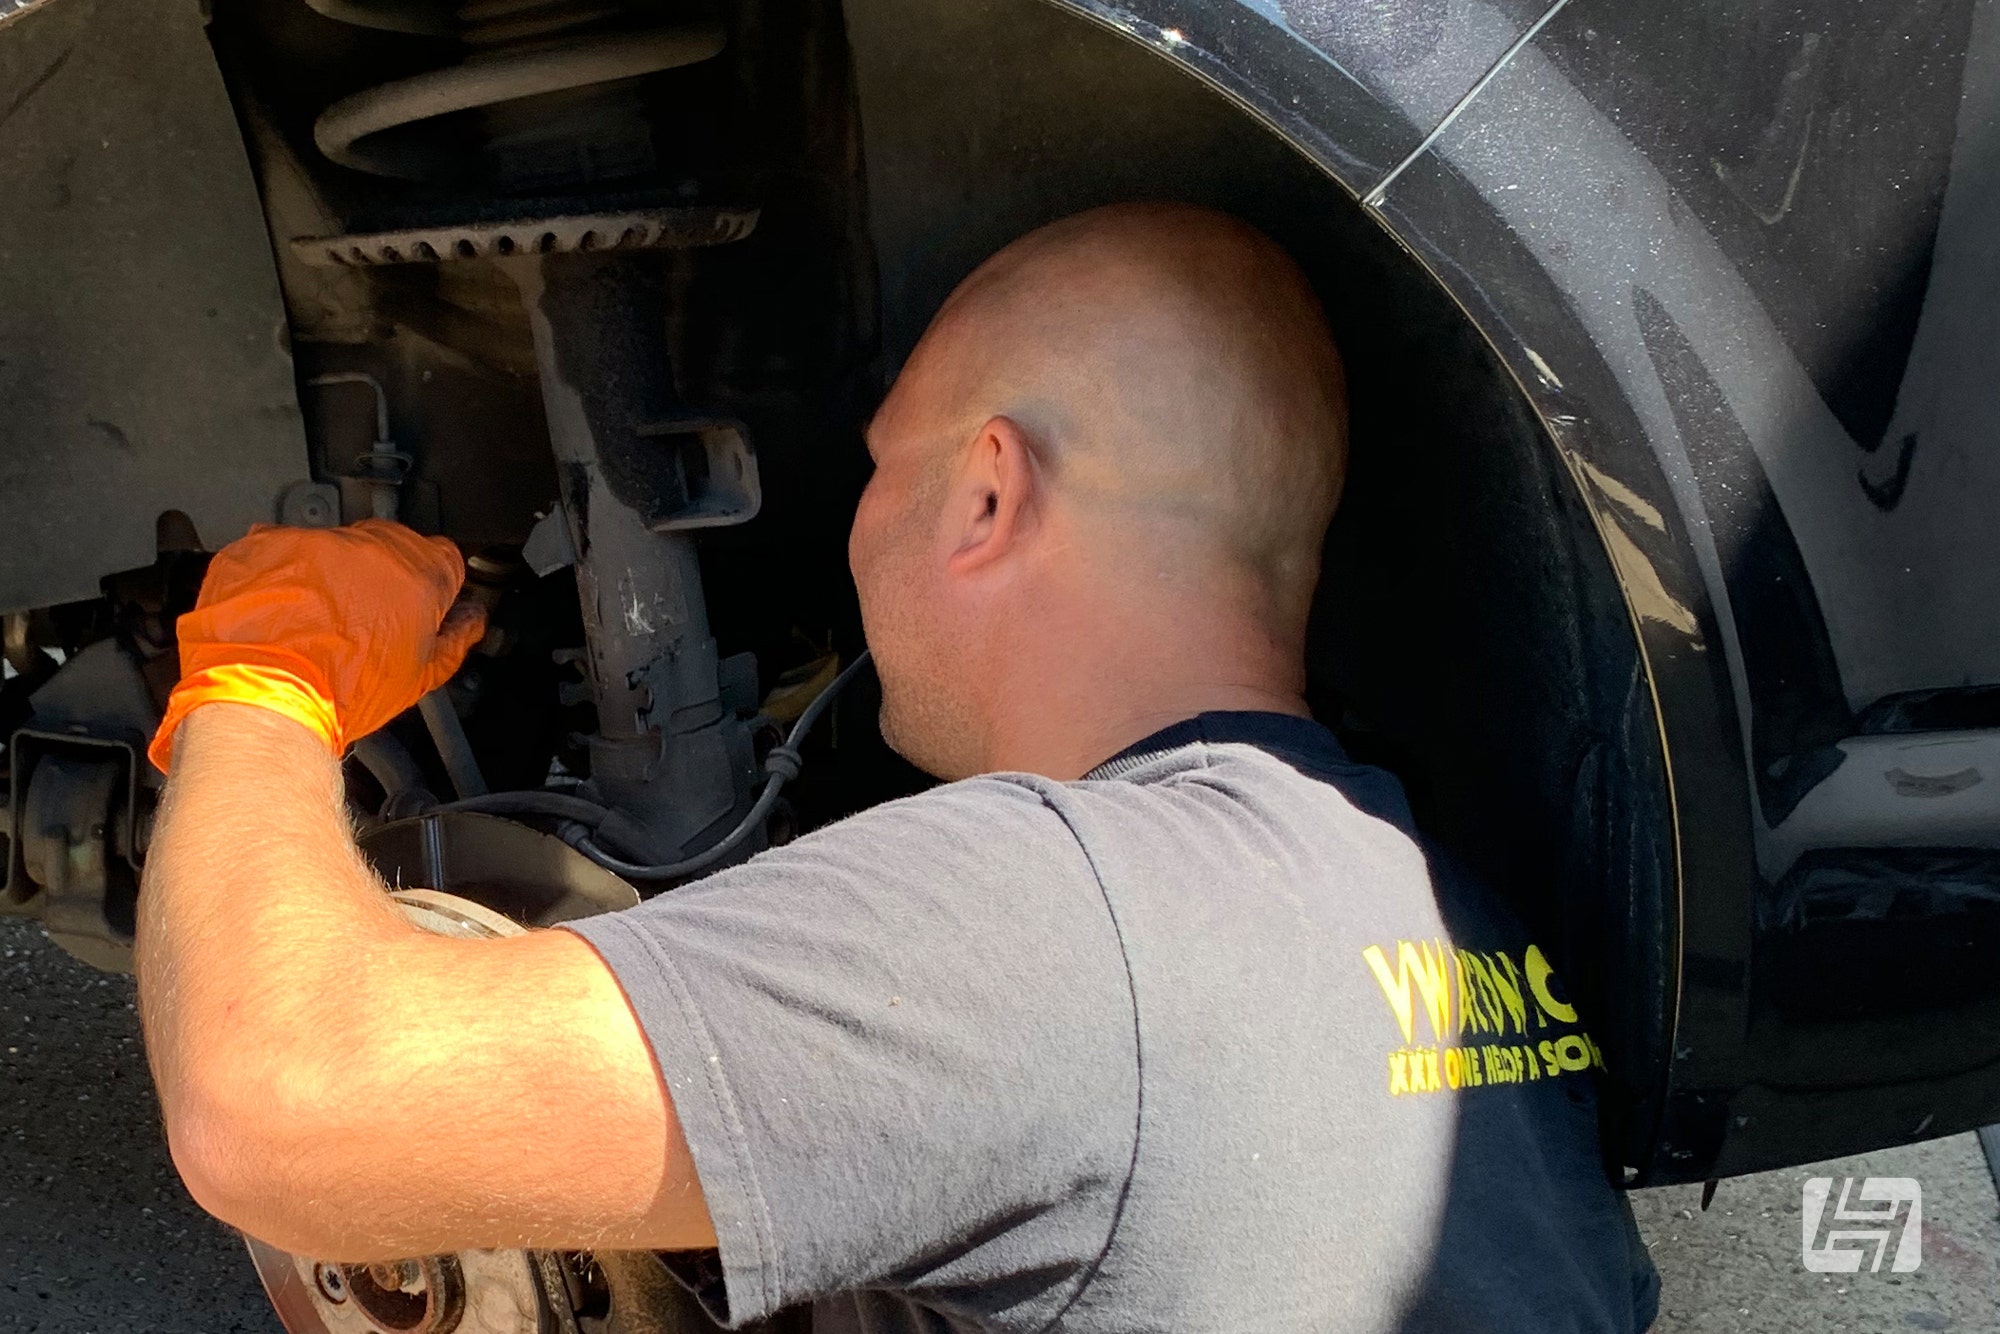
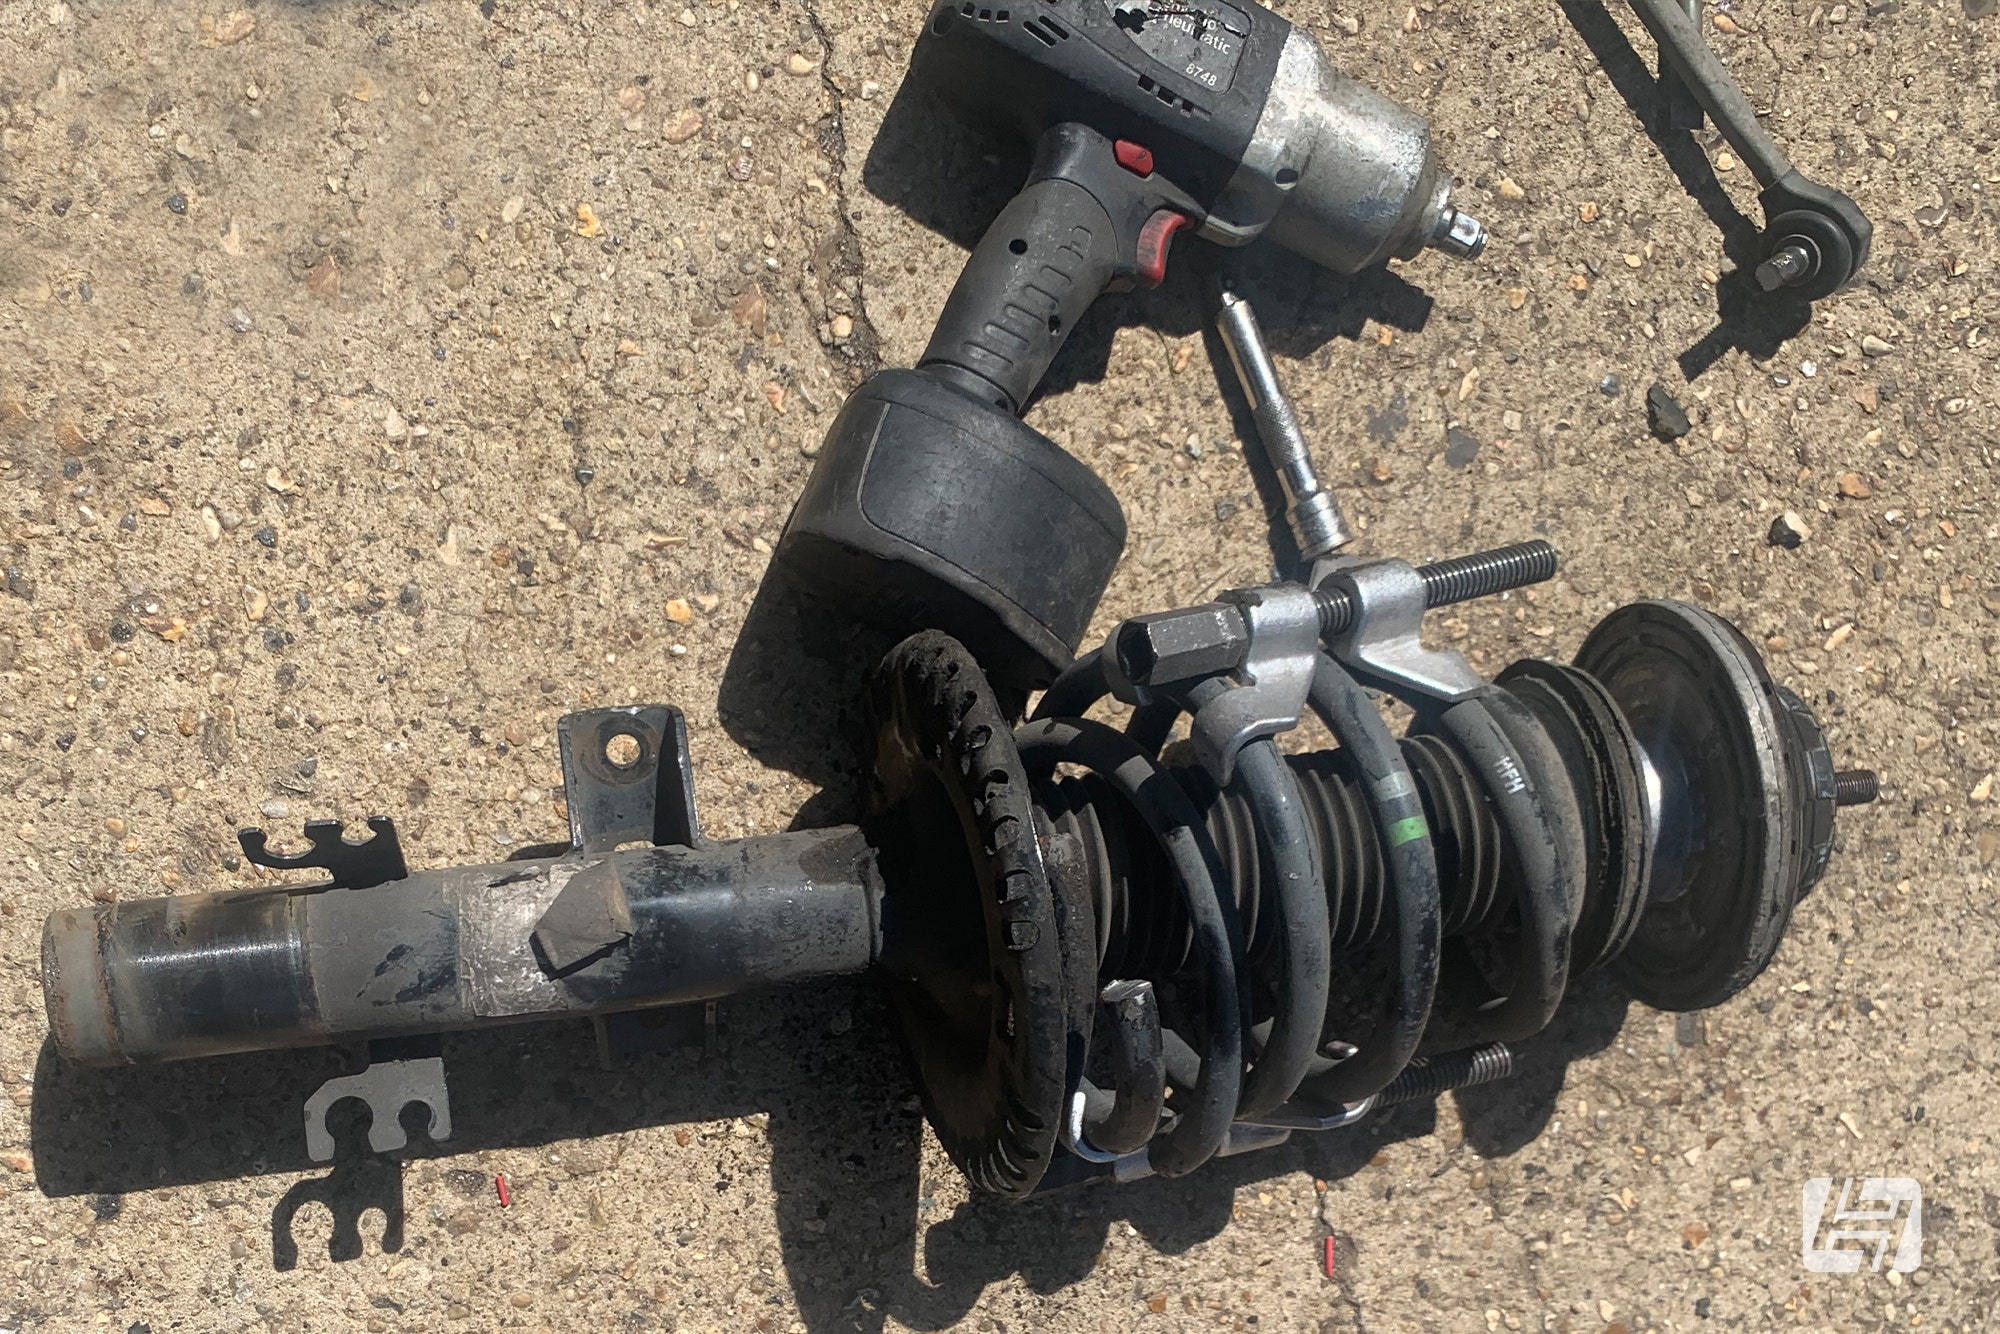
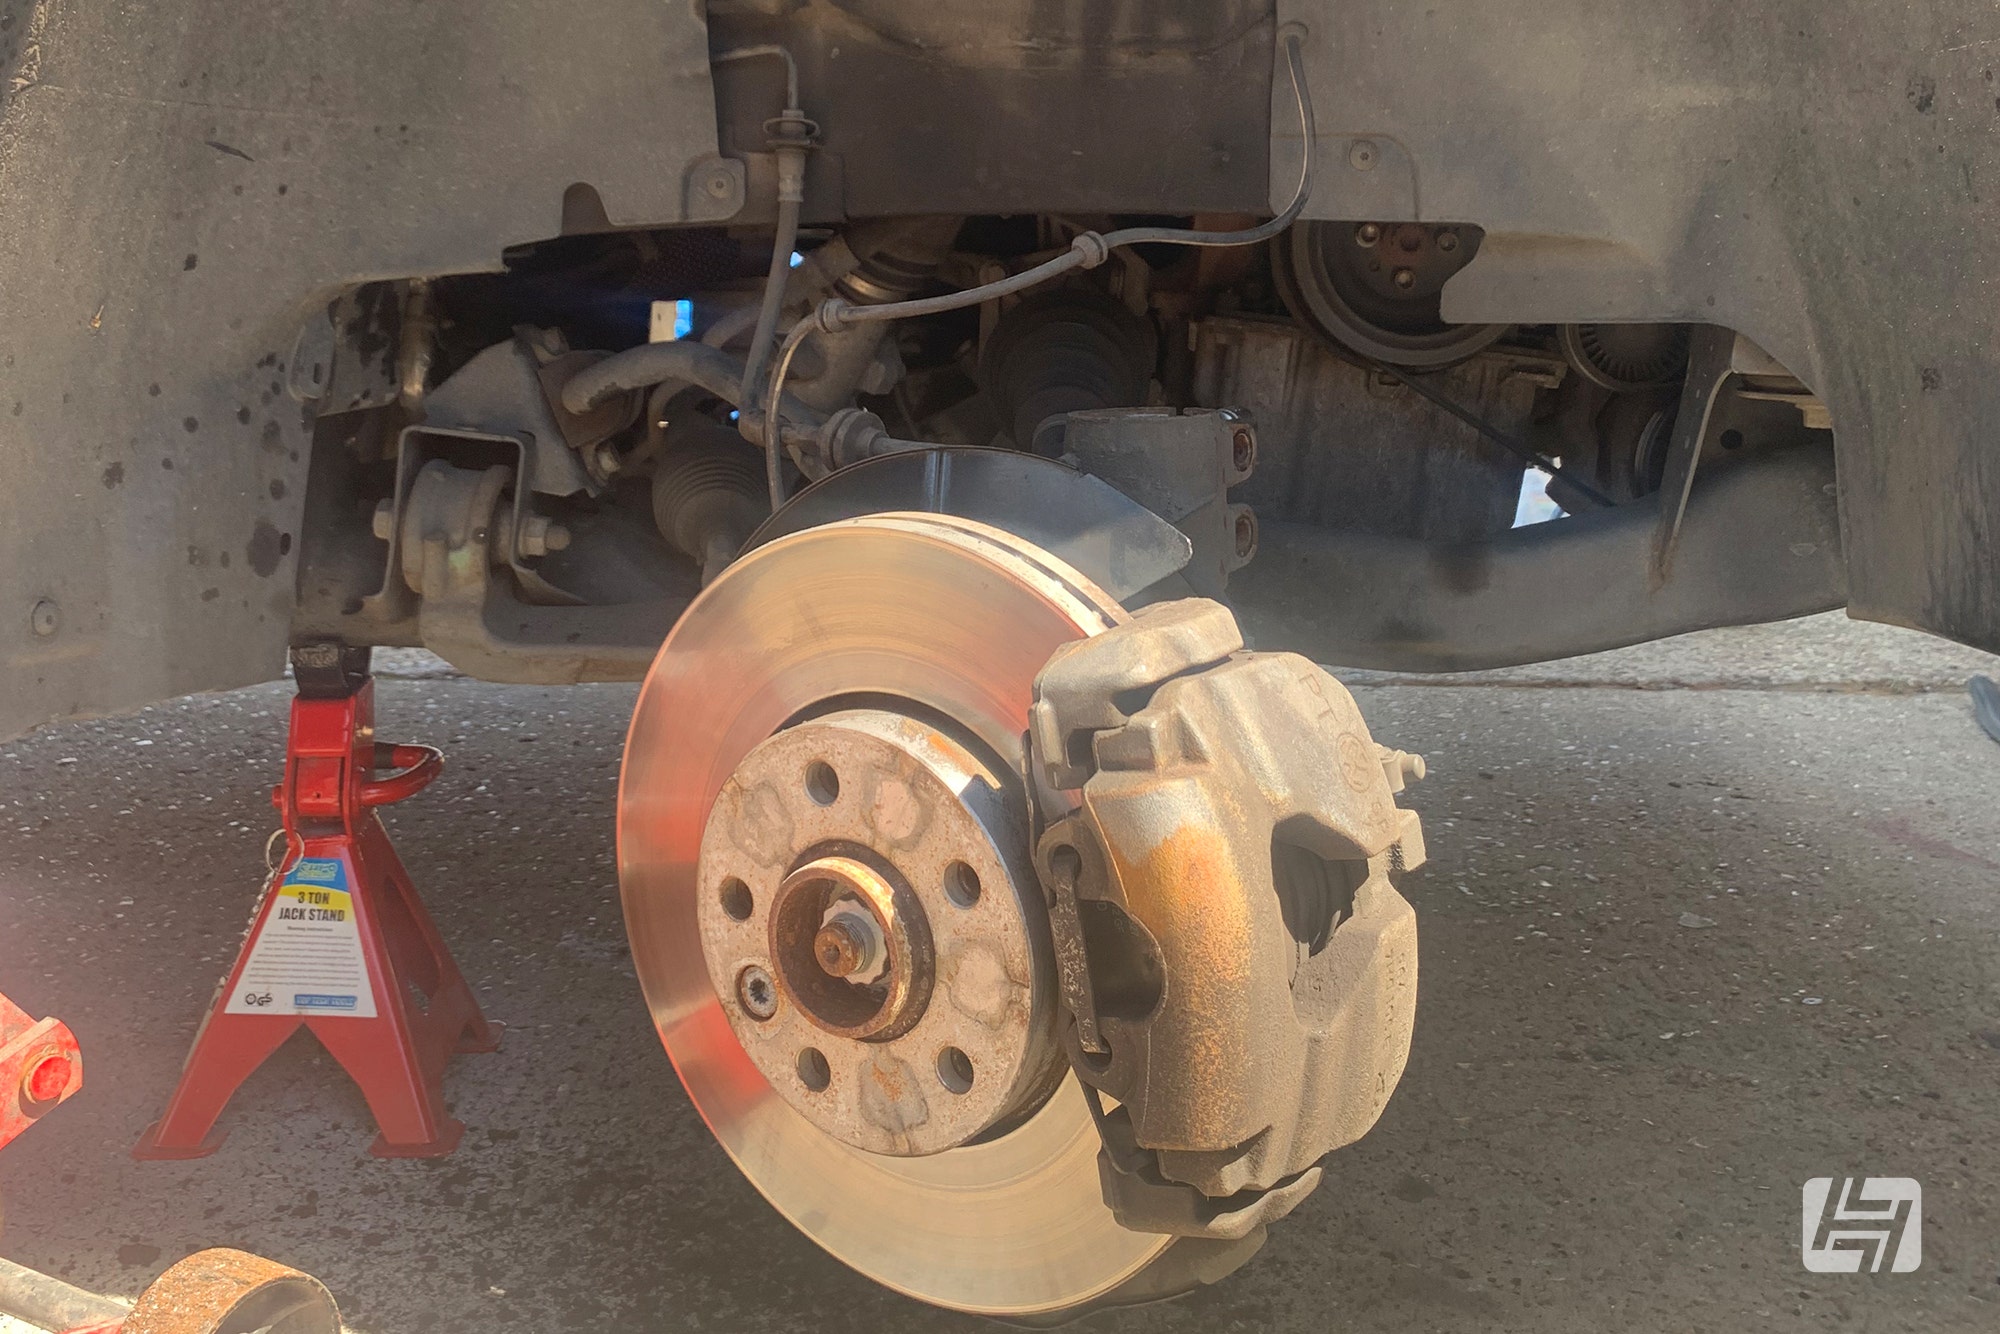
Removal of VW T6 front shocks
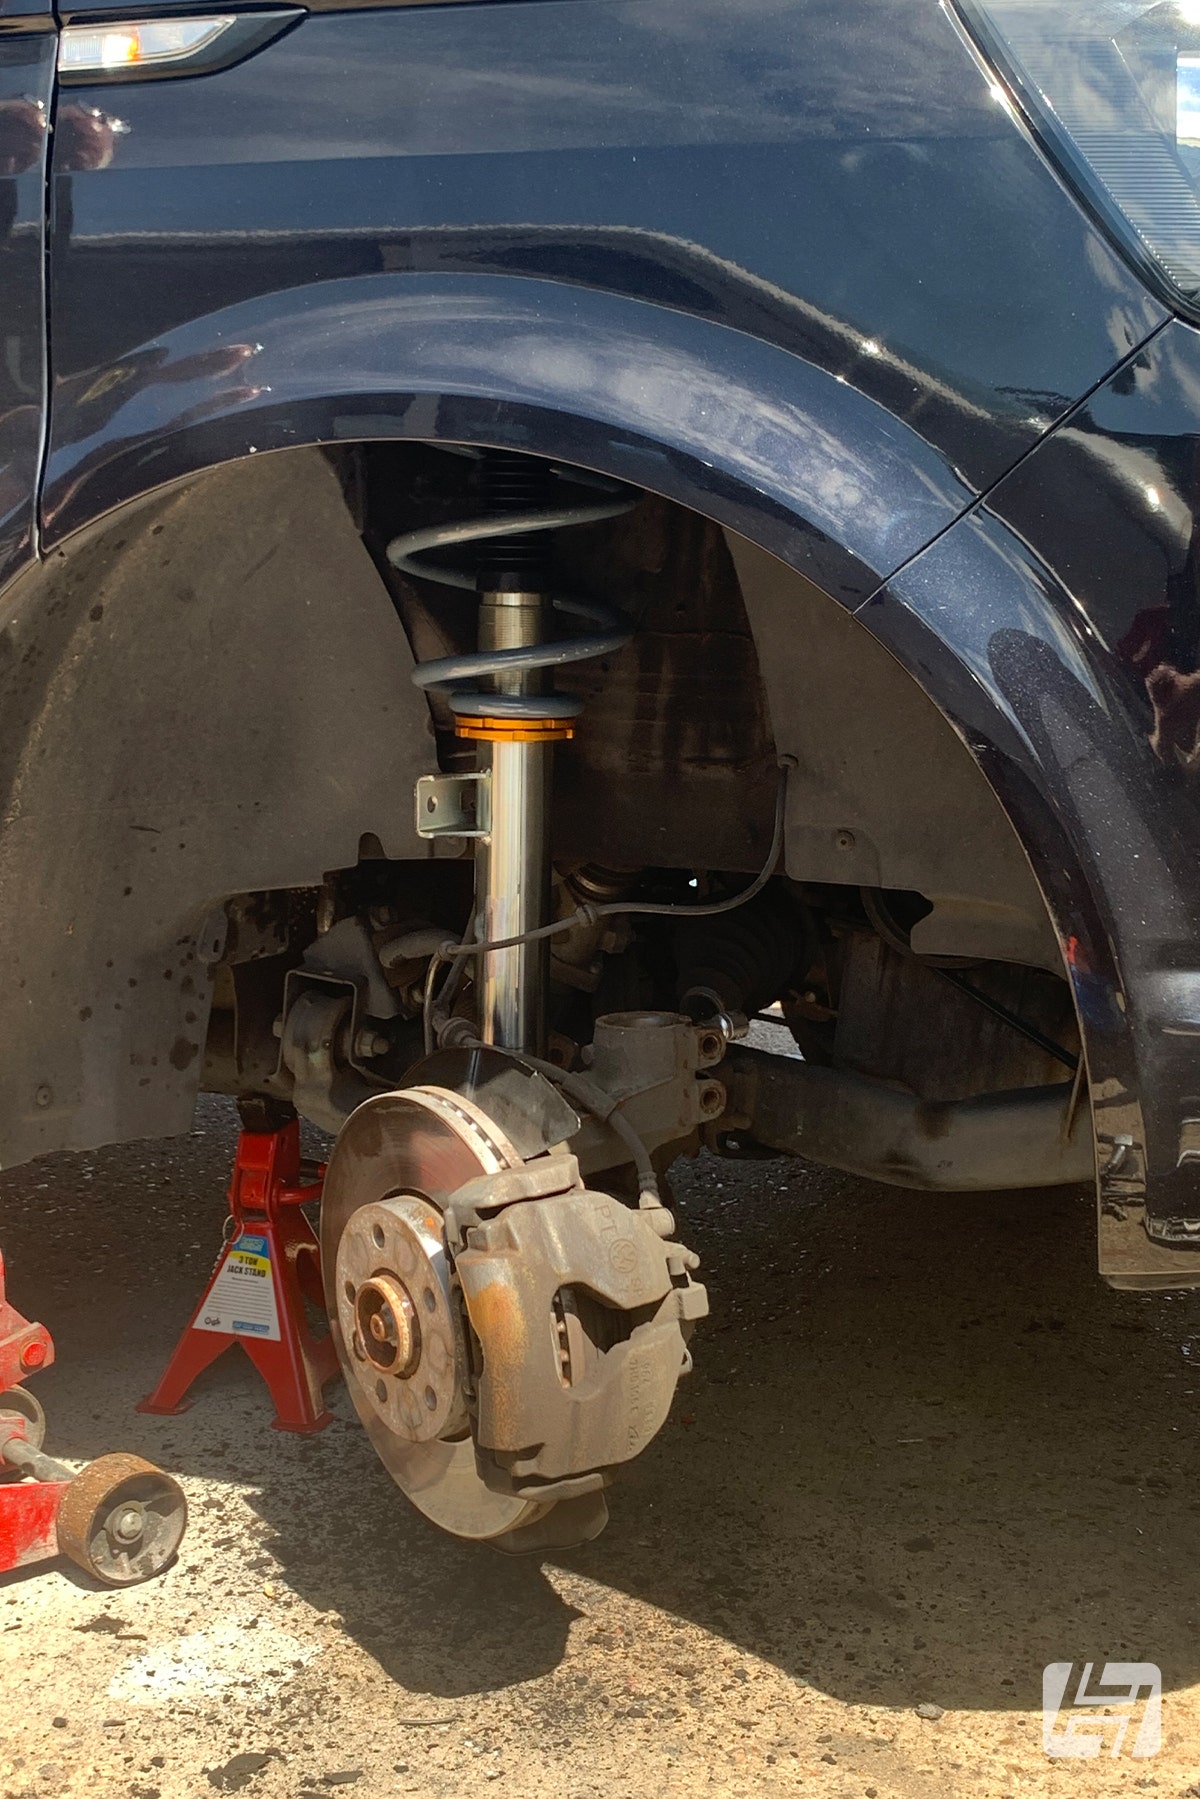
With the front wheels removed and the van supported on axle stands Danny could start with unbolting the struts from the hubs and disconnecting the anti-roll bar drop links. Next up, with the bonnet open he removes the plastic covers to access the strut top mounts - leaving them tight for now though. The front springs are under tension, so you'll need to be using spring compressors to gain enough clearance to allow for removal. Before lifting out the front strut assembly, make sure you have unclipped the brake pipe to save any snagging and finish undoing the top mounts. When it comes to refitting it makes absolute sense to install brand new T5 top mounts and T5/T6 drop links at the same time. And of course, book into your local workshop for a full alignment check before your new stance starts eating tyres.

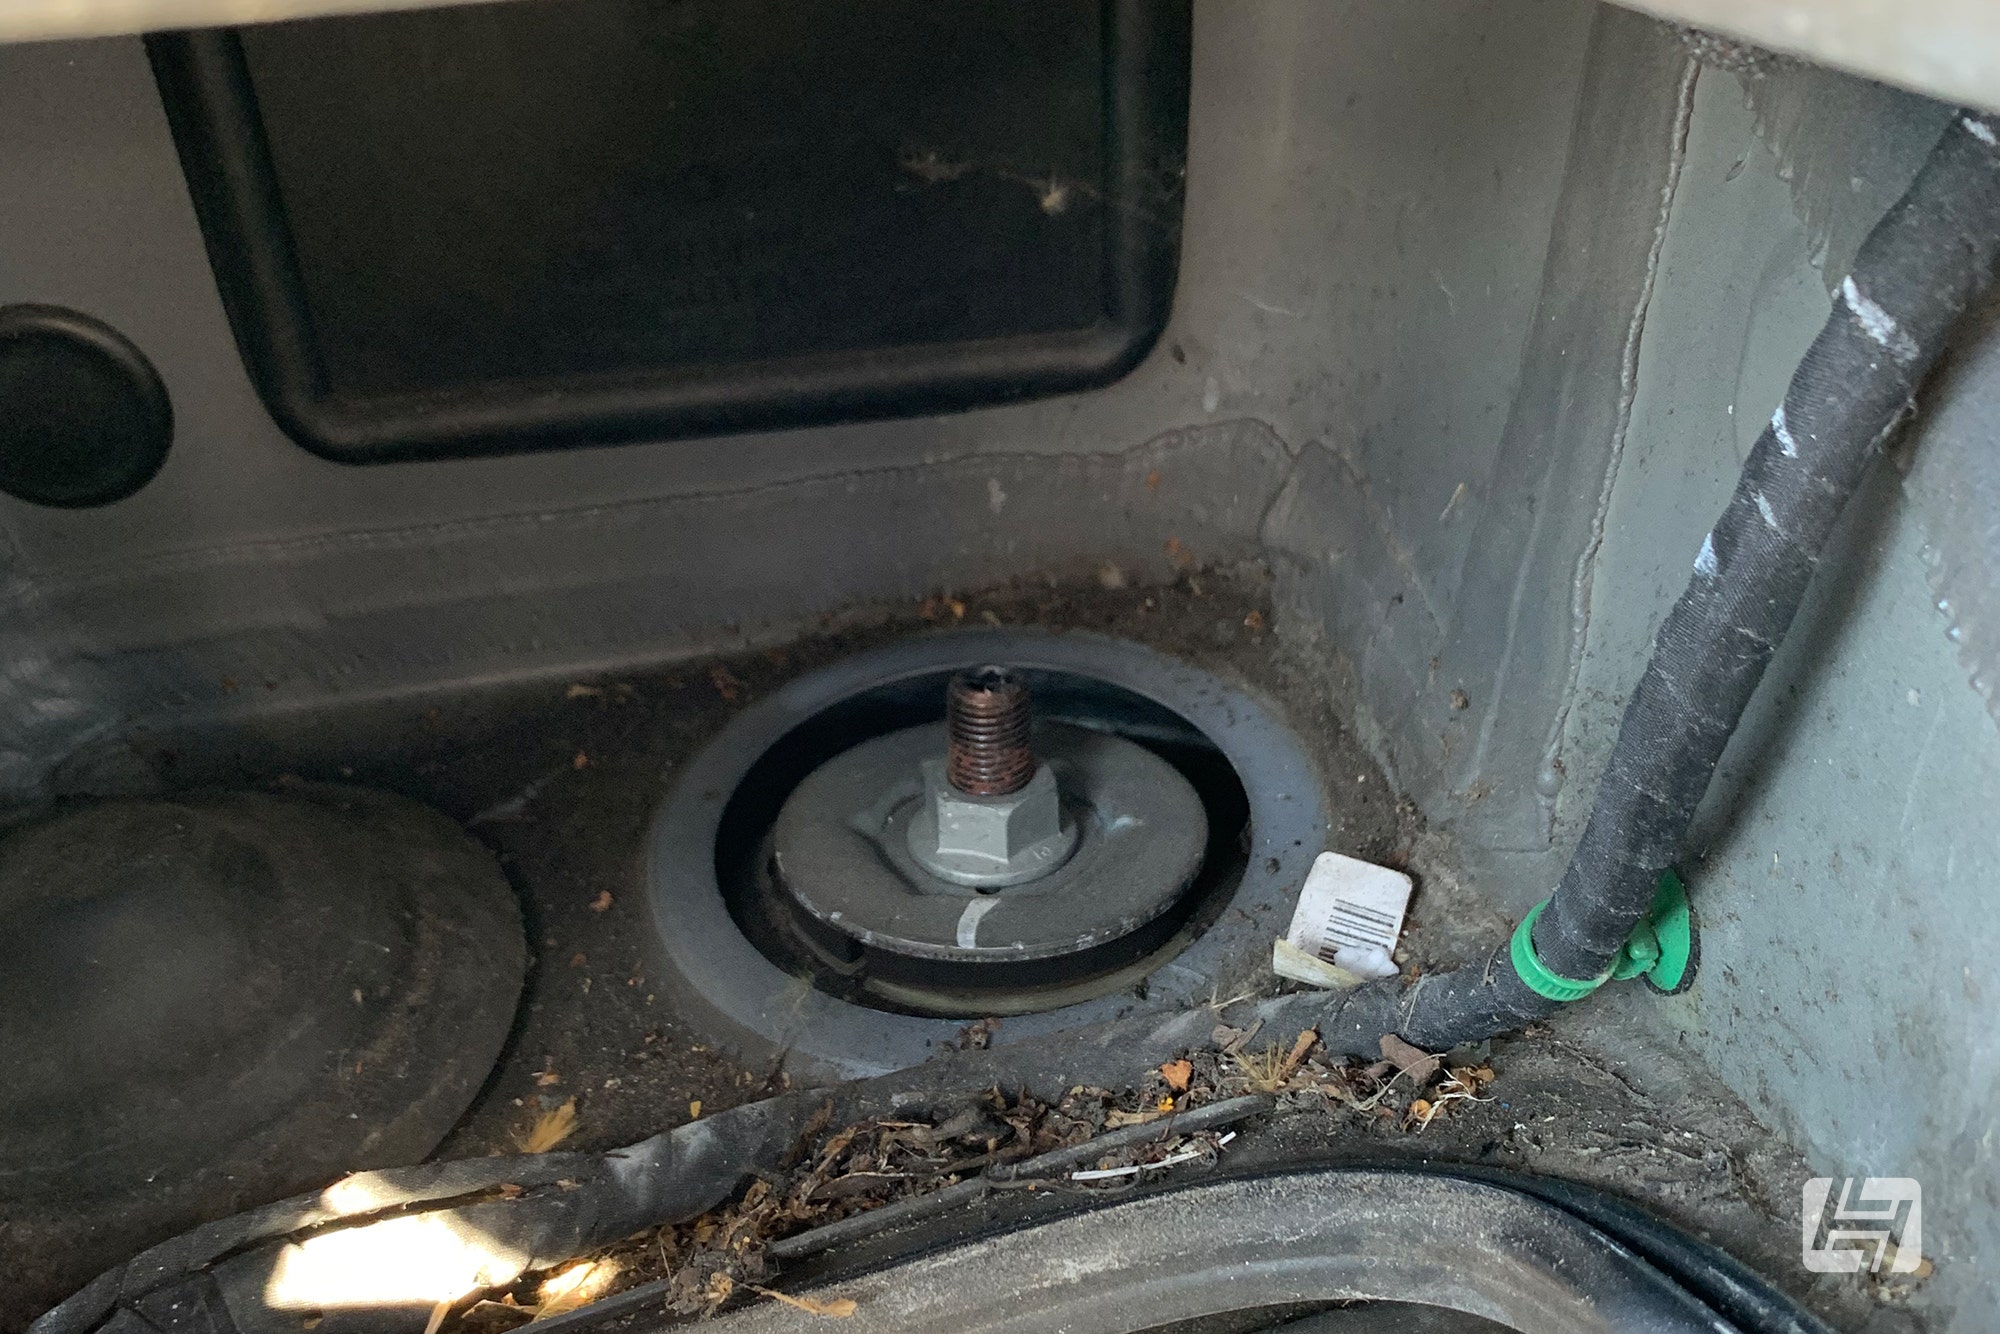
Changing VW T6 rear suspension
The rear end is a doddle in comparison to the front; once more, you'll need the wheels off and some axle stands underneath. The rear dampers are bolted top and bottom, but with those undone the rear arms will drop down, allowing the rear springs to be lifted out without the need for spring compressors. As we were planning to run somewhere near the lower end of the adjustment scale Jim jumped under the van with his trusty skill saw and removed the bump stops, but this may not be necessary if you’re planning on just a mild drop. The adjustable spring platform and lowering spring slipped into place with ease. Jim decided to run without the lower rubber packing cup, gaining an extra 10mm drop (not something Heritage Parts Centre would endorse) but since fitting he's covered 5k miles thus far and there are no squeaks or creaks from the rear. Putting it back together is just as easy. Secure the top of the SSP damper to the chassis of the van, then with either a smaller trolley jack lift the lower arm to meet the bottom bolt hole. Or very carefully adjust the height of the van on the jack so the holes align and you can fit the bolt in place.
Tried and Tested
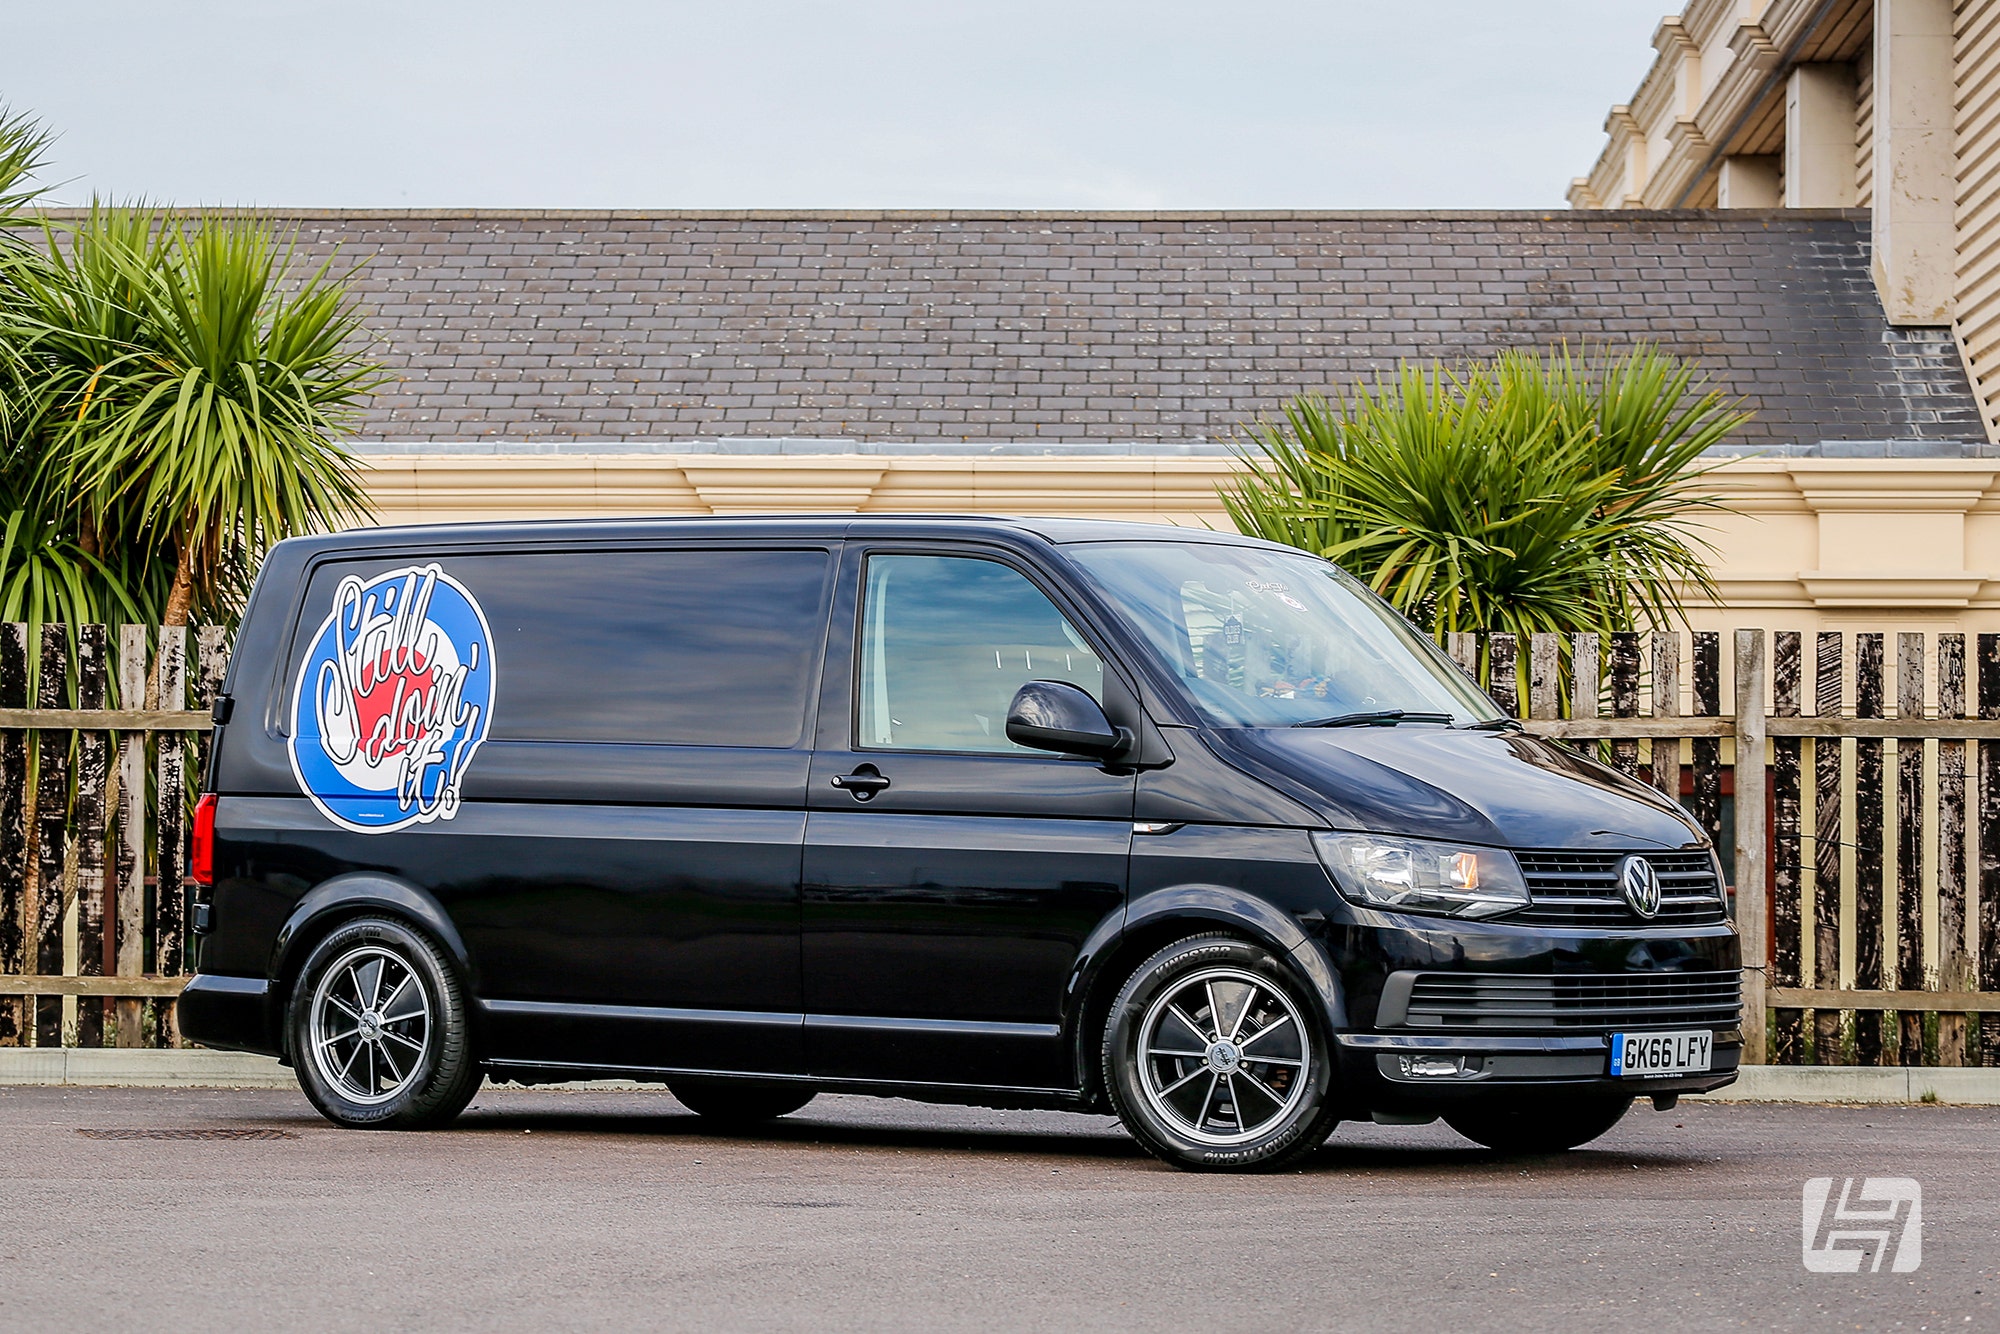
In conclusion, this kit was simple to fit and adjust and, once dialled in and aligned, it was clear that not only did it provide enough adjustment to reach the desired ride height (i.e. 70mm lower and level all round) but also the ride quality was very good indeed. Improved handling and a sportier feel yet without the crashing or choppy ride we’ve experienced with some coilover kits. Jim said, ‘I’ve covered just over 5k miles thus far and I’ve been really impressed with not only the ride and handling but also the load-carrying side of things, too – even when I’m carrying a load it doesn’t sag or scrape, which was the biggest issue I had with my previous Van that was fitted with cheap lowered springs’. A great stance, improved handling, excellent ride comfort and capable of handling heavy loads… that’s a lot of boxes ticked in the search for real-world, practical lows!

Retro Rollers
We didn't supply Paul and Jim with the BRM wheels, but I'm sure you'd be interested to know the specs, so back to you Paul... Jim also wanted to fit a fresh set of wheels and tyres and decided that he liked the look of the 17-in BRM replica rims he’d seen on some Bay window Vans in the past. Jim explained, ‘I’m an air-cooled guy at heart so I thought the retro BRMs would be a nod to my roots… oh, and I don’t think I’ve ever seen them on a T5/T6 so it would be cool to do something different’. I liked the plan however, there was a problem in as much as the wheels Jim wanted are not manufactured in the correct 5x120mm PCD (bolt pattern) to fit T5/T6 hubs. Measuring 7x17 with an ET of 40mm, there was a little room to work with under the ’arches hence we ordered up a set of 5x120mm to 5x112mm wheel adapters.
This was going to result in an effective ET of 15mm, which would give a slightly wider track than stock but, with sensible tyre sizes and the mid-level drop, we weren’t anticipating any problems. NB: Jim’s set-up works fine with this kit at the lowest setting, however, if you were planning to go really low (like 100mm+), it would be better to stick with 35-40mm ET to tuck the front wheels under the ’arches and avoid possible interference issues at full lock. The rims were fitted up with load rated 225/55R17 tyres, which matched the overall rolling radius of the original 16s and had enough sidewall to keep the rims safe when bumping up kerbs (I’ll be honest, the thought of bumping up a kerb in any vehicle is the stuff of nightmares as far as I’m concerned – clearly Jim and I live in very different worlds…!). Oh, and let’s not forget that the ride can get a little choppy with super-low profile tyres hence having a little sidewall would keep things comfy on this daily driver, and look right at home with Jim’s ‘retro vibe’.
And there you have it! A big thanks to Jim and to Paul, Volksworld Magazine Editor, for letting us share this article with you. Paul Knight / Andy