


 Beetle
 Type 2 Bay
 Type 2 Split
 Type 25
 Transporter T4
 Transporter T5
 Golf Mk1
 Golf Mk2


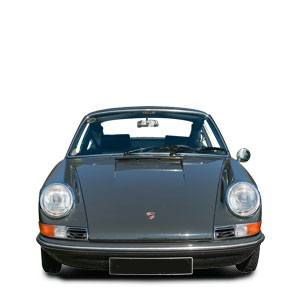
 911
911
 996
996
 997
997
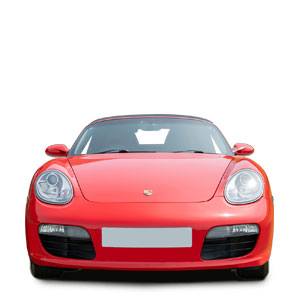
 986 Boxster
 987 Boxster
 912
912
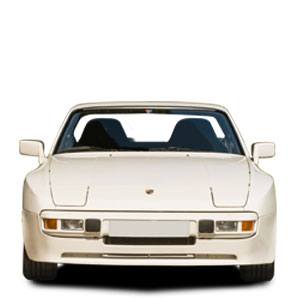 944
944
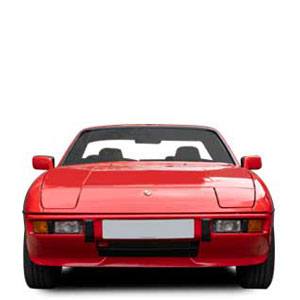 924
924


 Defender
 Discovery Series 1
 Discovery 2
 Series 1, 2 & 3
 Freelander
 Freelander 2


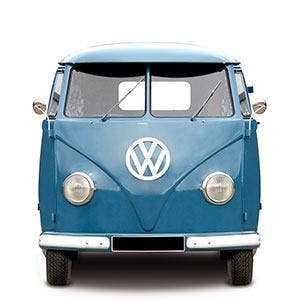
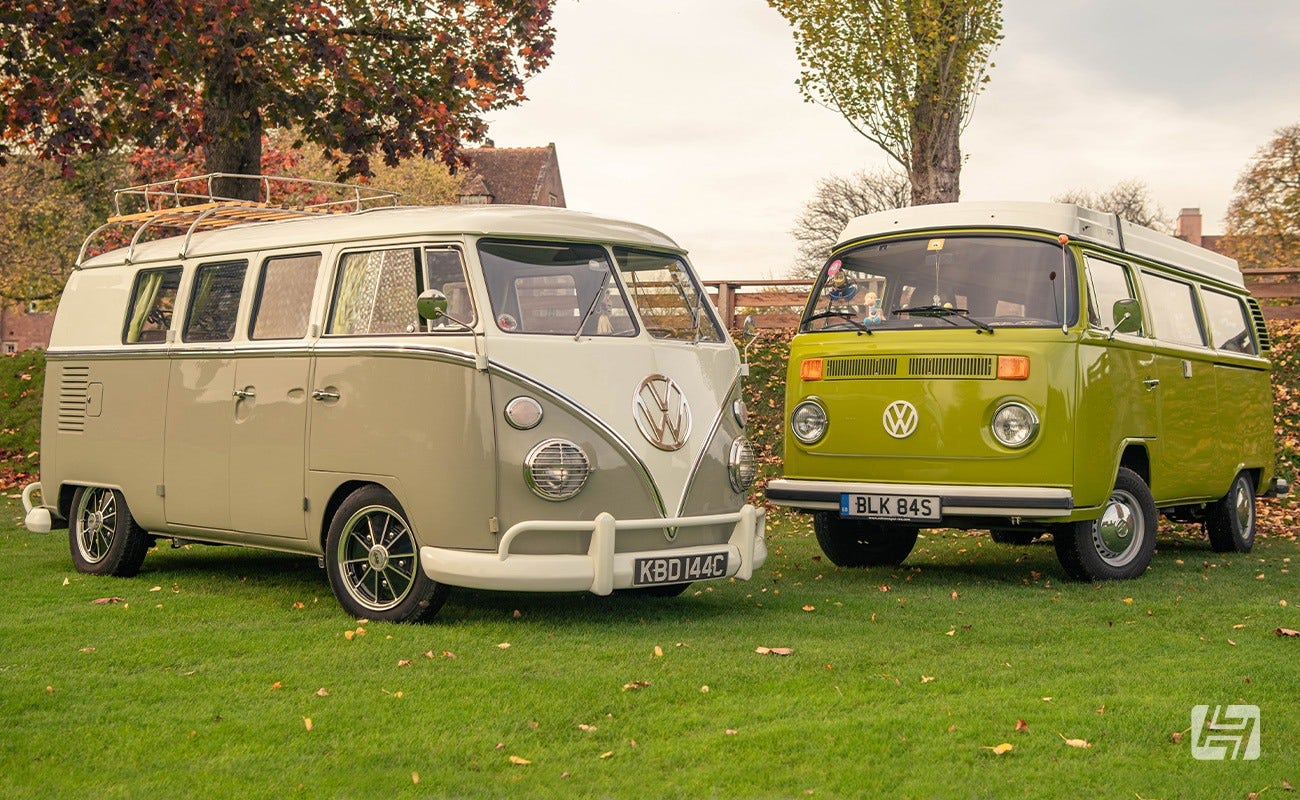
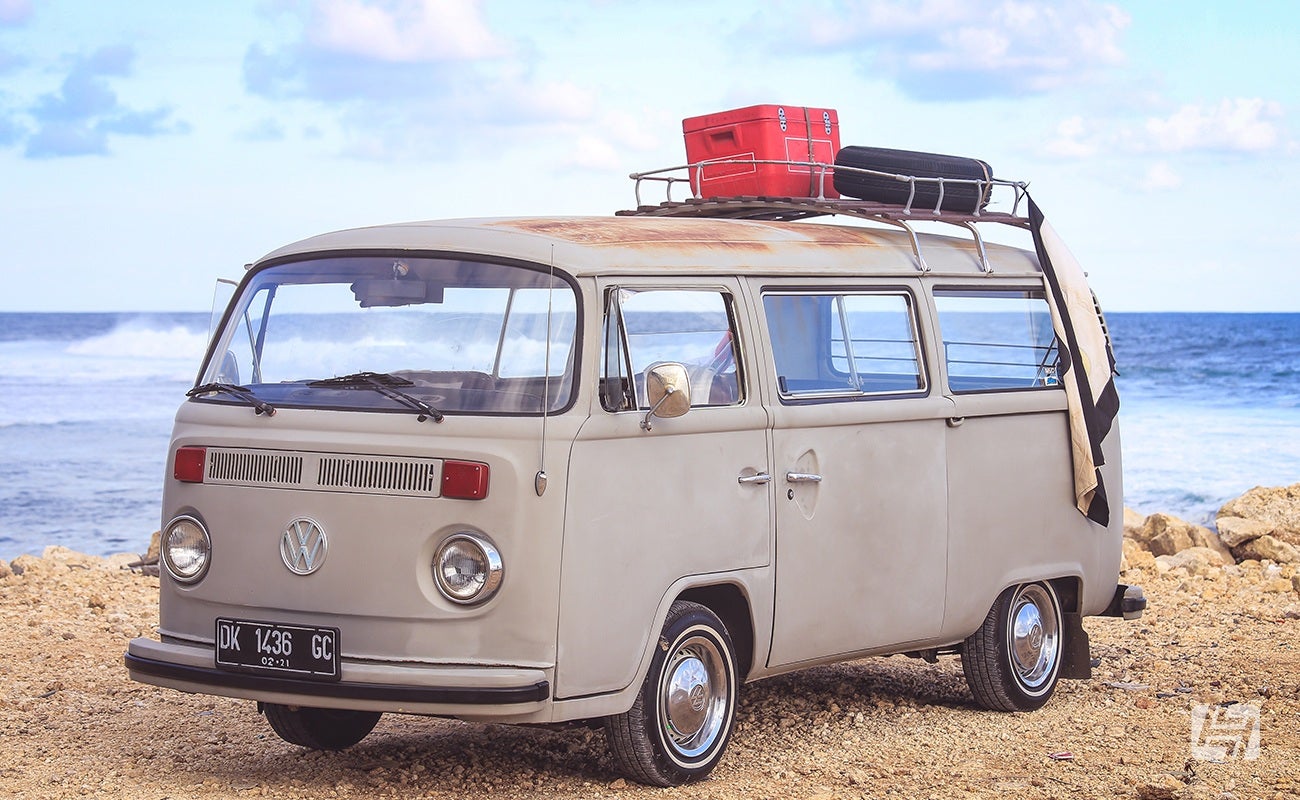
VW Type 2 Bay Buying Guide
Everyone likes a Bay Window, whether it’s a converted campervan, a standard Micro Bus or even a double-cab Pick-Up, but do you know what to look for when buying one? We’ve outlined the common problems to be aware of and how much they can cost to fix. Read our Bay Window buying guide to find out more.
Bay window history
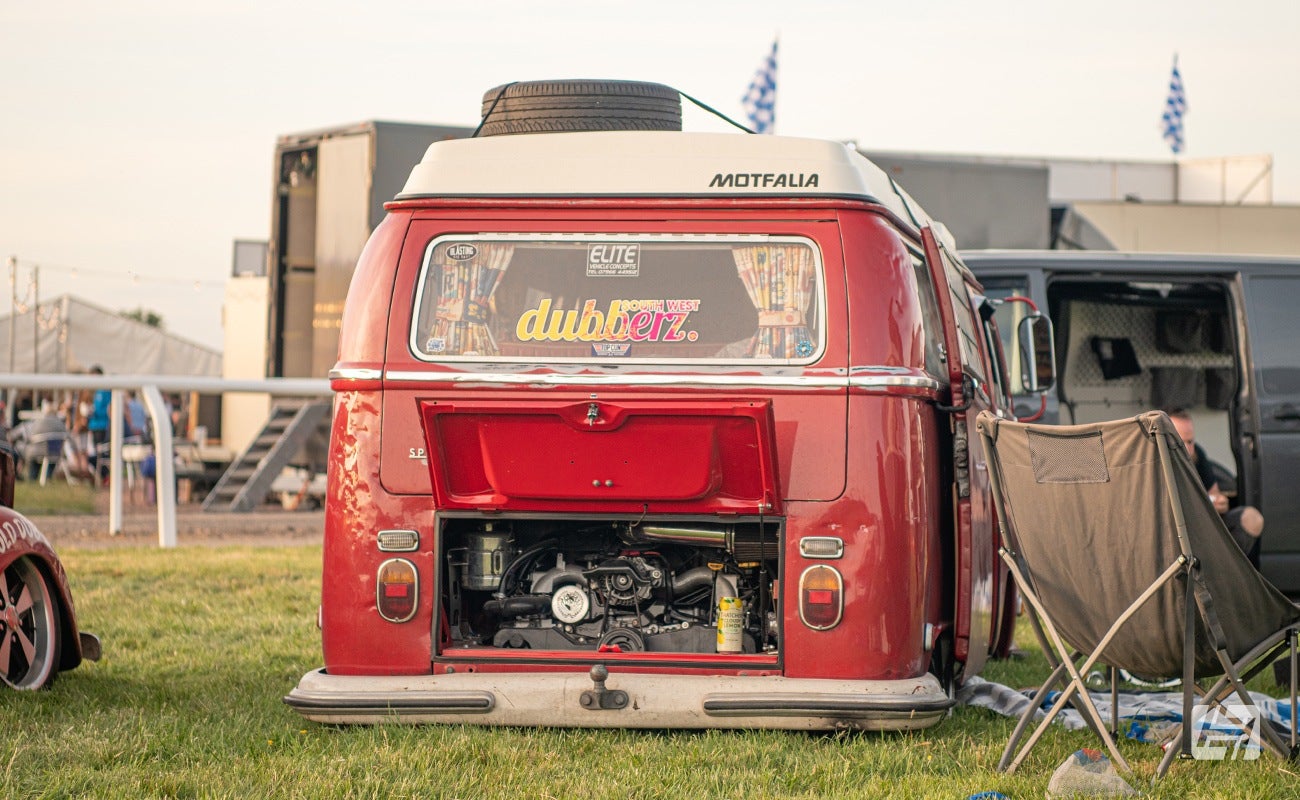
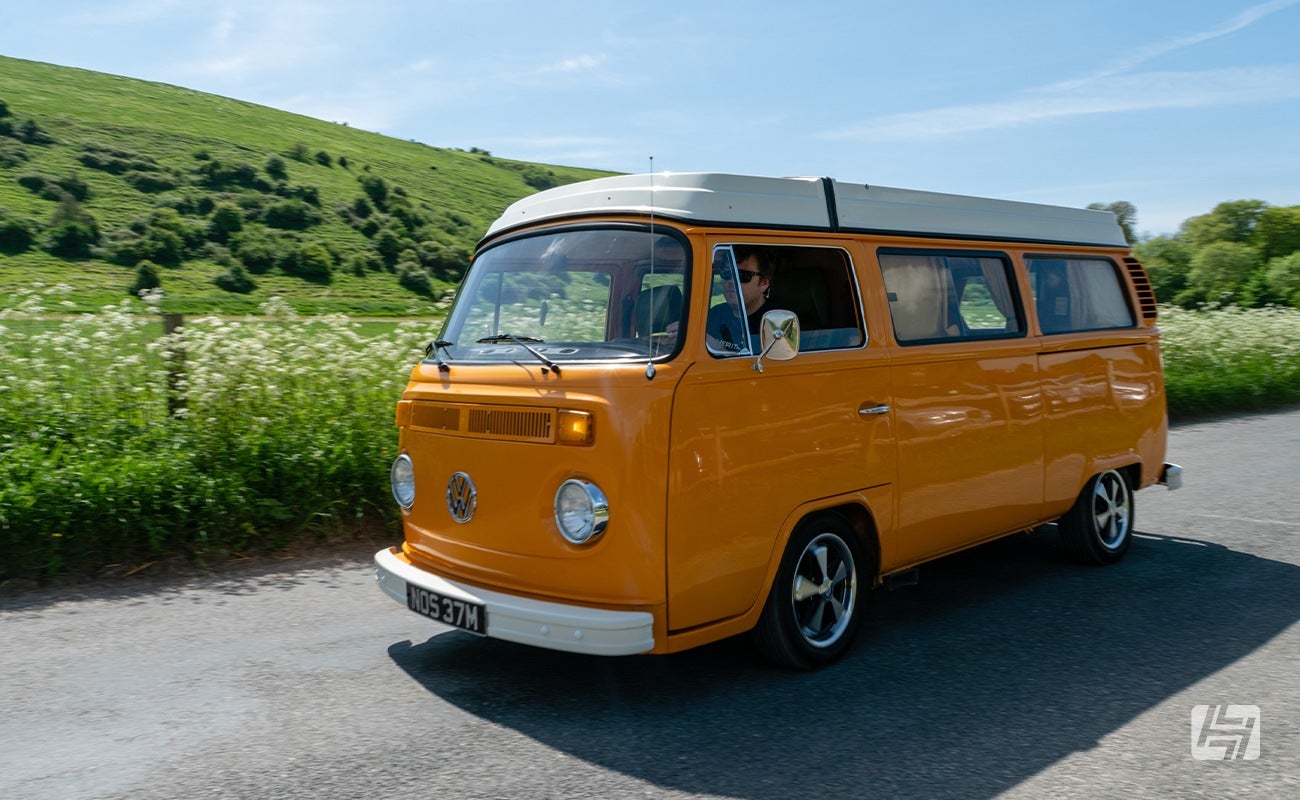
Sales of Volkswagen’s Split Screen Transporter (so-called because of the split down the middle of its windscreen) had almost reached 1.5 million by the time it was replaced with the more modern-looking Bay Window Type 2 in 1968. These early or 'lowlight' Bays, as they are now called are generally the most collectable model and can be identified by the low front indicators, small rear lights, rounded wrap-around bumpers, and moon-shaped rear vents. These early models ran until 1971, when a one-year-only 'crossover' model bridged the early and late style, mixing low front indicators with larger rear lights. Type 2 models from 1973 onwards (commonly referred to as a Late Bay) are often cheaper and in greater abundance. They were available with larger engines, fuel injection, servo-assisted brakes, and crash protection. The bumpers, just like the Beetle, switched to 'Europa style' and became larger for overall safety.
Whilst the Bay Window officially ceased European production in 1979 (replaced by the wedge-shaped T3), Brazil produced a combined Split Screen and Bay Window model long after, and more recently, the Bay Window was offered with a 1.4-litre water-cooled petrol engine (production ceased in 2013), but to avoid confusion, this buying guide is looking at the Bays manufactured between 1968 and 1979. Read our Brazilian Kombi buying guide here.
Is a Bay for you?
One of the biggest lures of a Bay Window is its use as a campervan. Volkswagen never produced a campervan version but left this to specialist converters such as Danbury, Viking, and Westfalia. Some of these conversions are very desirable if they are in original condition, but ask to see evidence and make sure any parts that are missing or need replacing are available. Take a look here at our Westfalia trim range here to get an idea of prices and availability.
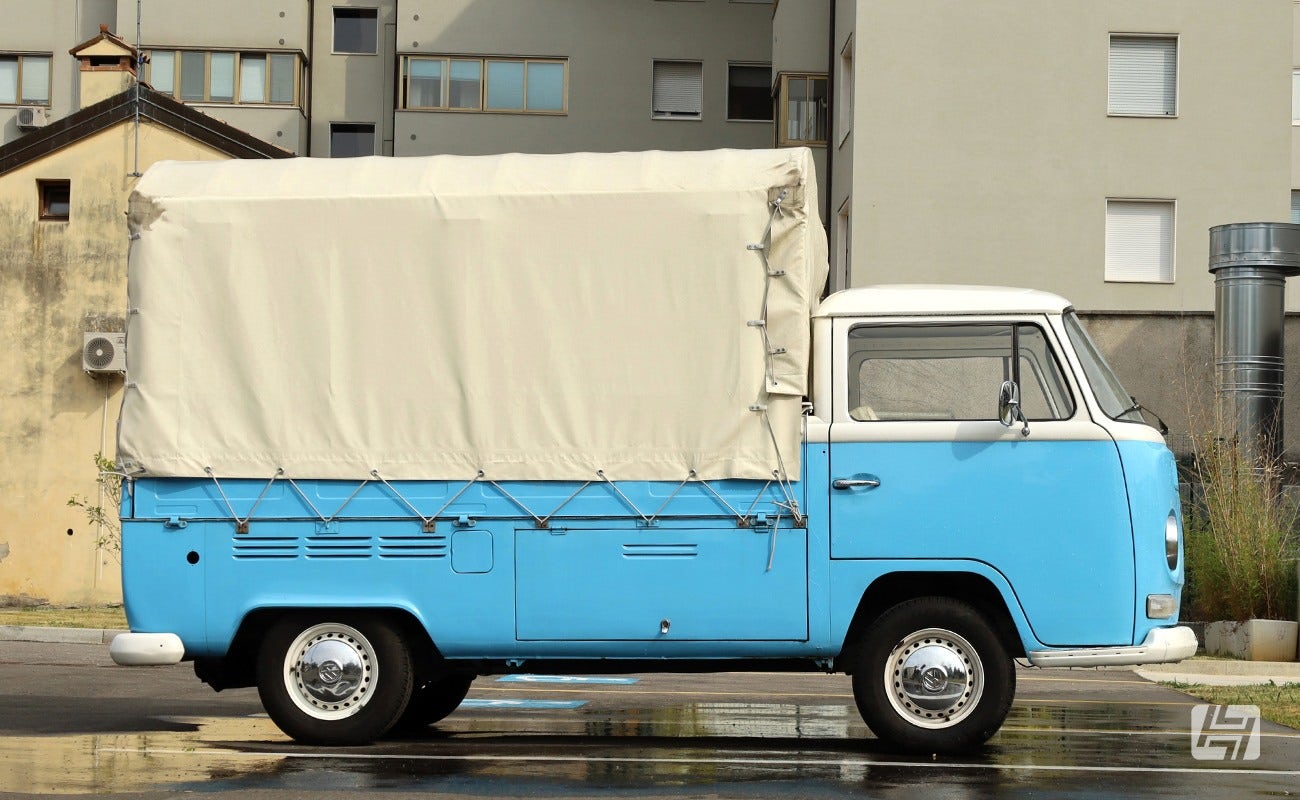
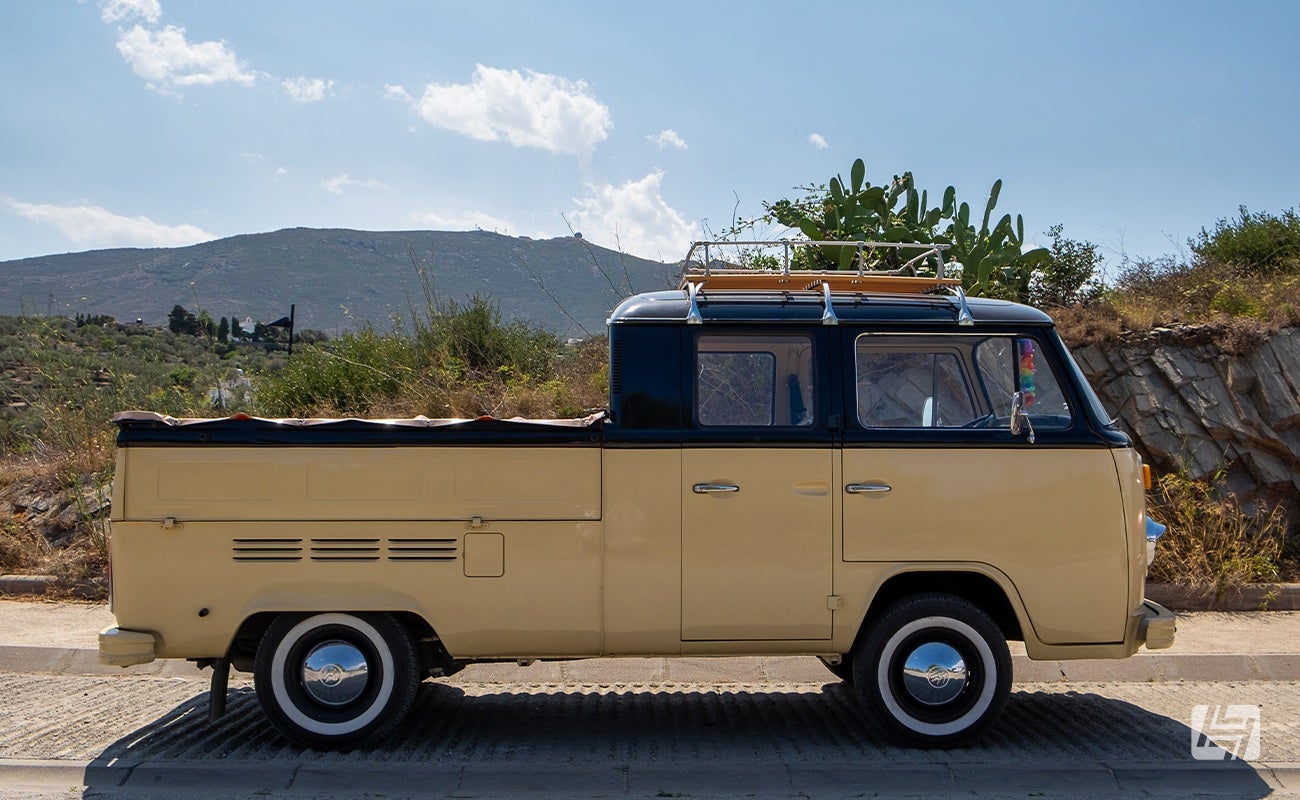
Volkswagen’s line-up of standard Bay Window models includes a panel van, a Micro Bus with seven seats and a Pick-Up (single- and double-cab). A Micro Bus offers the advantage of seatbelts and seat mounting points installed as standard, whereas a panel van may not have any of these fitted, so if a rock-and-roll bed has been installed for instance, check how it and the rear seatbelts have been secured.
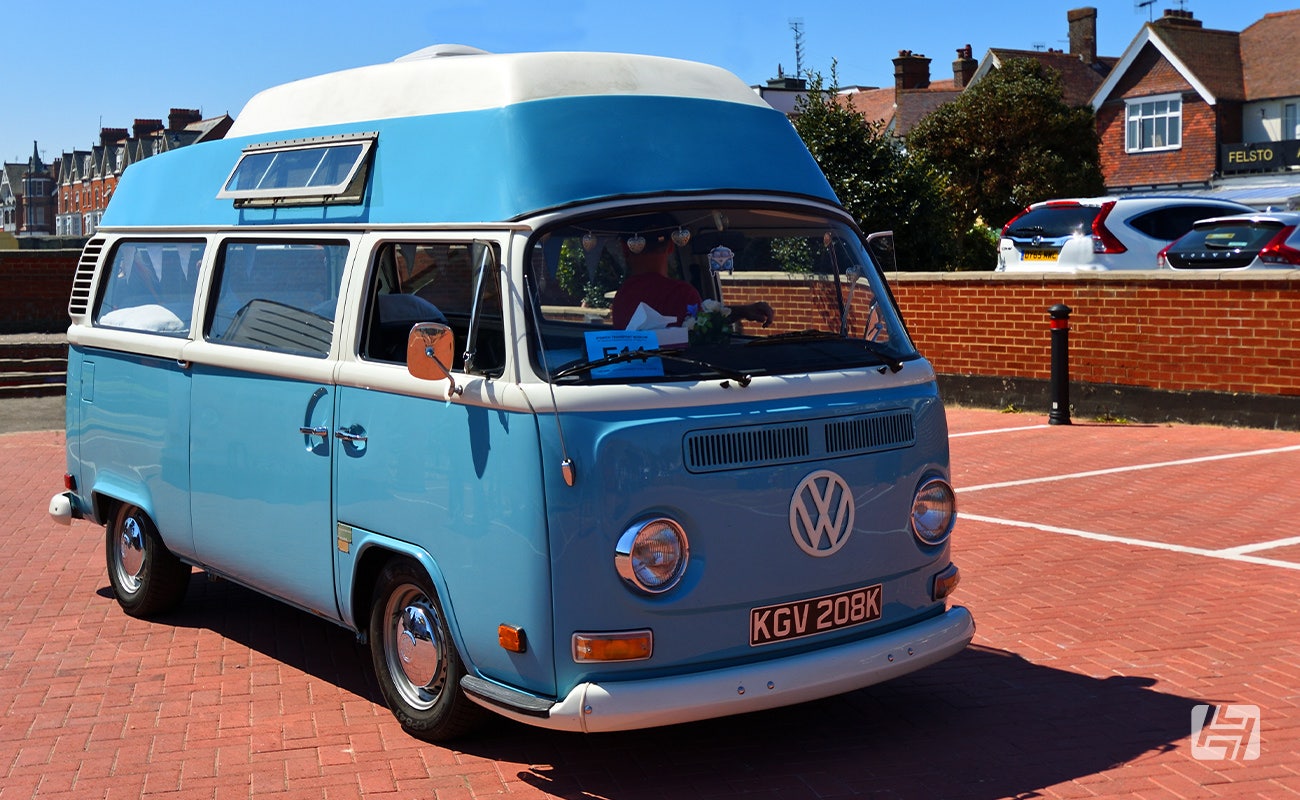
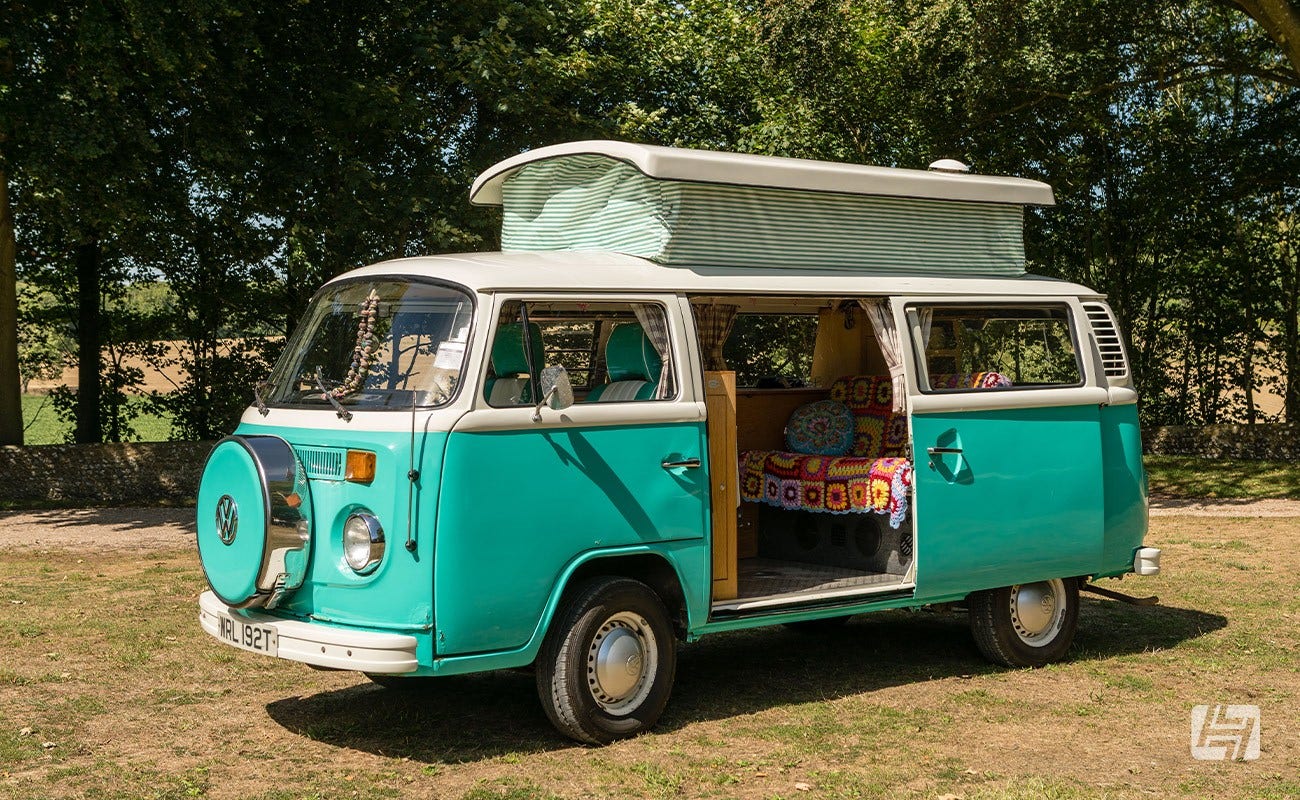
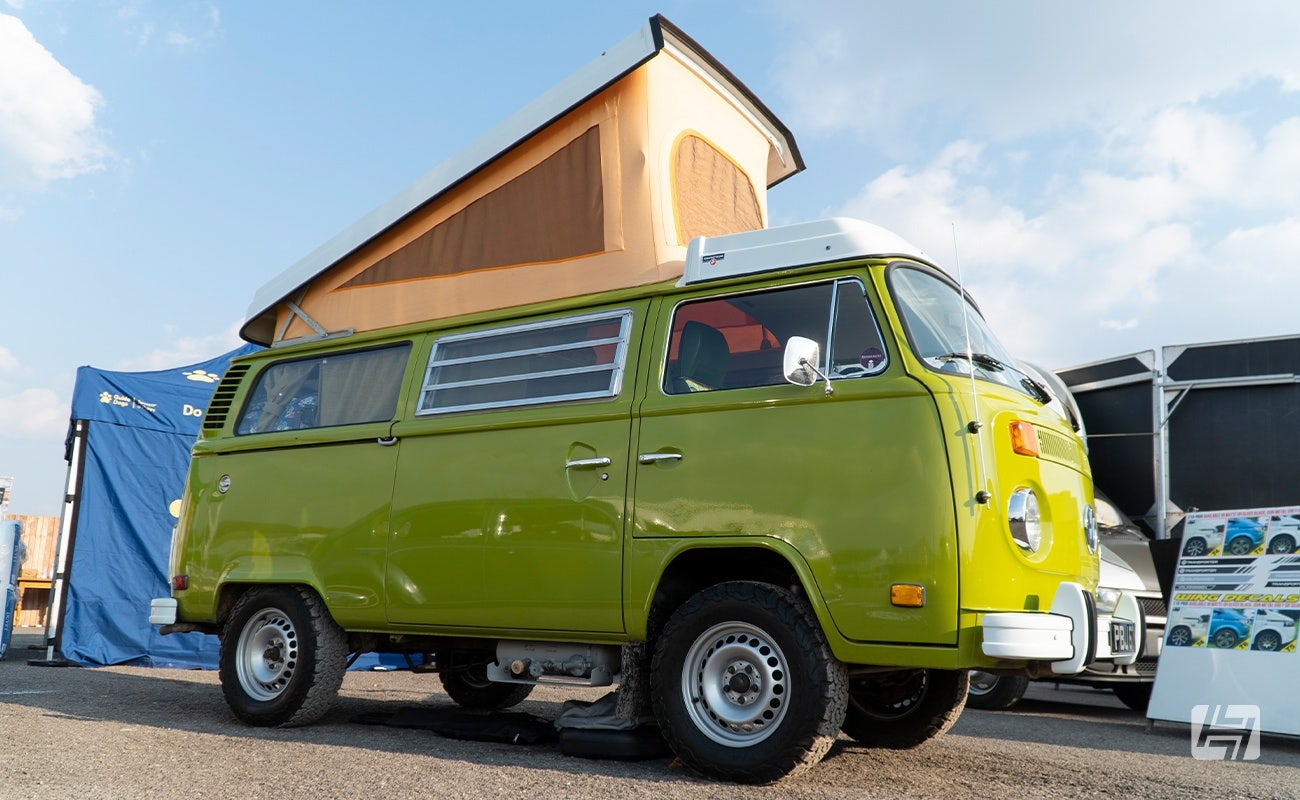
Pop, tin or high top?
A pop-top (elevating roof) or a high-top (fixed high roof, often made from GRP) helps to open up the interior space, but there are a few issues to be aware of. A pop-top can leak and when camping in high winds, it may need to be closed to avoid damage, which means that any bunk beds in use are out of action. Those leaks can create problems for dampness inside the vehicle, resulting in mould and corrosion – replacement pop top seals are available to help prevent this.
High-tops don’t fit inside most garages and can struggle with car parks that have height restrictions. Plus, their aerodynamics can reduce performance and increase fuel consumption.
Whatever type of roof is fitted on top, the Baywindow's dimensions are usually all the same, with a length of 4.28m, which is shorter than the latest Ford Mondeo, and a width of 1.72m, which is also narrower than most modern family saloons and SUVs. The only exception would be a coach-built special such as a Karmann Gipsy or a Jurgens Autovilla, which has a larger caravan-type body mounted behind the VW cab section.
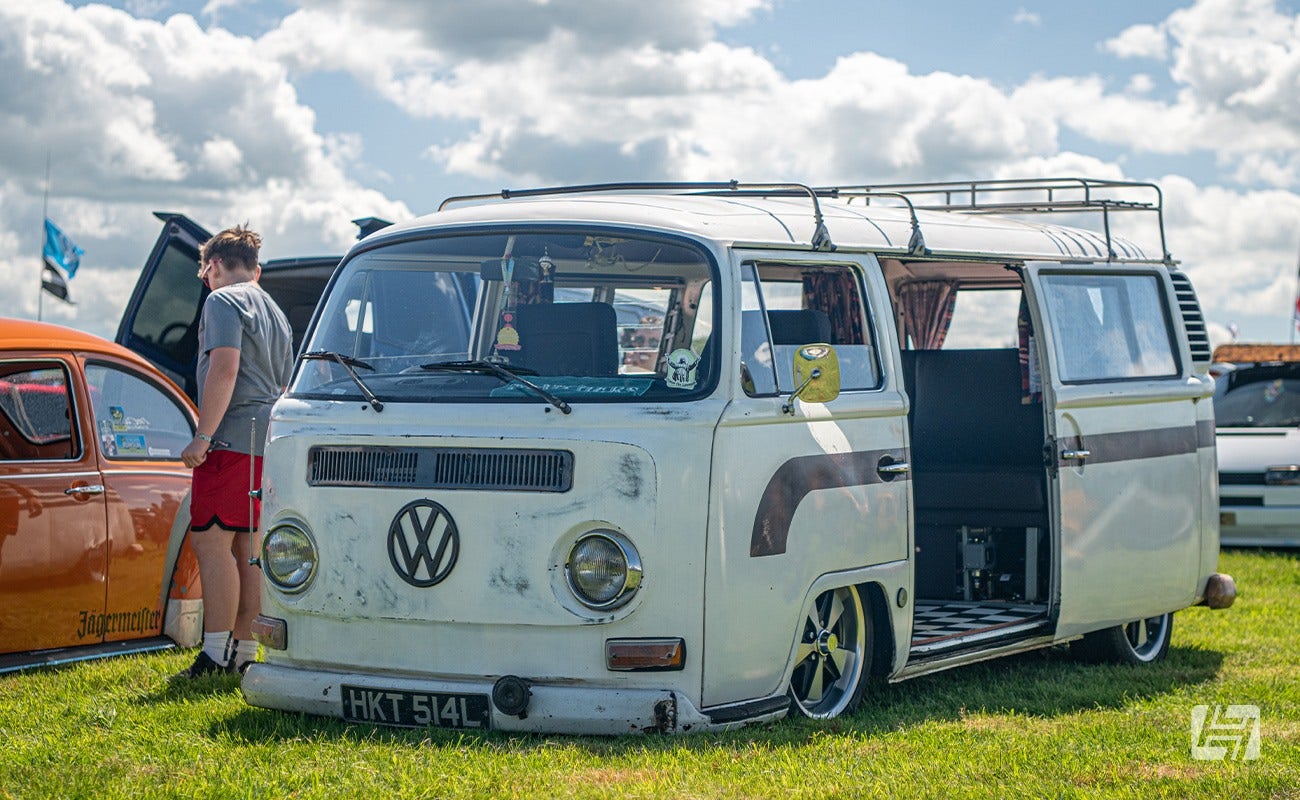
Should I buy a modified VW Type 2?
Good-condition standard Bays demand a high price, whether it’s a Micro Bus with an original seven-seat interior, or a Westfalia-converted campervan with all the standard trim, including orange and green plaid upholstery. However, a modified Bay with a modern interior (compact fridge, sink/hob, electric hook-up, heater), or perhaps one with a Subaru flat-four water-cooled engine conversion and uprated brakes and suspension can be just as desirable, and just as expensive. Our advice is to decide what you want to use a Bay for before looking for the specification.
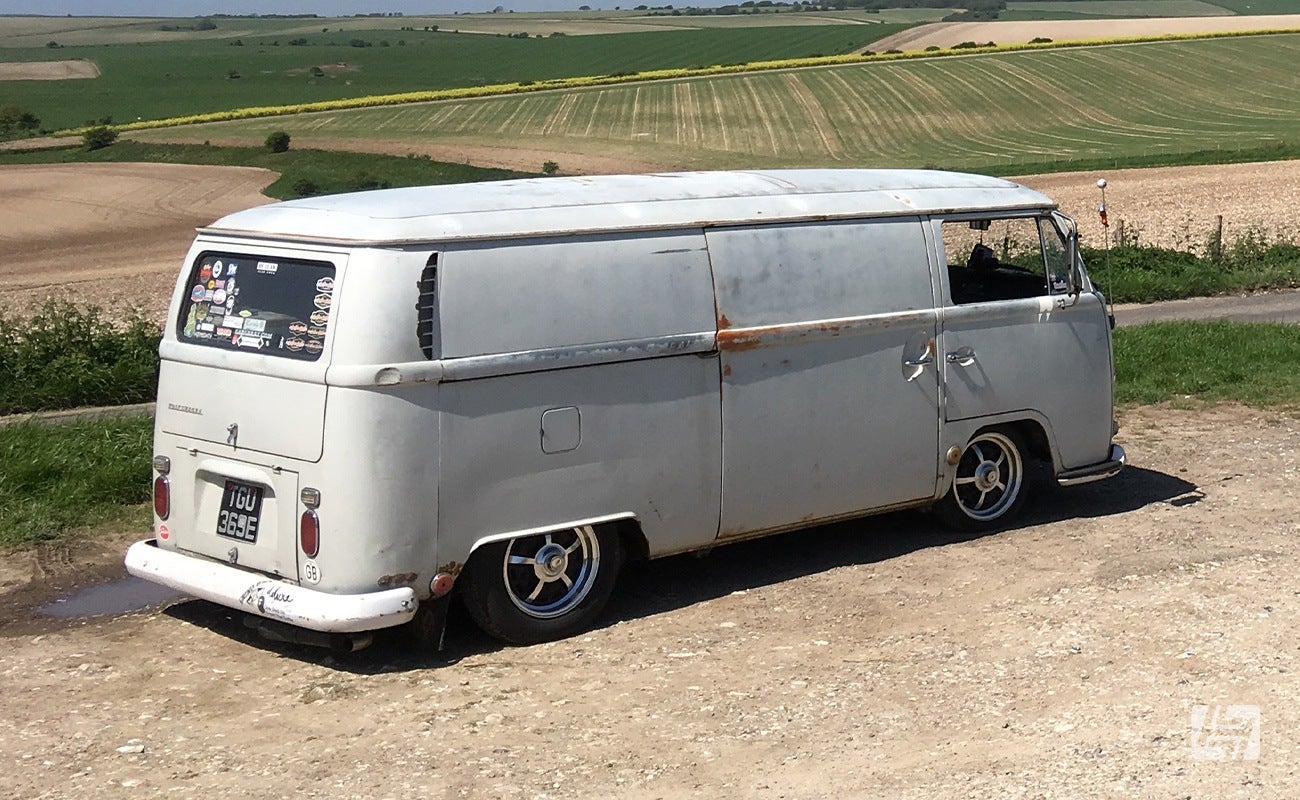
Is rust a problem for the VW Bay window?
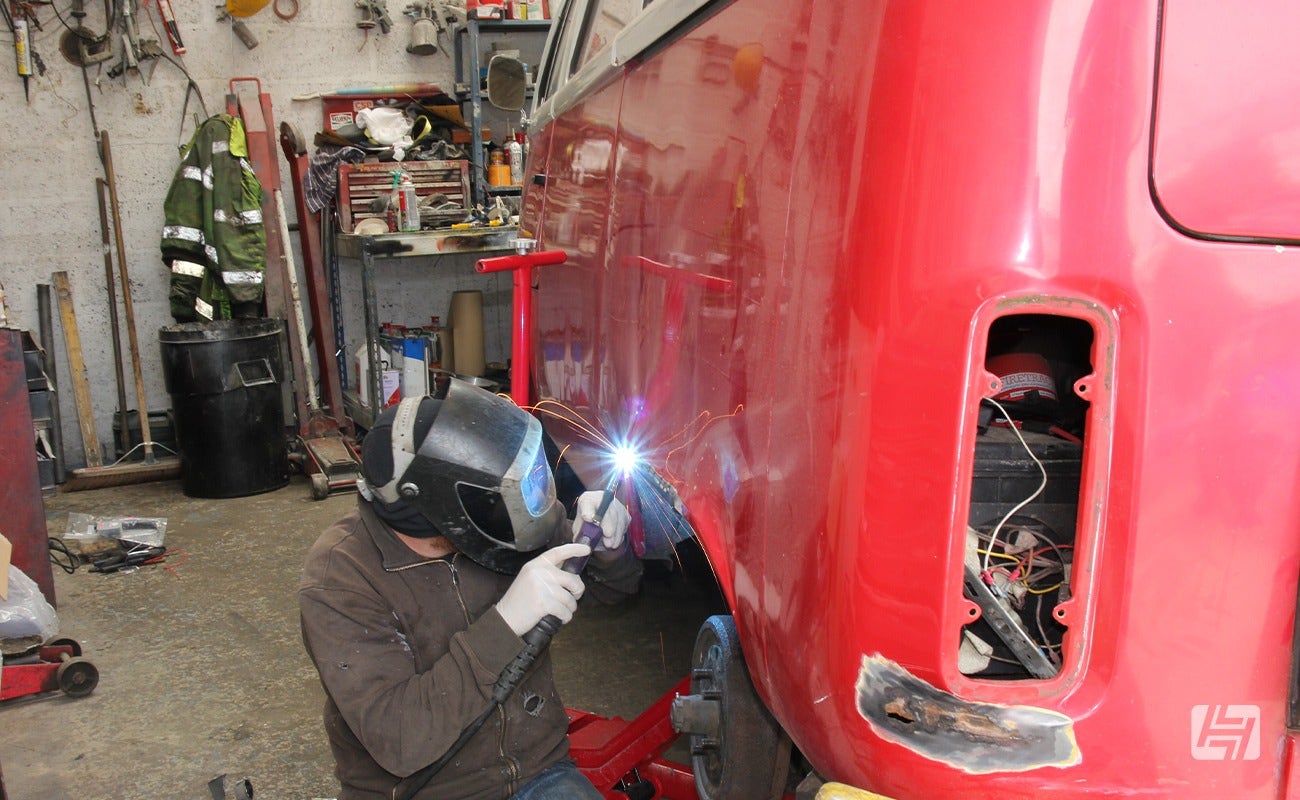
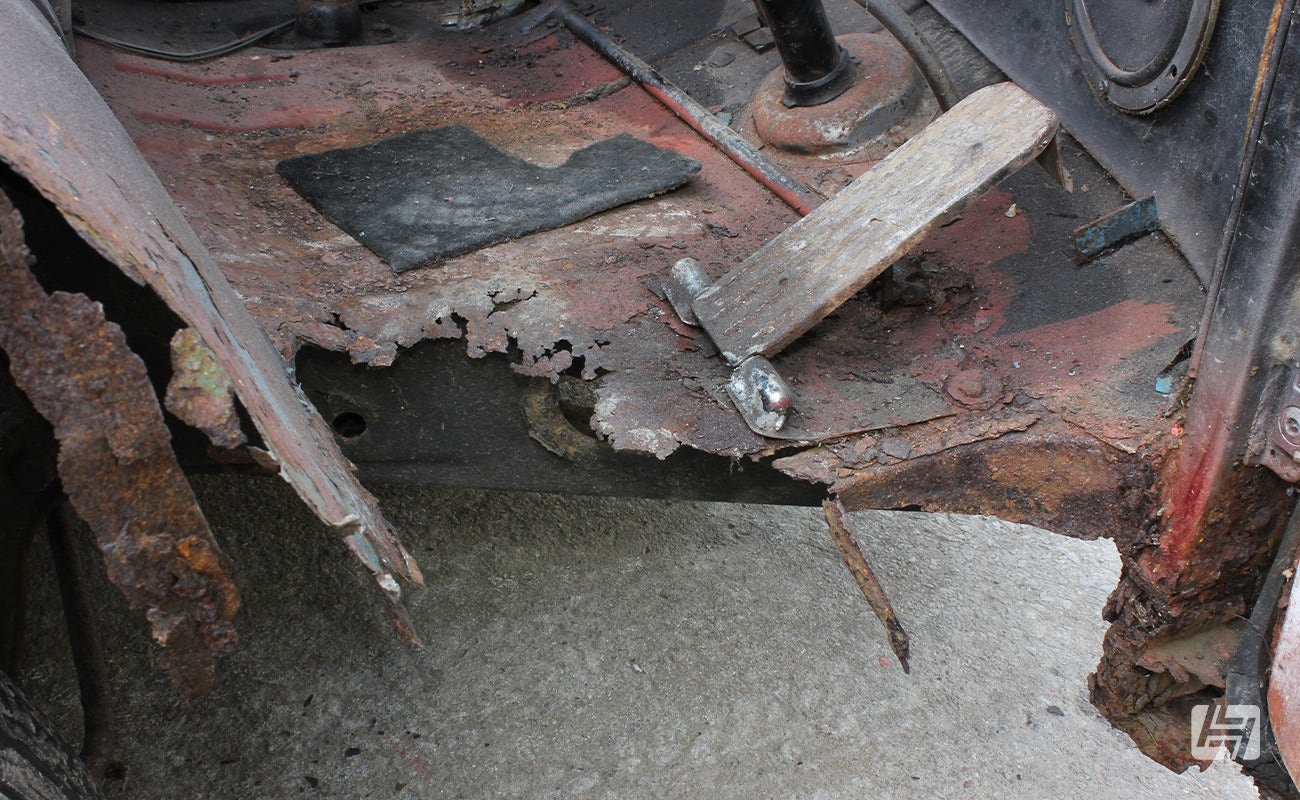
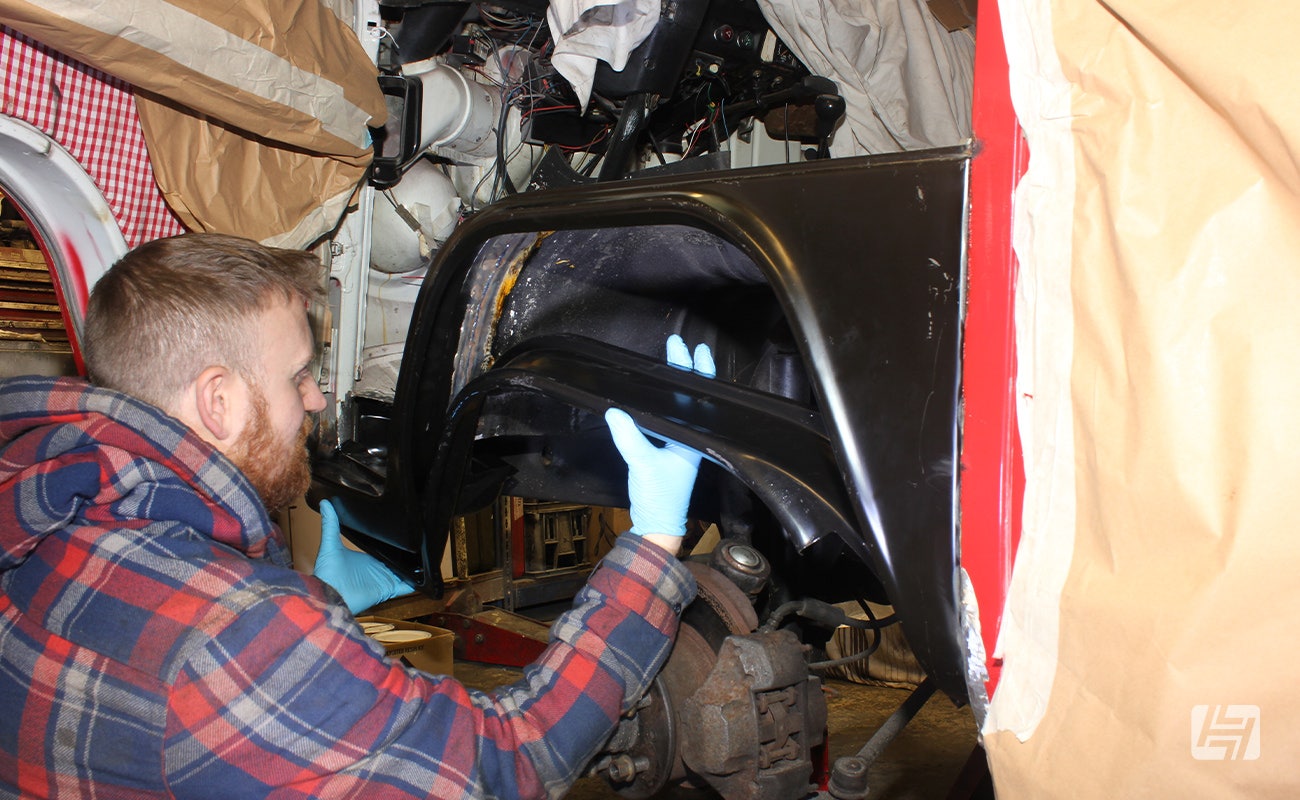
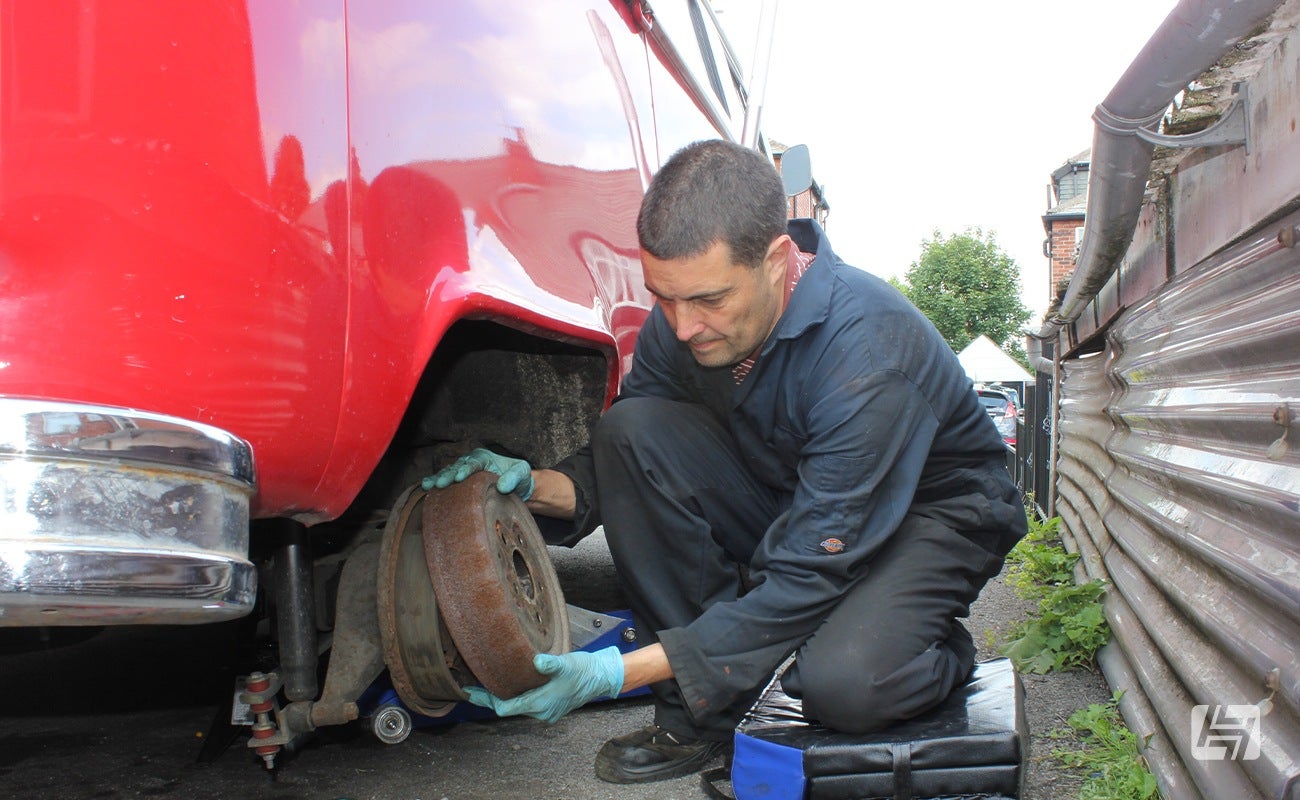
The bottom six inches of a Bay are generally where rust can be found if it has taken hold of the metalwork, so inspect the sills, floors, chassis rails, outriggers and the front beam. Take a torch and something to lie on to be able to carefully check the underside of the vehicle.
Bay Window repair panels are available for most areas of the underside. However, the rust can often spread further, so if a sill is rusty from the underside, it may also be rotten inside, which could mean the inner and outer sections have to be replaced. Whilst repair panels can cost between £50 and £100, once you’ve included an inner sill, jacking point, welding costs, and paint, the final bill can easily be around £600 or more. Major repairs such as a sill replacement are time-consuming and complicated, especially on the side where there’s a sliding door, so we recommend using a specialist who knows what’s involved.
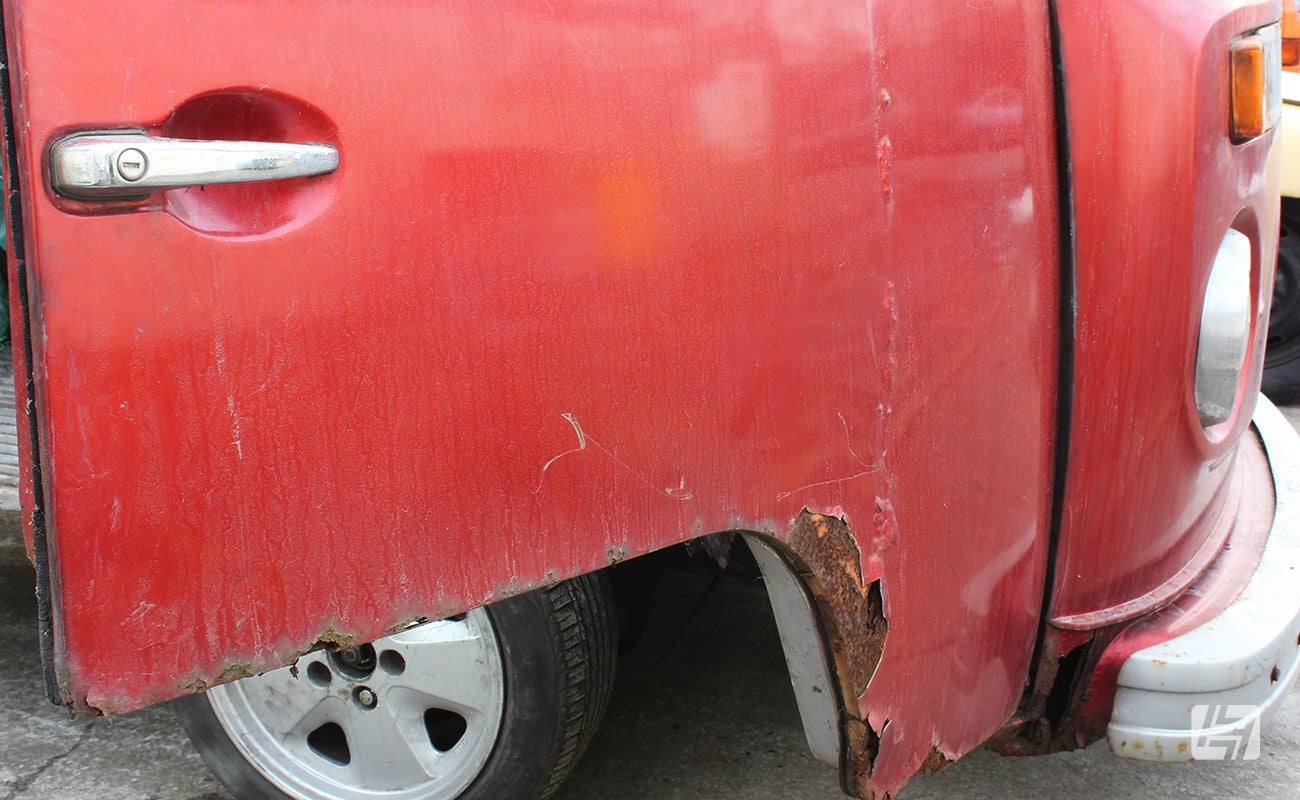
On the outside of a Bay, check for rust across the bottom edges and where the seams for the panels meet. Feel around the wheel arches for rust and filler repairs – use a magnet to check for filler. Moisture can become trapped underneath the window seals, and a common rust spot is along the base of the windscreen - repair panels are available, but again this can get complicated quickly if the rust has spread.
Open all the doors to check along the bottom edges for corrosion and moisture. Inspect the door steps (known as cab steps, which have several repair panels) for the front doors where moisture can become trapped and corrosion can form.
Some panels are no longer available new, such as a complete door, but a Type 2 door skin and smaller repair panels are, alternatively you may be able to source a used item from a specialist VW dismantler.
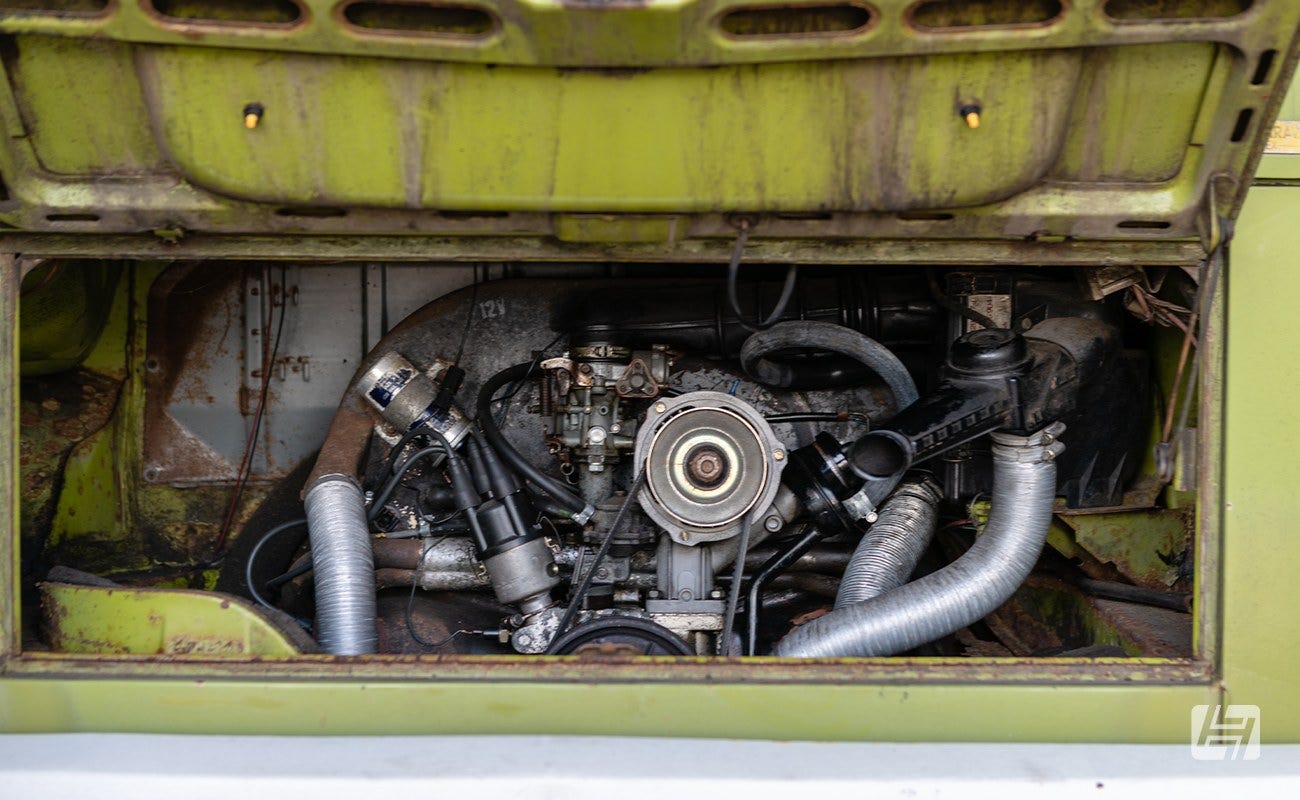
T2 Bay engine options
All of the Bays we’re focusing on in this buying guide are equipped with a four-cylinder air-cooled engine as standard. The smallest is a 1.6-litre (1584cc), which can be quickly identified with its high fan housing and a dynamo or alternator in the middle of the engine bay. Larger 1.7-, 1.8- and 2.0-litre air-cooled engines were fitted to later Bays as an option in Europe, but as standard in the USA from 1973, some being equipped with fuel-injection instead of a single carburettor. The Fuel injection can be costly to fix if broken or missing bits, but it is possible to convert back to a single or dual carburettor set-up if required. From an identification point of view, these engines have a lower fan housing and a not-so-prominent alternator.
If the engine can be run and an oil pressure gauge is fitted, ensure it displays around 50-60psi when cold and 20psi when warm at idle. Afterwards, check the underside of the engine for oil leaks from where it’s secured to the gearbox. The rear main oil seal can turn brittle, resulting in oil leaking past it. A replacement costs less than £10 but needs the engine to be removed to fit it.
More oil leaks can emerge from the pushrod tube seals on either side of the underneath of the engine, again a cheap-to-purchase part but could be labour intensive if the heads have to come off. Spring-loaded push rod tubes should save that hassle for you. You'll find them all on our website here.
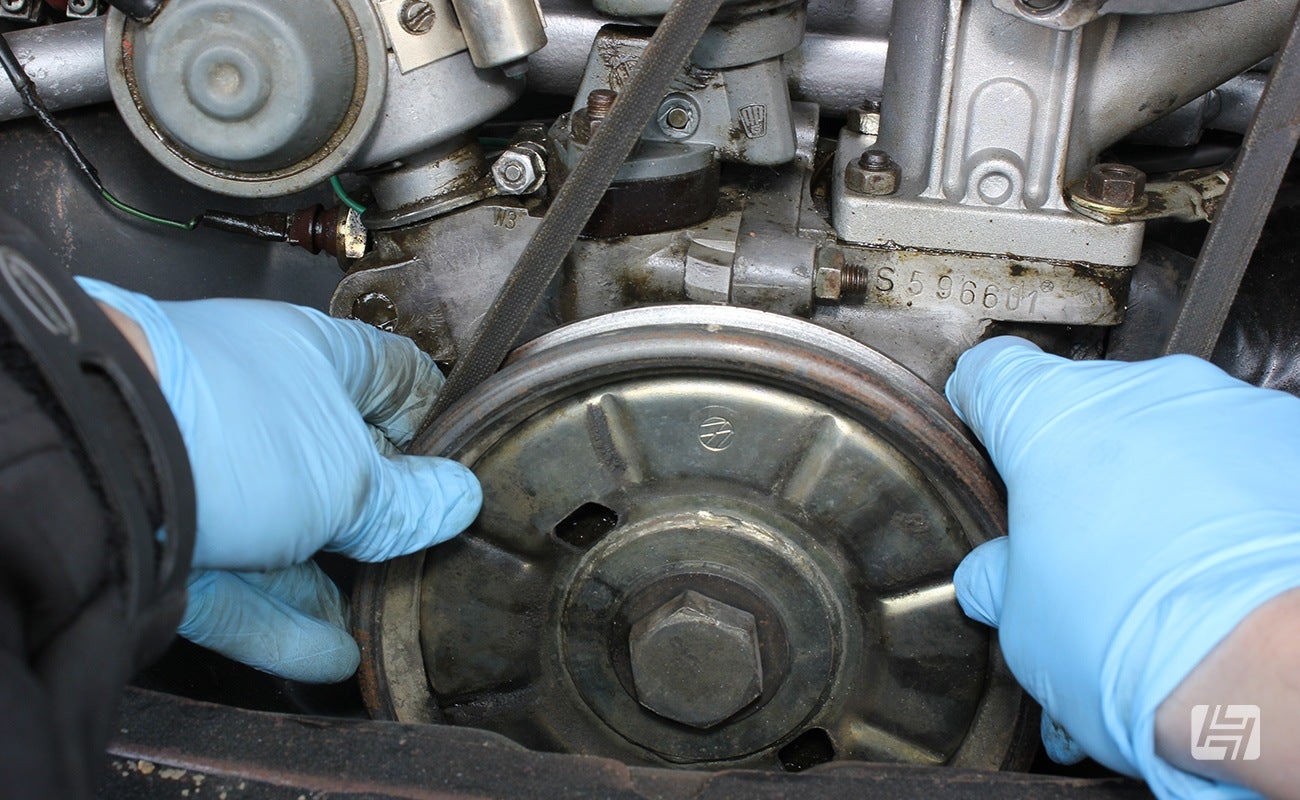
To check for end-float movement waggle the crankshaft pulley forwards and backwards There should be about 0.15mm of movement, which is difficult to estimate, but if you can see the pulley moving, internal bearing wear is more likely and the engine will need rebuilding.
Rebuild kits are available for the Type 2 engines, and there is also a range of non-exchange all-new engines from SSP with aluminium or magnesium cases.
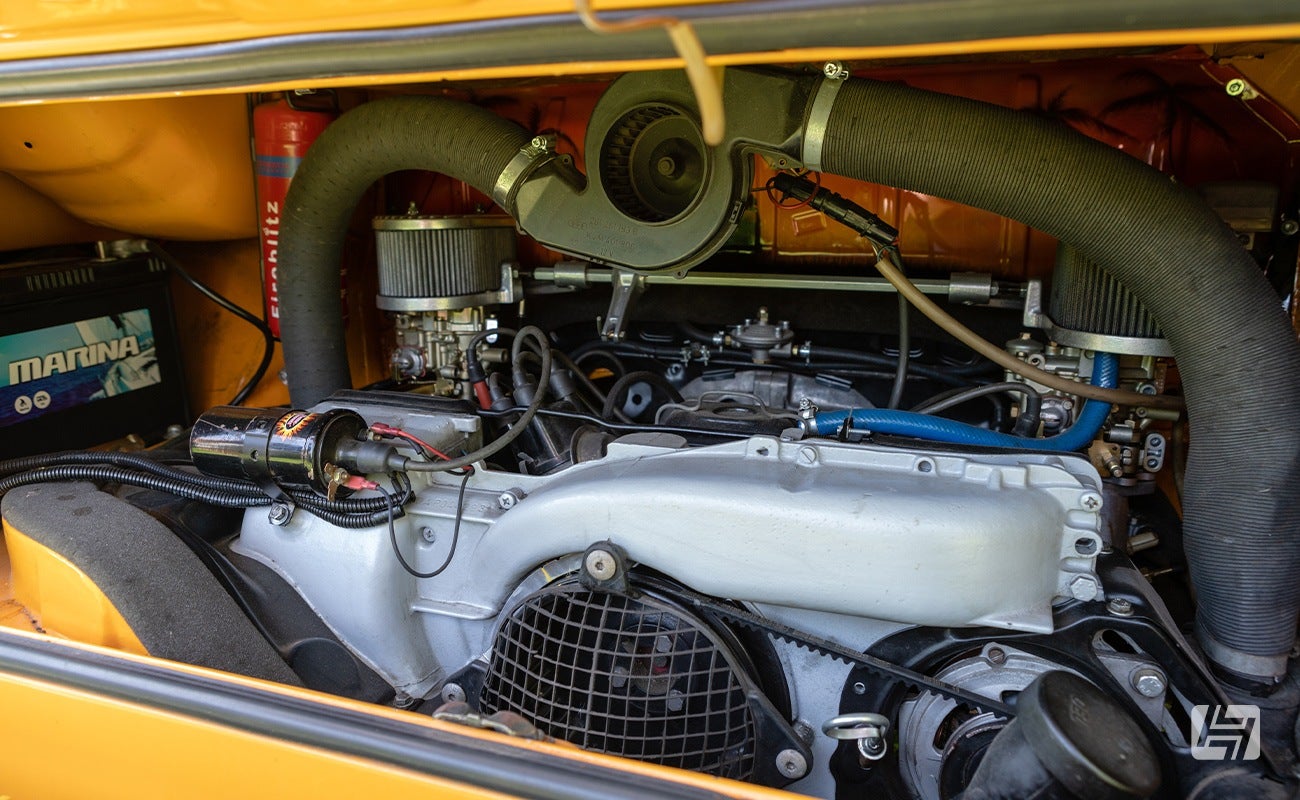
If an engine has been modified, make sure it has some additional equipment to help preserve it. At the very least, it should have an oil pressure gauge and also an oil temperature gauge. An external oil cooler will help to control the oil’s temperature, but also check all the tinware is present because this is essential to engine cooling.
Transmission checks
A four-speed manual gearbox is standard fitment on the Bay, although some are equipped with an automatic. Check the operation of the cable-operated clutch to ensure there’s a sufficient biting point and that the clutch doesn’t slip under acceleration. Make sure the ‘box doesn’t jump out of gear or that worn synchromesh results in crunchy down changes. Budget at least £800 for a professional gearbox rebuild, or treat yourself to one of our Rancho reconditioned gearboxes for a little bit more.
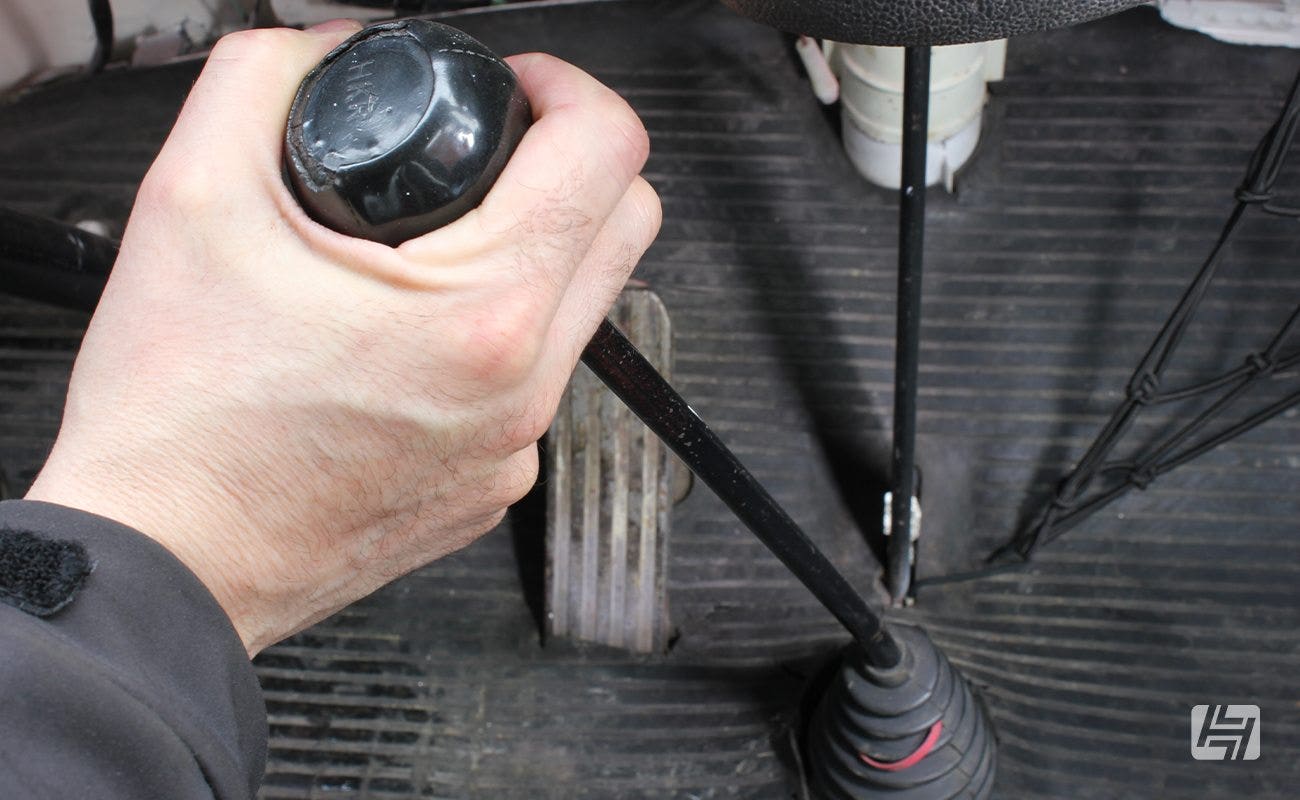
Check the gears are straightforward to select, especially reverse. The rod-change mechanism has a long way to travel to the gearbox at the rear, so if gearchanges are difficult, the bushes at the base of the gear stick and at the gearbox can be replaced and may fix the problem. We stock a gearshift bushing kit here which should help.
What you need to know about Type 2 brakes
Drums were fitted all around on the Bay up until late 1970 when solid discs with two-pot calipers were fitted at the front. Conversion kits to change front drums to disc brakes are available. A brake servo conversion is also a worthwhile upgrade, which won’t improve braking performance, but will require less effort on the brake pedal to slow down. Parts such as a choice of servos, master cylinders, reservoirs, and hoses are available here.
If a test drive is possible, check the vehicle doesn’t veer to the left or right under braking, which may suggest there are braking or wheel alignment issues, or both. The umbrella-styled handbrake should easily lock the rear brake drums, but if the handbrake is weak and there’s a large amount of travel on the brake pedal before the brakes bite, it may need adjusting.
Bay window suspension
The front suspension on the Bay comprises a twin beam with upper and lower arms, telescopic dampers and an anti-roll bar, whereas the rear has trailing arms controlled via torsion bars and a couple of telescopic dampers.
Check for corrosion in the casing of the twin front beam. Inside these casings, there are torsion leaf springs that twist with the movement of the upper and lower arms attached to the wheel hubs/uprights. Check the dust covers on the ball joints of the front suspension arms, which can split and allow dirt and water inside, resulting in premature wear.
Visually inspect the telescopic dampers for leaks and perished rubber mounting bushes – replacement OE and custom shock absorbers are available here.
Going up or down is relatively easy with the use of beam adjusters and /or dropped spindles on the front and realigning the spring plates on the rear. Longer shocks will be required for a Swamper style (as below) whereas shorter shock absorbers will probably be needed for a heavy drop to the floor.
Steering
A steering box is fitted as standard to the Bay, which has unfortunately become increasingly difficult for specialists to overhaul. The availability of new or reconditioned units is also scarce, with only LHD steering boxes for ‘73-‘79 Bays being available at present. For all other steering boxes, some spares are available here.
Check for excessive play in the steering, which according to the UK MOT test, can be up to 7.5cm of travel at the steering wheel before the road wheels move (based on a 38cm-diameter steering wheel).
Whilst never fitted from the factory, power steering has become a popular upgrade on these vehicles, and it is even possible to convert to a steering rack if your budget allows for it!
Electrics
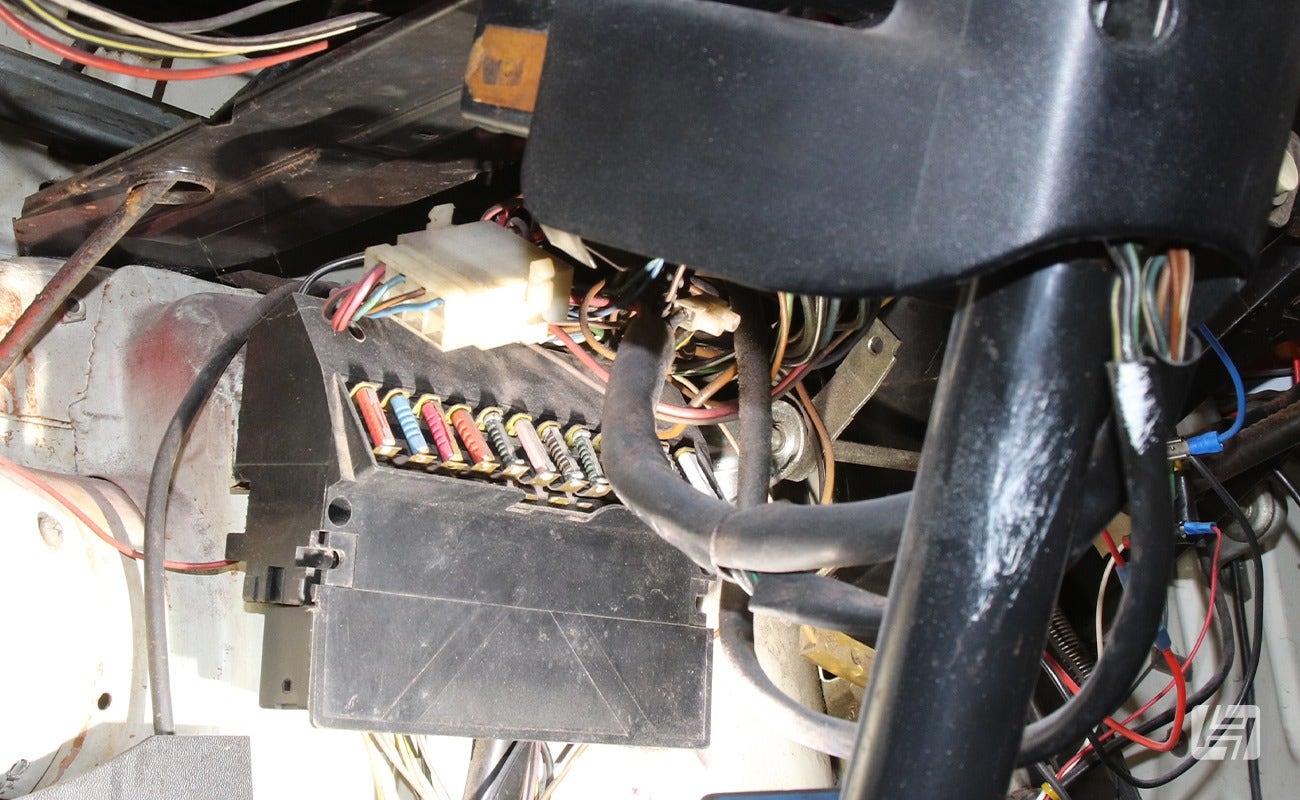
All Bays have 12-volt negative earth electrics, with a single battery being installed in the offside rear corner of the engine bay. Find the main fusebox underneath the dashboard and check it for water ingress that can leak through via the windscreen or front vents. Faulty electrics can be caused by corroded fuses and/or relays and poor earth connections.
If a leisure battery is fitted, check it is securely mounted and the wiring to any equipment is correctly fused, along with a split-charge system that should only operate when the engine is running. If a mains hook-up is installed, check it has some means of cutting off via a trip switch or fuse. If you are in doubt about any of the electrics, ask for a second opinion from an auto electrician.

How much is a Type 2 VW Bay?
There’s very little change from $5000 for an abandoned (but salvageable) restoration project in pieces. Most road-legal Bays start at around $10,000 for something that promises to be reliable but may need some cosmetic work, such as a respray or a new interior. Realistically, expect to spend up to $20,000 for one that’s ready for the road, but a lot more if you want a recent restoration, something highly modified, or an import that’s rust-free.
Be wary of vehicles that haven’t been MOT tested, despite most of them qualifying for exemption in the UK (extensive modifications from standard mean such a vehicle has to be tested). Unless you are looking at a restoration project, insist on an MOT test, and if in doubt, pay for an independent inspection for peace of mind.
Should you buy a Bay window Type 2?
Everyone should own a campervan at some point in their life, and one of the most popular has got to be the VW Bay Window model. Unfortunately, it’s now an expensive investment to join the fraternity, so do your homework and don’t rush into buying the first one you see.
You may find our 'how to choose a VW Campervan' blog of interest if you are still undecided on whether a classic or modern campervan is for you.
Rob