


 Beetle
 Type 2 Bay
 Type 2 Split
 Type 25
 Transporter T4
 Transporter T5
 Golf Mk1
 Golf Mk2


 911
911
 996
996
 997
997
 986 Boxster
 987 Boxster
 912
912
 944
944
 924
924


 Defender
 Discovery Series 1
 Discovery 2
 Series 1, 2 & 3
 Freelander
 Freelander 2


Understanding Aircooled VW Ignition Timing
If your engine struggles to start or feels as though it is down on power, then checking and adjusting the ignition timing may be the answer. Having an understanding of how the ignition timing works is just as important as knowing how to adjust it, so we’ve explained all you need to know below. We’ll begin with some background information on the distributor.
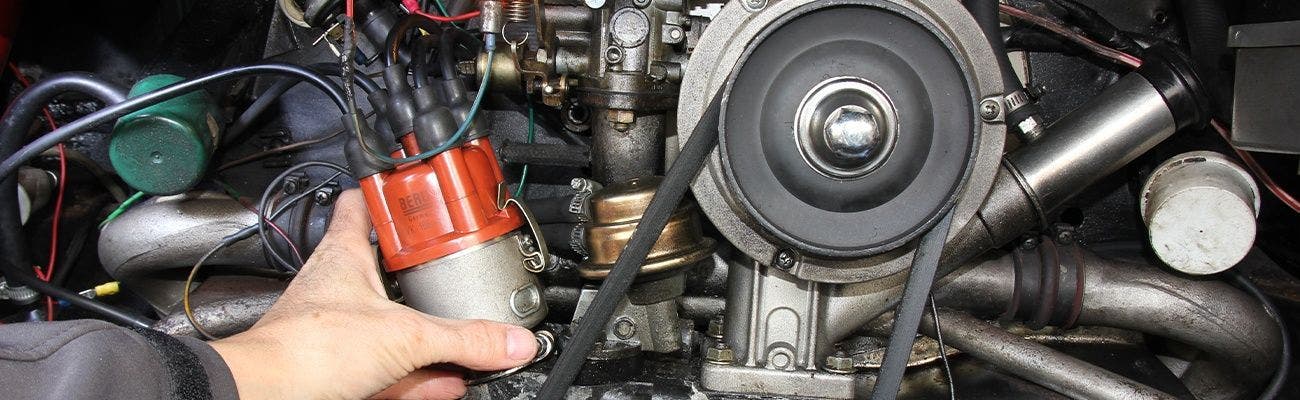
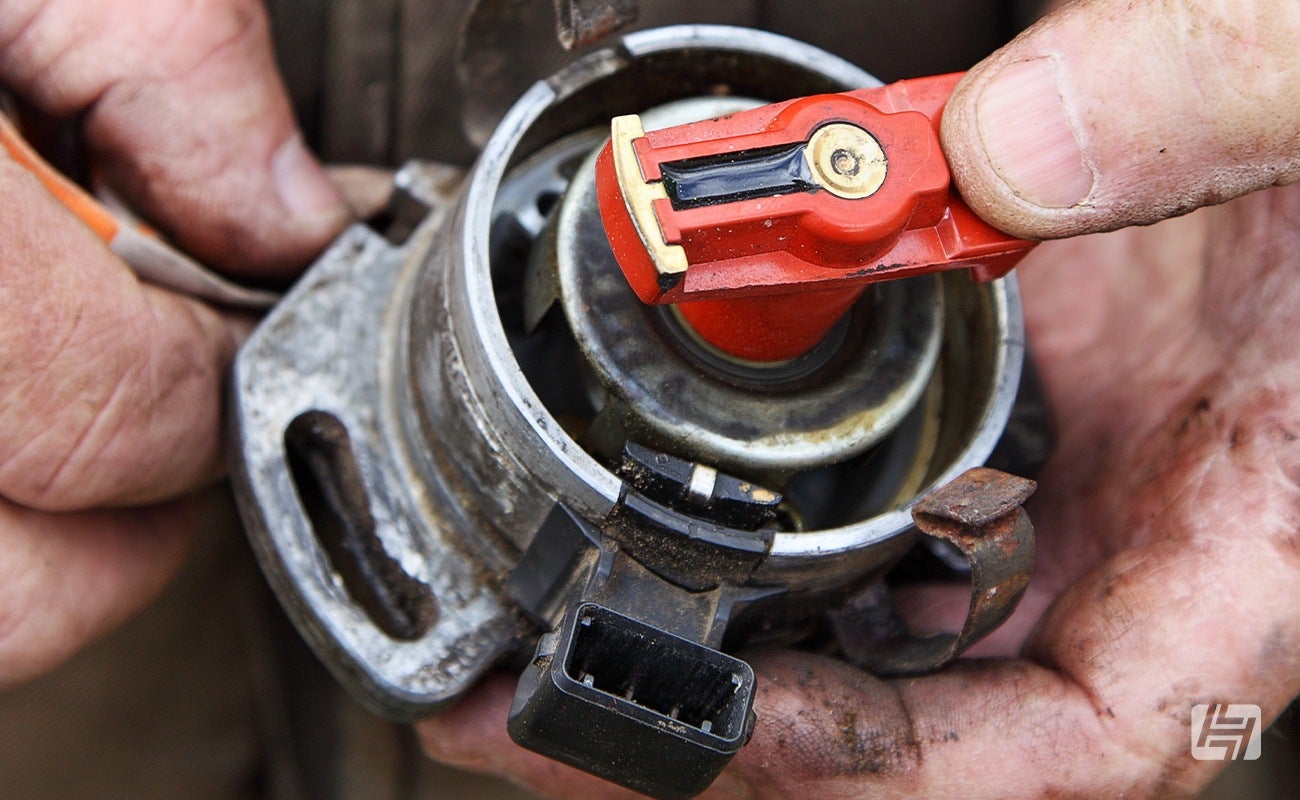
How Does A Distributor Work?
The distributor is one of the essential components of an engine for ensuring a substantial spark provides sufficient combustion to force the pistons down the cylinders and rotate the crankshaft. In brief, when the high-voltage charge from the coil (around 20,000 volts) is delivered to the distributor, it travels down the main centre shaft and looks for an exit route through the rotor arm and the metal contacts on the inside of the distributor cap. This centre shaft is rotated by the engine using a drive gear on the bottom of it. At the top of the shaft is a separate upper shaft and the rotor arm sits on top of this. The upper shaft also consists of a cam, which opens and closes the points. The charge from the coil is controlled by the points, which open and close, acting as a switch to deliver the power from the coil.
The aforementioned parts and several others, including bob weights and advance springs, all contribute towards the performance of the distributor. And their condition and specification help to determine how efficient the distributor can be.
What Is Causing A Lack Of Power?
When an engine’s ignition timing is incorrect, it often results in a lack of power. Whilst this could be caused by fuelling issues, if you are confident there are no problems in this area, then there are some preliminary checks to conduct before you start checking the ignition timing and adjusting it.
Assuming your spark plugs are in good working order (see our blog on spark plugs here) it’s worthwhile checking all of the HT (high-tension) leads are connected between them and the distributor, along with the single lead between the coil and the distributor. This can often eliminate a simple problem of a loose HT lead and consequently, an engine that isn’t firing on all of its spark plugs.
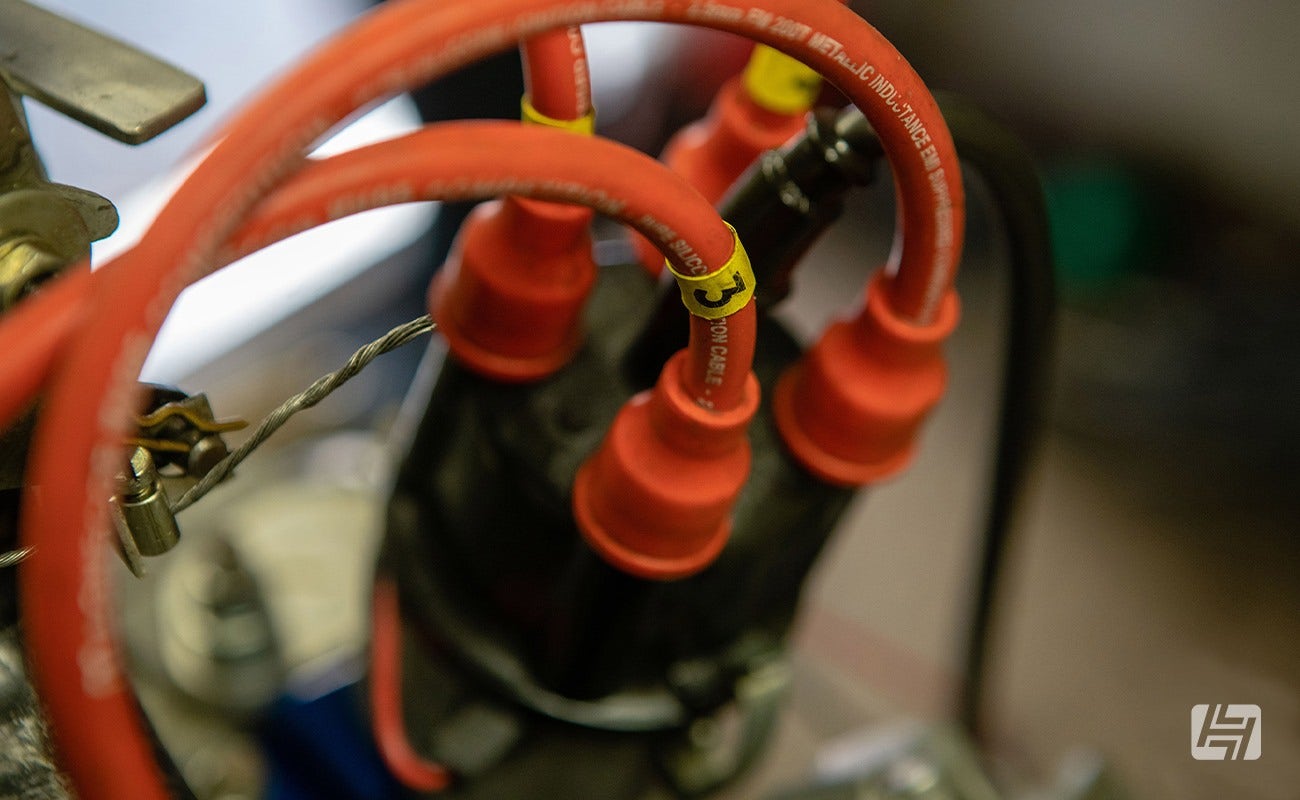
If an engine is not only down on power but also sounds as though it is misfiring or not running as smoothly as it should, the firing order of the HT leads may be wrong. VW’s air-cooled engines have a firing order of 1, 4, 3, 2 when looking at the engine from the rear of the vehicle (assuming it’s rear-mounted), with number 1 being on the right side nearest the front, number 2 on the same side, and number 3 on the left side nearest the front with number 4 being on the rearmost left side.
Check the arrangement of the HT leads connected to the distributor cap to ensure they are arranged in the firing order. In the case of air-cooled engines, the rotor arm inside the distributor spins around in a clockwise direction, so the 1, 4, 3, 2 arrangement also needs to be checked in a clockwise pattern.
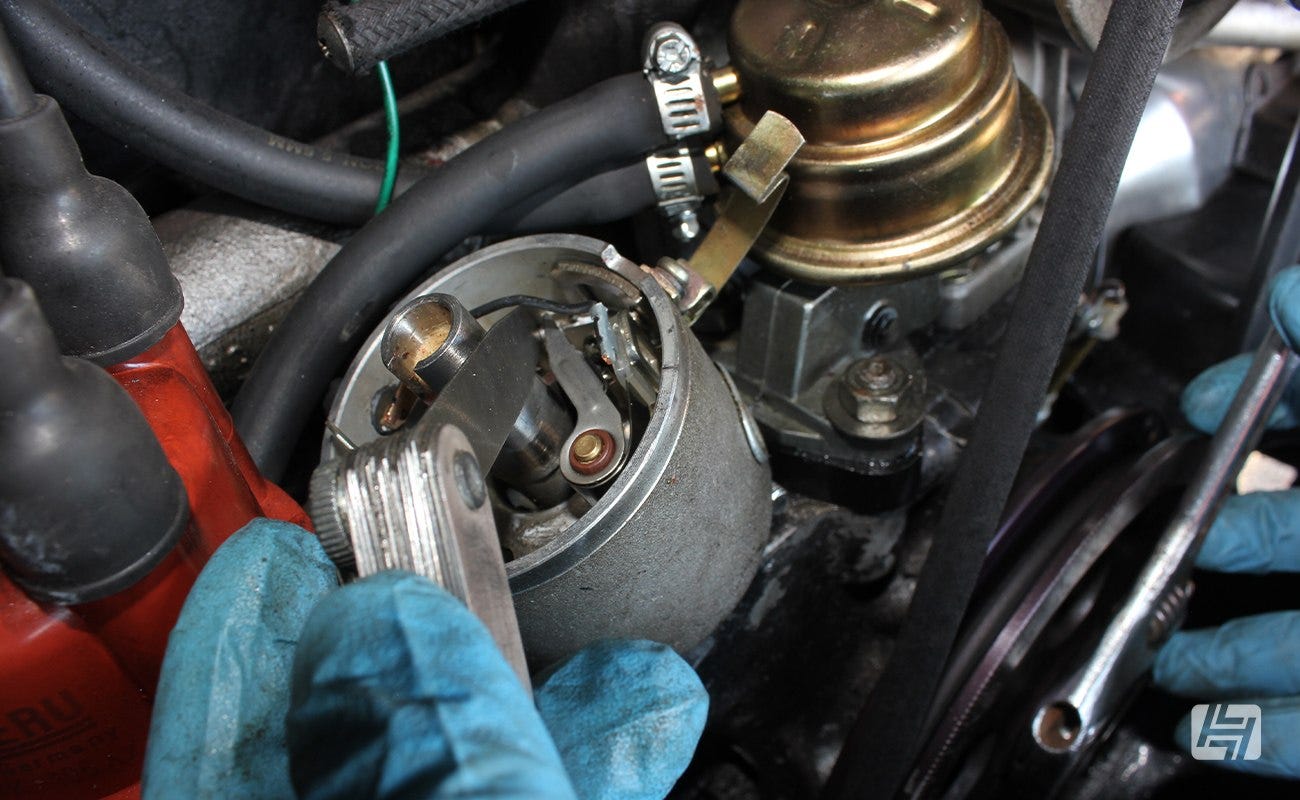
How To Check Points Gap
An incorrect points gap can reduce an engine’s performance, so it’s worth checking it before you proceed with checking the engine’s ignition timing. So, with the vehicle on level ground, remove the distributor cap, and either rock the vehicle in third gear or select neutral and use a suitable spanner or socket to turn the crankshaft pulley clockwise until the ignition points inside the distributor are fully open. You’ll then need a set of feeler gauges to measure this gap. On most air-cooled engines, this gap should be 0.4mm or 0.016 of an inch (16-thousandth of an inch). If the gap needs adjusting, carefully slacken the crosshead securing screw for the points, move them a little, then tighten it.
How To Check Ignition Timing
If you have conducted all of our checks and either found no problems, or the engine is still down on power, then checking the ignition timing is the next stage. This can be conducted with either a timing strobe or on engines such as air-cooled ones, using what’s known as a static timing method. We’ll explain both:
Aircooled VW Static Timing
It is possible to check the ignition timing using a wire and small 12-volt bulb, providing you have timing marks on the crankshaft pulley. The wire must be connected to the base of the bulb (the live connection). Connect the other end of the wire to the negative terminal on the coil (the same connection for the condenser), and secure the side of the bulb to earth, such as the return spring on the carburettor. Alternatively, a simple test light for around £5 can be used.
Once your homemade timing equipment or test light is connected, switch on the ignition, but do not run the engine. Turn the crankshaft pulley clockwise using a suitable spanner. Look at the timing markings on the crankshaft pulley. When the bulb illuminates, note the pulley’s position at 12 o’clock (there should be something on the engine or its timing cover to help show where this Top Dead Centre (TDC) point is located).
The position of the pulley when the bulb illuminates varies between different engines, but it’s generally between five and seven degrees either before or after the Top Dead Centre marking on the engine (in some cases it’s zero degrees).
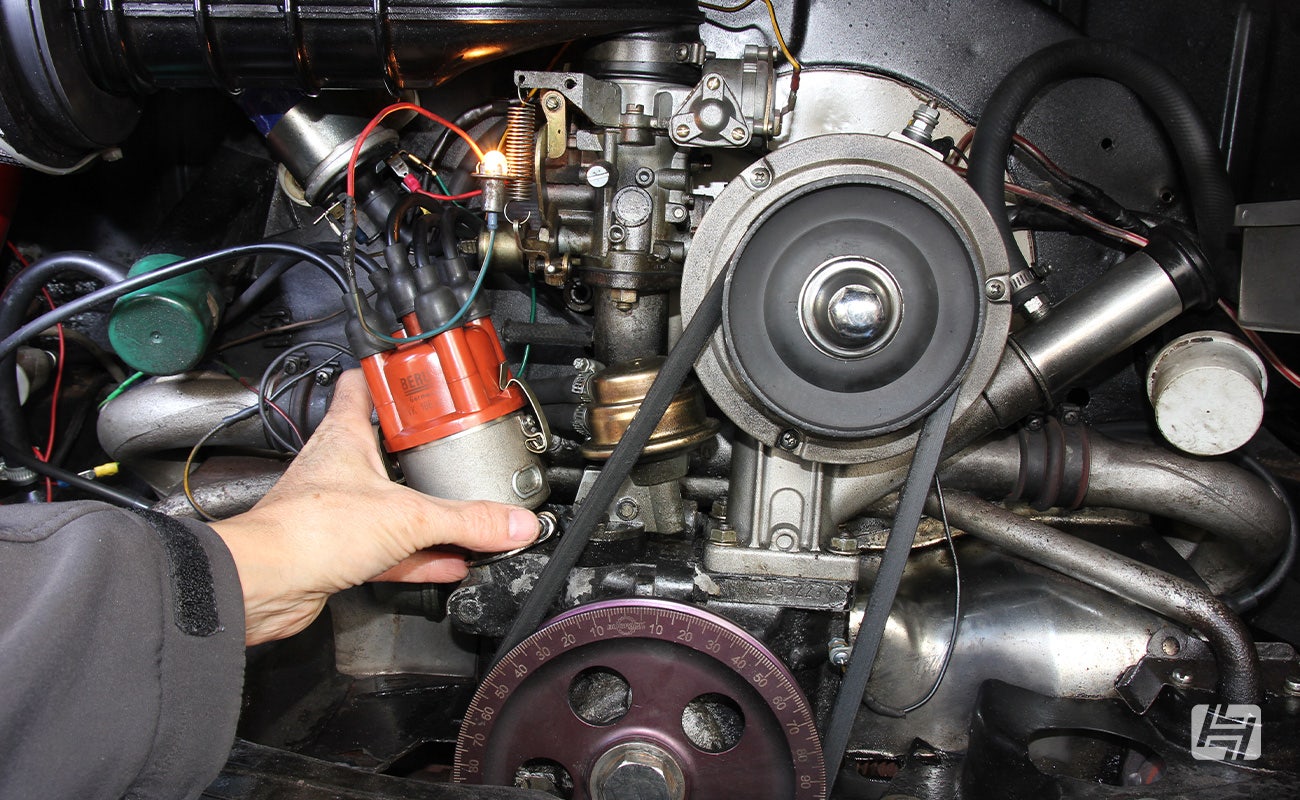
A standard crankshaft pulley will have a few notches on its outer edge to help with the timing marks we’ve mentioned, whereas aftermarket pulleys, such as the one shown in our photograph, have degree markings all the way around. These are particularly popular on air-cooled engines, such as the ones we sell here for Beetles, Bays and Splitscreens.
If after checking the engine’s static timing, it needs to be adjusted, move the crankshaft pulley to the position where it should be for the bulb to illuminate (e.g. 5 degrees after Top Dead Centre), but because the ignition timing is wrong, the bulb won’t have lit. Slacken the clamp around the body of the distributor so that the distributor can be rotated, then gently move it until the bulb illuminates. Tighten the clamp around the distributor.
Aircooled VW Timing Using A Strobe
If you have a timing strobe, then the ignition timing can be checked and adjusted using this equipment, but it does require the engine to be running and, in some cases, the thin vacuum pipe between the distributor and carburettor to be detached from the distributor.
Adjusting the ignition timing with the engine running is more dangerous than static timing because there’s a risk of getting clothing, hair or your fingers caught in the rotating drive belt for the alternator or dynamo.
Before running the engine, connect the timing strobe’s wires. There are usually two crocodile clips to connect to the battery (red for positive and black for negative), plus a plastic clamp to attach to the HT lead for cylinder number one (on the frontmost right side of a rear-mounted air-cooled engine).
Make sure the wires for the timing strobe cannot get caught in the engine’s drive belt and are not touching anything hot, such as the exhaust.
Look at the crankshaft pulley for its timing marks and add dots of white paint to them to be able to see them more clearly.
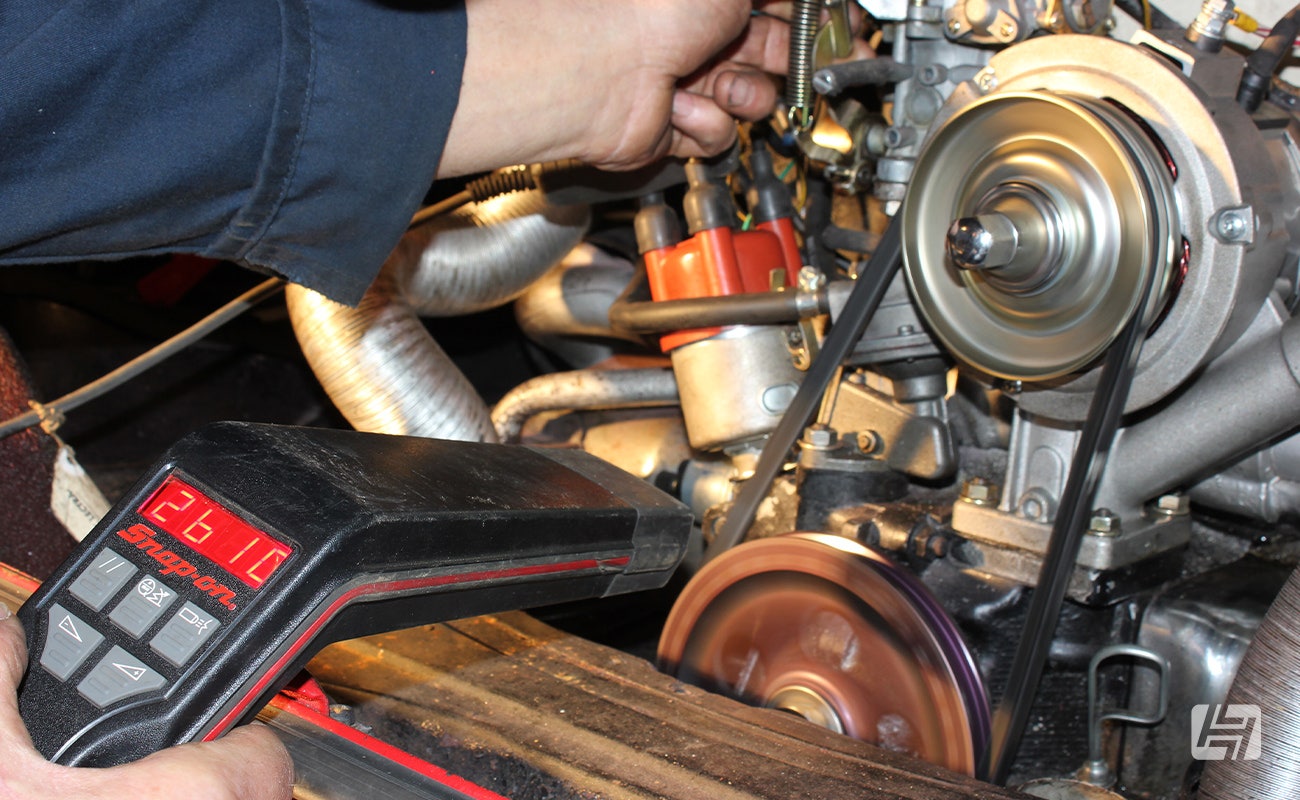
Start the engine and let it idle, which should be around 800-900rpm in most cases. Point the timing strobe at the top of the 12 o’clock position for the crankshaft pulley, then press its trigger to activate its light. The light will be triggered every time electricity travels down the HT lead for cylinder number one to fire the spark plug. As the light pulses, providing you are pointing it at the Top Dead Centre mark on the crankshaft, you should be able to see those timing marks that you highlighted with paint. Or if you have an aftermarket pulley with numbers (degrees), you’ll be able to read them.
If the timing is incorrect, switch off the engine, slacken the clamp around the distributor, run the engine again and carefully adjust the position of the distributor until the timing marks illuminated by the strobe are in the correct position. This is the most dangerous part of the job, especially on air-cooled engines, because your hand will be very close to the moving rubber drive belt (fan belt). Ask someone to watch you and for them to be ready to switch off the engine.
Some people prefer to set the ignition timing with the engine running at around 3,000rpm instead of idle, in which case the timing mark to look for can be up to 30 degrees from Top Dead Centre (an aftermarket pulley with numbers instead of timing marks will be needed).
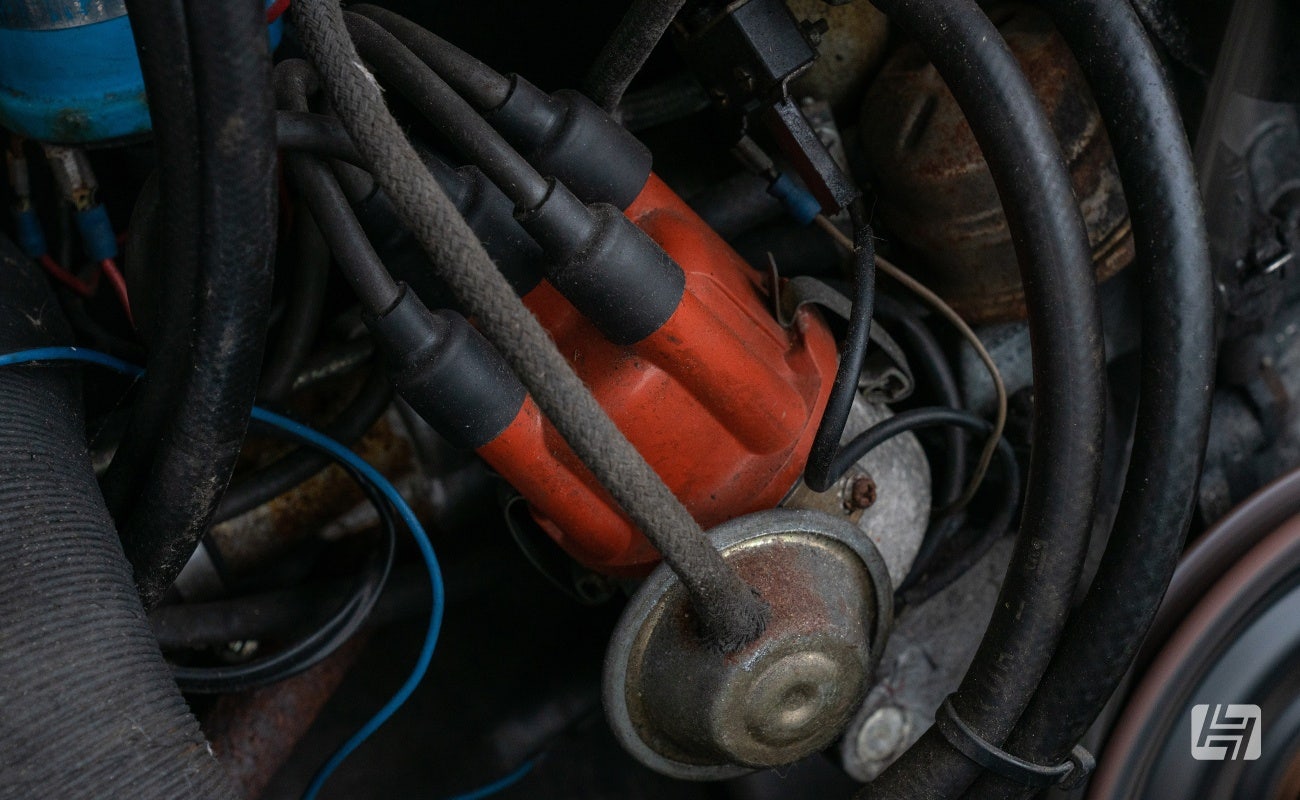
What Is Vacuum Advance?
The round-shaped vacuum unit on the side of some distributors is designed as an economy aid. Inside, there’s a spring and rubber diaphragm, which is connected to the distributor’s baseplate via an arm. A plastic tube between the vacuum unit and the carburettor or inlet manifold controls the vacuum using air drawn from the engine, which in turn moves the baseplate inside the distributor and alters the position of the points to help advance or retard the ignition timing. At part throttle, the inlet manifold’s vacuum pulls the diaphragm, which in turn rotates the baseplate in relation to the cam and advances the points’ timing.
Is It Worth It?
Ensuring your engine’s ignition timing is correct is a worthwhile job and just as important as checking or changing the spark plugs, measuring the points gap, and any other aspect of routine maintenance. It may initially seem like a dark art, but once you have gone through the steps, whether it’s with a timing strobe or a homemade bulb and wire, you’ll have a greater understanding of how your engine works and how to get the most out of it.
For further information, take a look at our blog on How to fix engine running problems
Rob Hawkins