


 Beetle
 Type 2 Bay
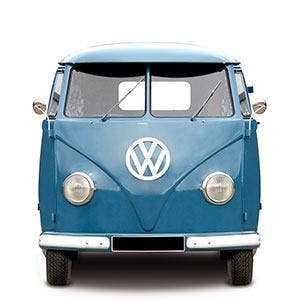 Type 2 Split
 Type 25
 Transporter T4
 Transporter T5
 Golf Mk1
 Golf Mk2


 911
911
 996
996
 997
997
 986 Boxster
 987 Boxster
 912
912
 944
944
 924
924


 Defender
 Discovery Series 1
 Discovery 2
 Series 1, 2 & 3
 Freelander
 Freelander 2


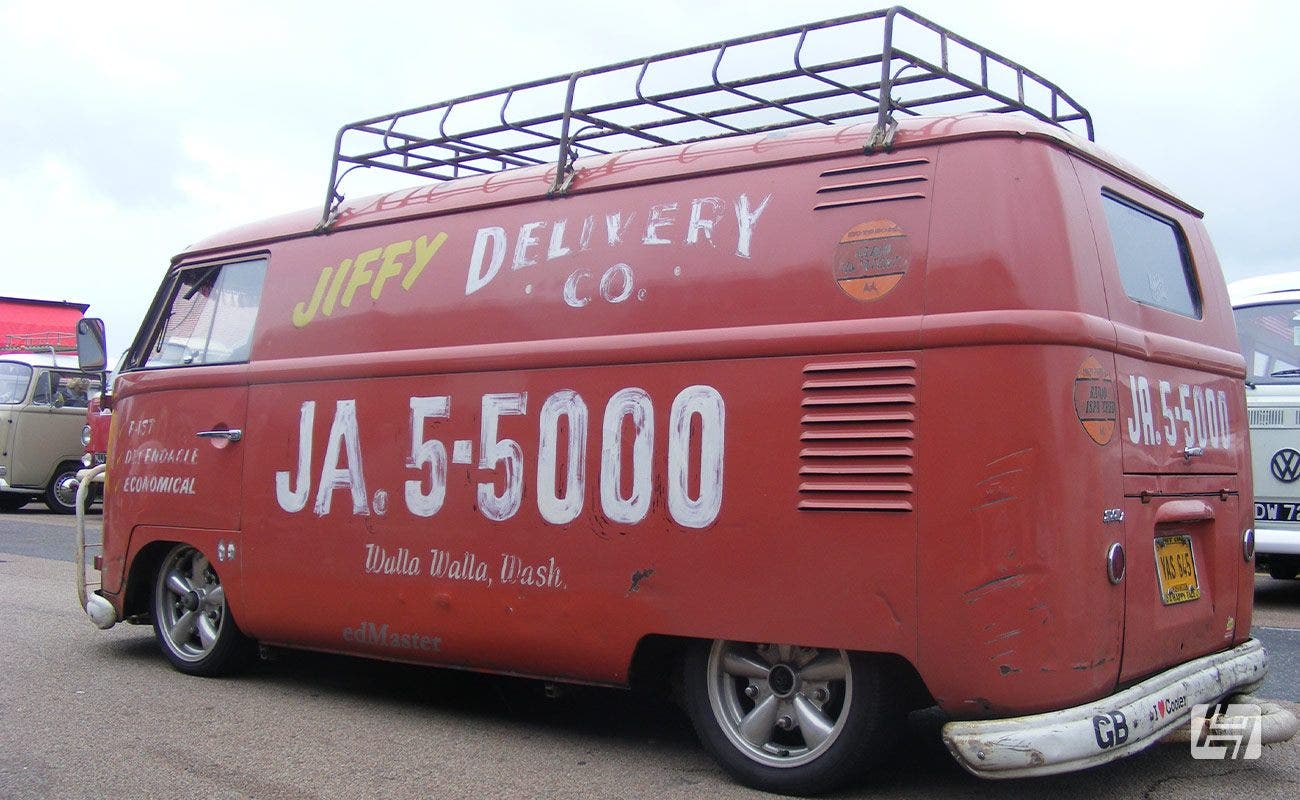
How To Lower An Aircooled VW Bus
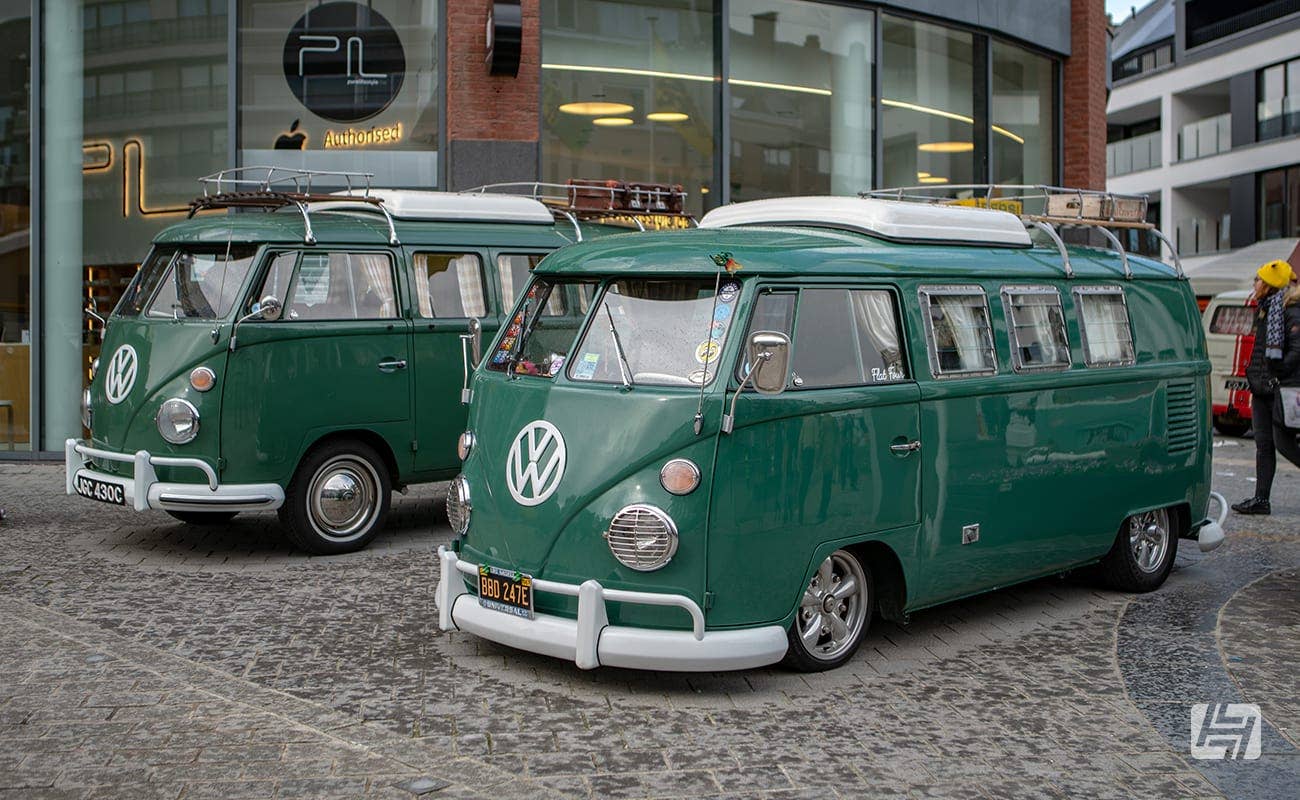
The Volkswagen Type 2 is one of the most iconic vehicles on the street. But whilst they look simply wonderful in stock form, there is something pretty cool about an aircooled bus that scrapes its belly as you cruise along in the sun. If you are searching for some stance inspiration or are keen to carry out a ride height reduction, read on. Here's how to lower an aircooled VW Bus.
Understanding VW Bus Suspension
Air-cooled Buses come in three varieties, Split, Bay and early T3/Type 25. For no other reason than they have entirely different suspension set-ups, we’re not going to mention the Type 25 again here, but you can find all you need for T25 suspension over on our website.
Splits and Bays have essentially the same underpinnings as a Beetle, which is hardly surprising, seeing as VW drew inspiration from the Type 1 whilst creating the Type 2. In fact, the early commercial prototypes sat on a modified Beetle chassis, but they proved to be too weak, so VW went back to the drawing board and came up with the restorers’ nightmare we’re familiar with today.
This suspension arrangement was already tried and tested by the time the first Splitscreen buses rolled out of Wolfsburg in 1949, and if you can navigate your way around VW Beetle suspension, working on a Split or Bay will hold no fears for you; everything is fundamentally the same, albeit just a bit bigger.
How does VW Bus Suspension work?
The aircooled Type 2 models were equipped with torsion bar suspension. Torsion bars are metal leaves that sit in a housing – the beam axle at the front and in torsion bar housings on the rear. They are fixed in one position and when a wheel moves up or down on the axle, the torsion bar twists but always returns back to its original position. This return rate is in effect, the vehicle's suspension. Some people confusingly believe the shock absorbers do this job, but they’re really just dampeners and they are there to smooth out the ride.
Unless you’re running air-ride, all torsion bars are locked into place, with a central grub screw in each of the tubes on the front beam and by the spring plates on the back end. To raise or lower the suspension you reposition the torsion bars/leaves where you want them. Simple, huh?
Is Split and Bay Suspension the same?
Pretty much, yes. But there are a couple of very important differences.
All Splitscreen buses left the factory with king and link pin beams and all Bay Windows, from 1967-onwards, have ball joint front ends. Brazilian-built buses are the exception and continued to use king and link pin suspension throughout production.
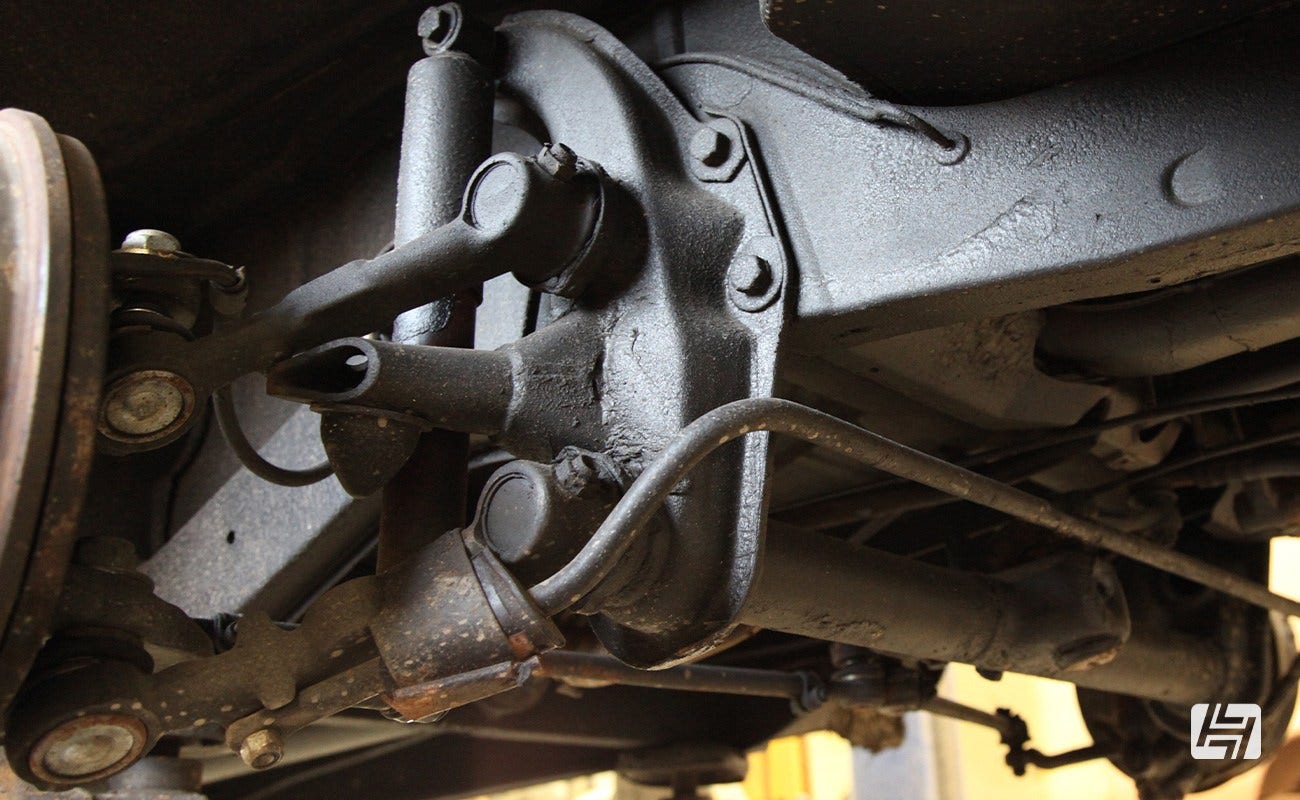
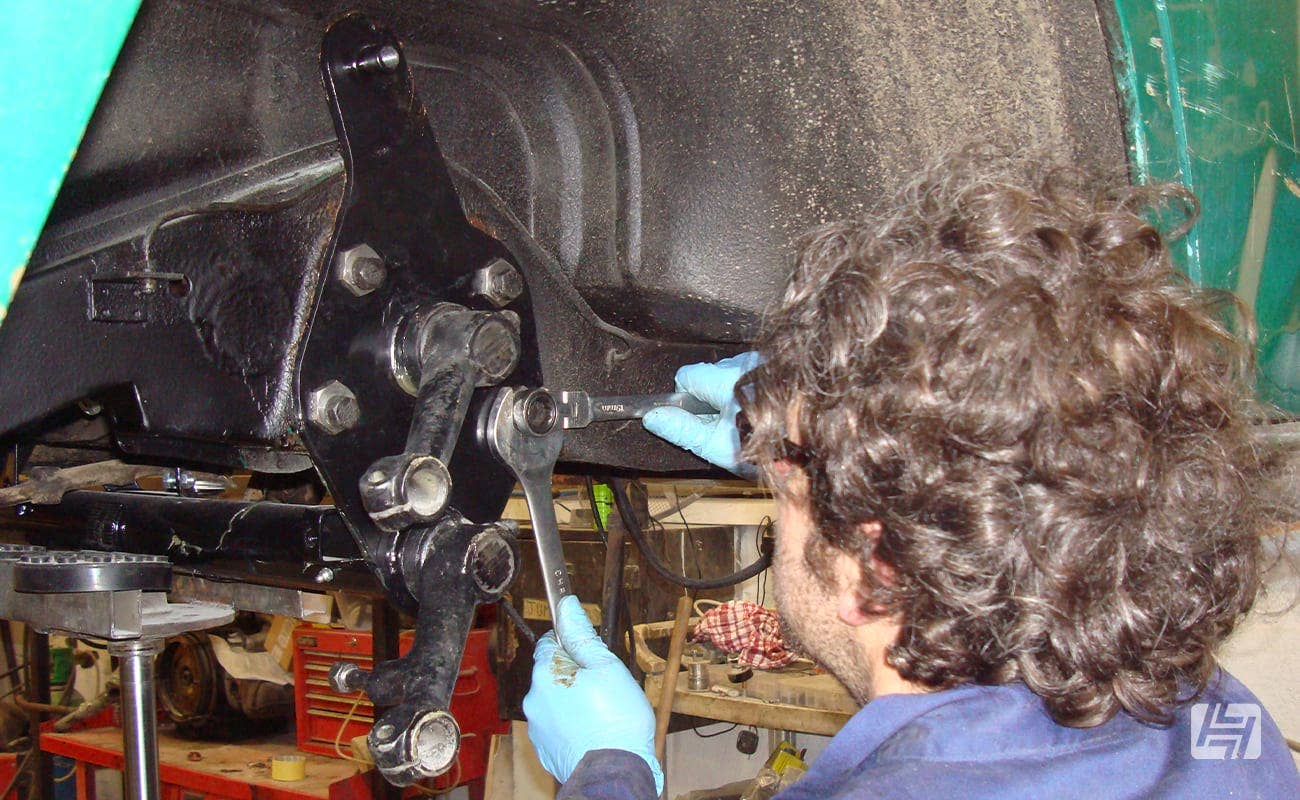
Both Splits and Bays have front spindles (more on those in a moment) but how they attach to the front end differs. A link pin beam has spindles that rotate on a large vertical kingpin. The pin is held in the torsion arms with two horizontal link pins. You can buy a link pin refurb kit, but they’ll need to be reamed out and pressed in, so letting a professional with all the right kit handle that job is the sensible option.
Ball joint spindles mount directly onto Type 2 ball joints, and are pressed into the torsion arms. Both setups should be treated to regular maintenance. King and link pins require annual greasing if you don’t want them to wear out and whilst ball joints don’t need anything like that, you do need to keep an eye on the rubber ball joint boot. They have an annoying tendency to split. When they do, dirt and water get in and destroys the joint. But that’s old VWs for you.
The biggest difference between Split and Bay suspension can be found under the rear end. Split Screen Type 2s have a swing axle gearbox and Bay Windows run IRS (Independent Rear Suspension). A common upgrade on Splits is to replace the old rear end and ditch the reduction boxes they left the factory with. Owners go down one of two roads; they go for a straight axle set up from a Beetle, which deletes the reduction boxes, or they weld brackets on the rear frame horns and upgrade to IRS.

What does IRS and Straight Axle mean?
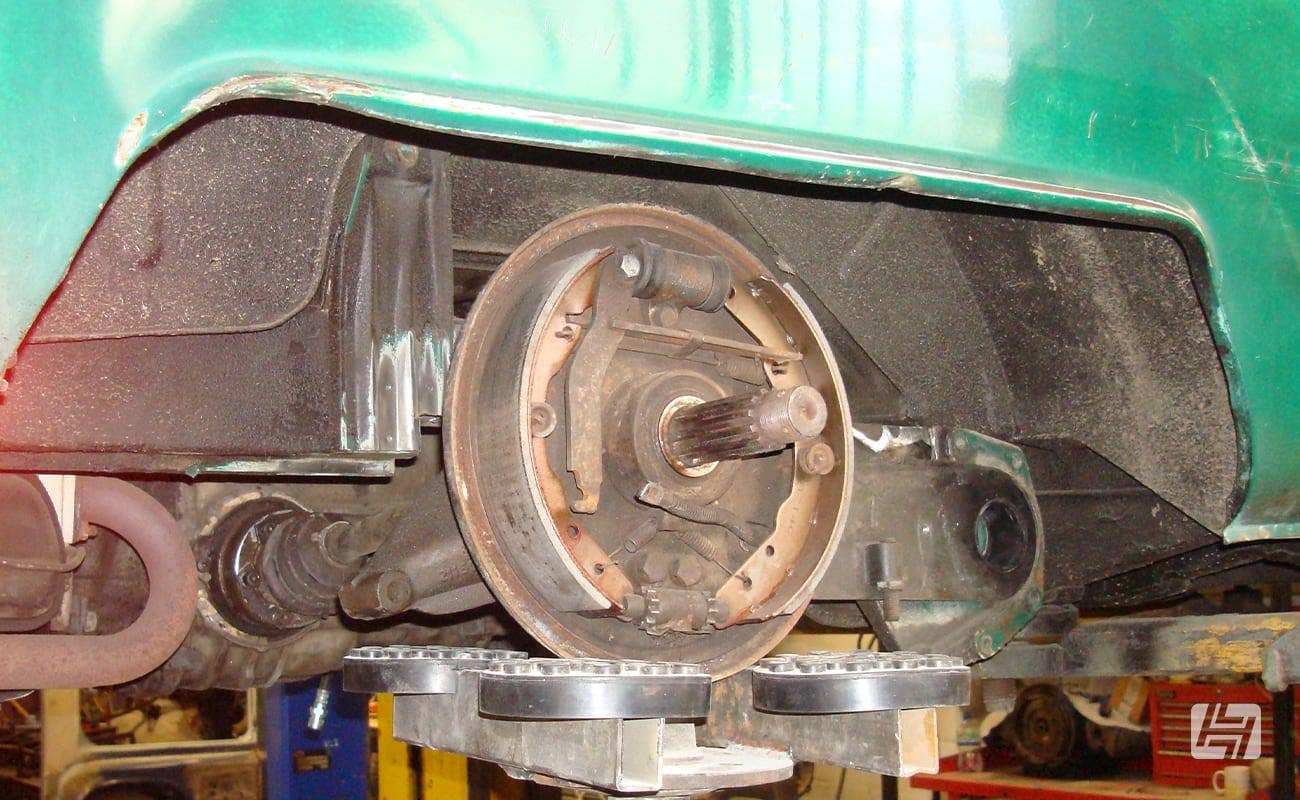
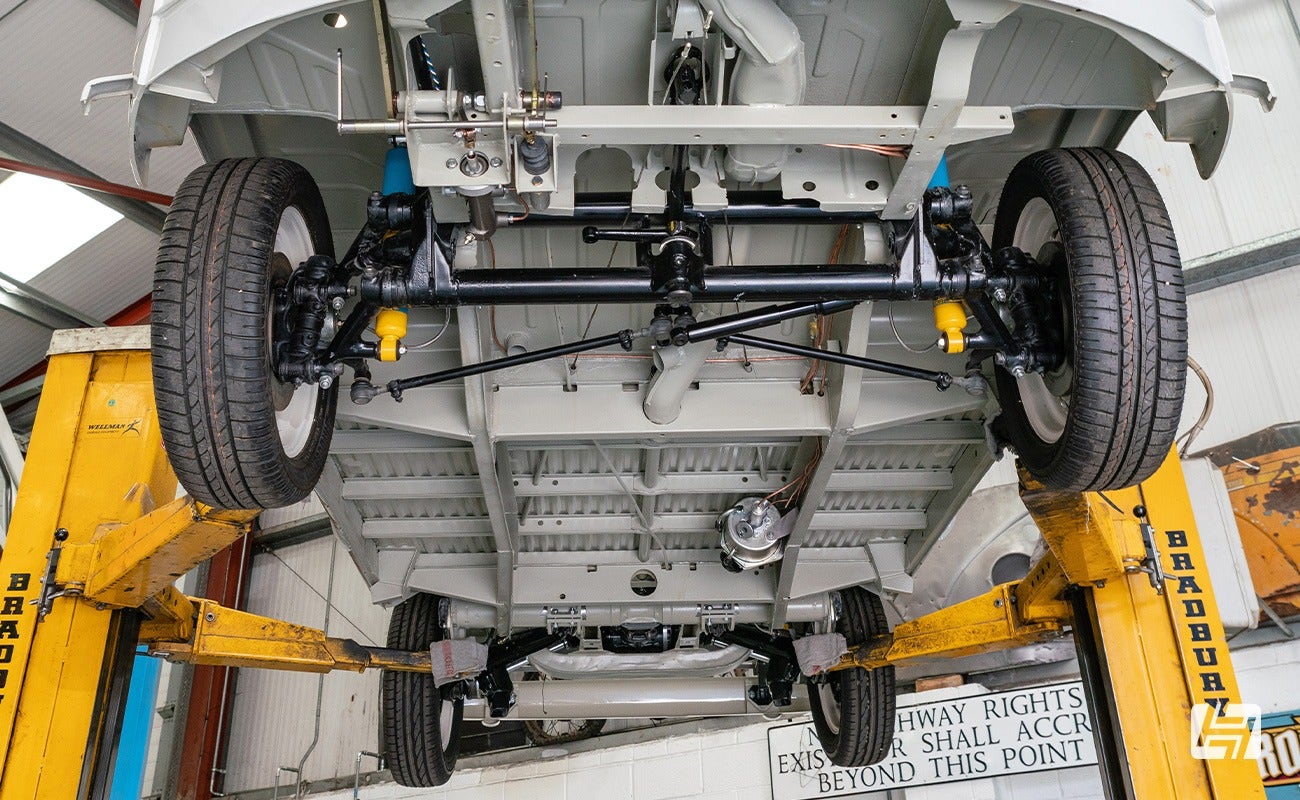
How do you know if you have Independent Rear Suspension? Easy. IRS has a driveshaft going from the back of the wheel housing to the gearbox. These driveshafts have a rubber boot with a CV joint on either end with bolts running around the circumference to mount them. If your Bus has metal tubes without these CV joints running between the gearbox and wheels it’s still on the old swing axle set up. Clear?
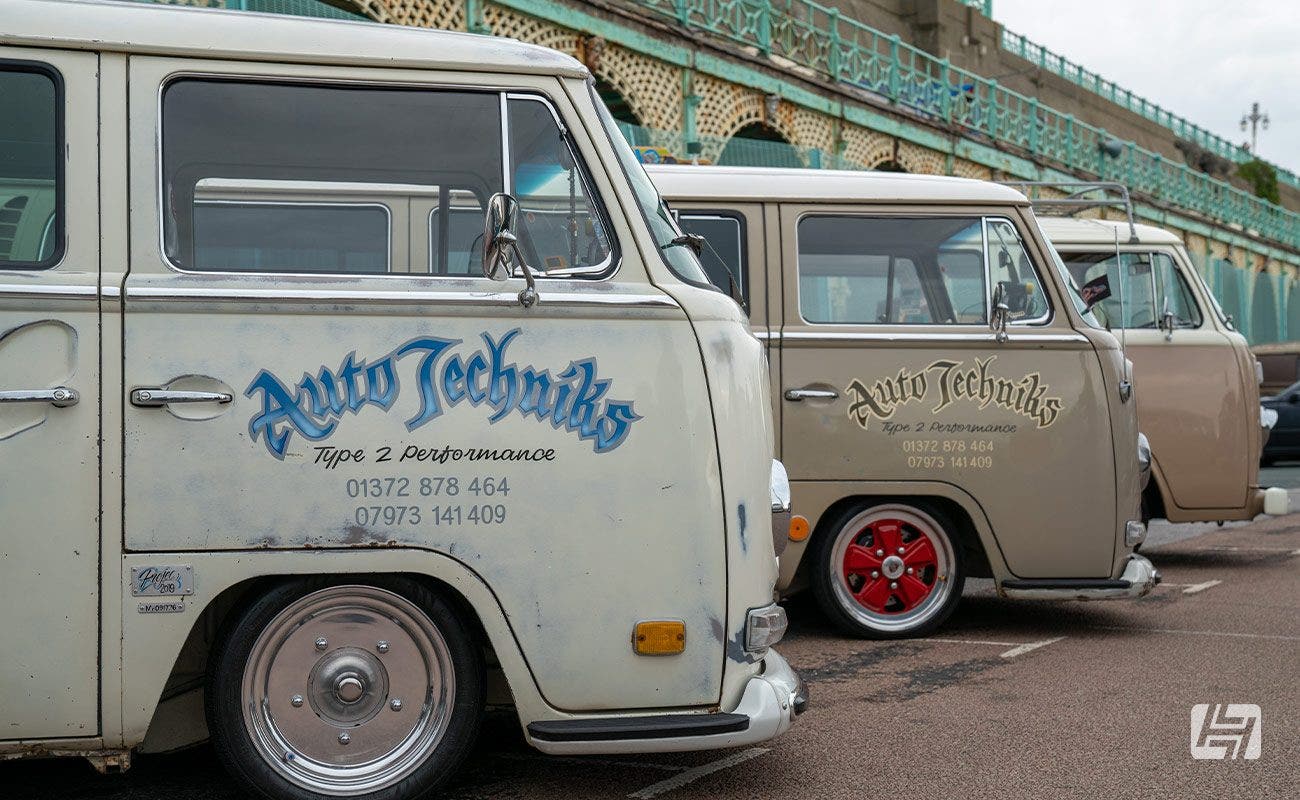
Why lower your aircooled VW Bus?
It’s only once you understand how something works that you can then go about modifying it. Most people who lower a Bus do so because it looks cool, but there are practical reasons too. Firstly, you might need to lower a Bus to get it inside your garage. Another is they have an alarming amount of body roll at stock height. And thirdly, Buses are horribly affected by crosswinds on the motorway.
Dropping them down an inch or two can make a huge difference, which is why a lot of stock lovers still go for a mild drop. Lowering is also forced upon them because rear ends sag over time and, if you’re converting the rear end to straight axle or IRS to improve the gearing, it lowers the rear of the Bus so you’ll have to level it out.
Modifying VW Bus Front Suspension
Bus owners had it tough in the old days. There wasn’t the plethora of off the peg parts there are now. Most Splits owners replaced their old link pin beams with Bay Window / ball joint beams. Now you have Bay owners backdating their Buses with link pin conversions as they provide a lower, smoother ride.
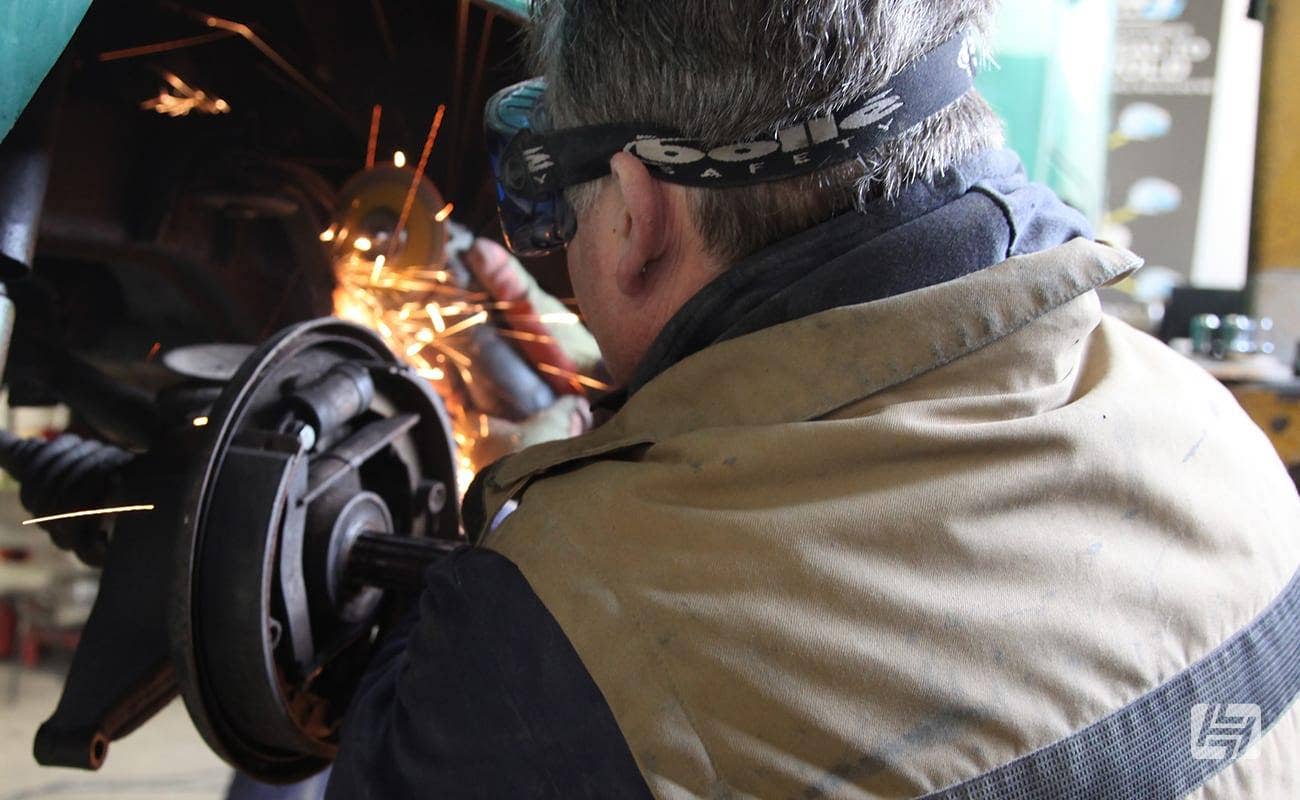
It's pretty common to peep under a Bus and find a beam that has had the central grub screw cut and turned. By that we mean, welded into a lower position with no adjustment. This isn’t necessarily a bad thing. It works. But you should check the quality of the welds as some owners used to do this without removing the beam and the quality of weld on the top tube could be iffy at best and almost non-existent towards the rear at worst.
How does an adjustable front beam work?
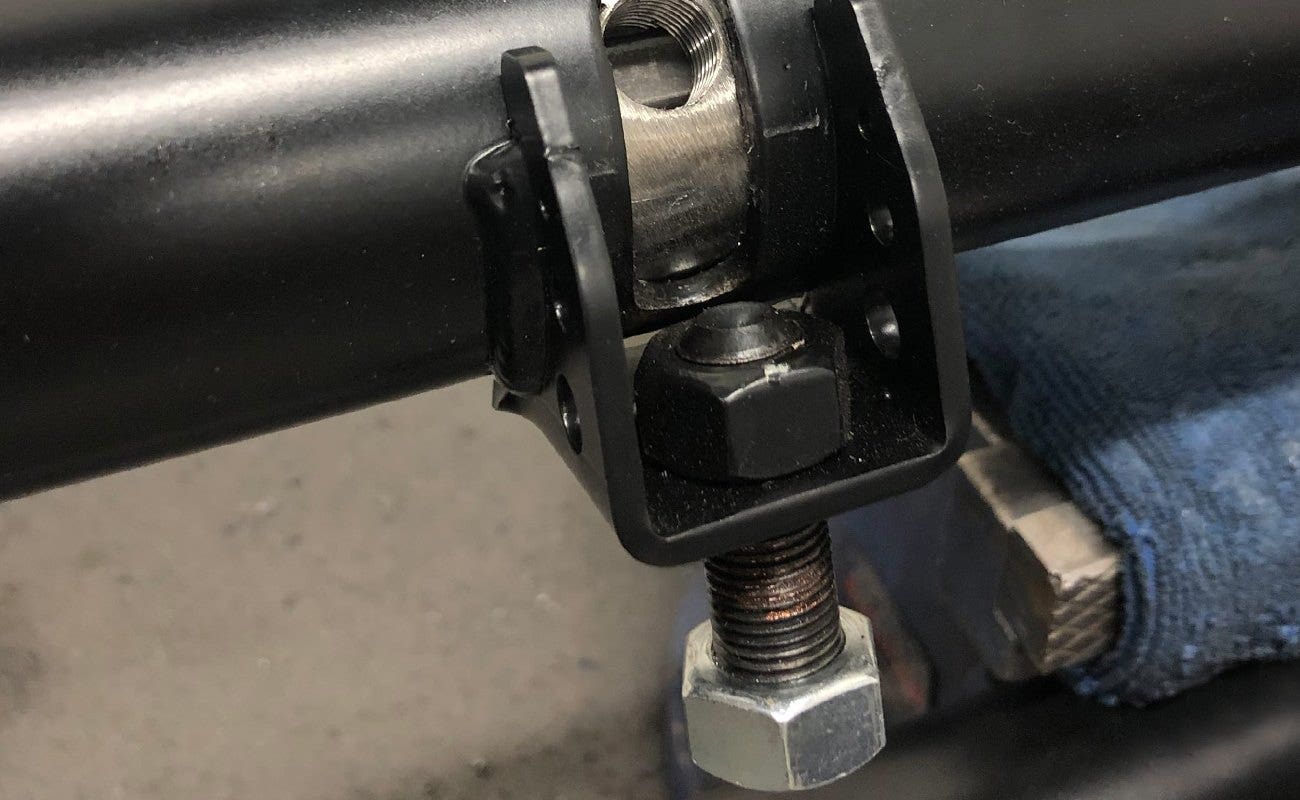
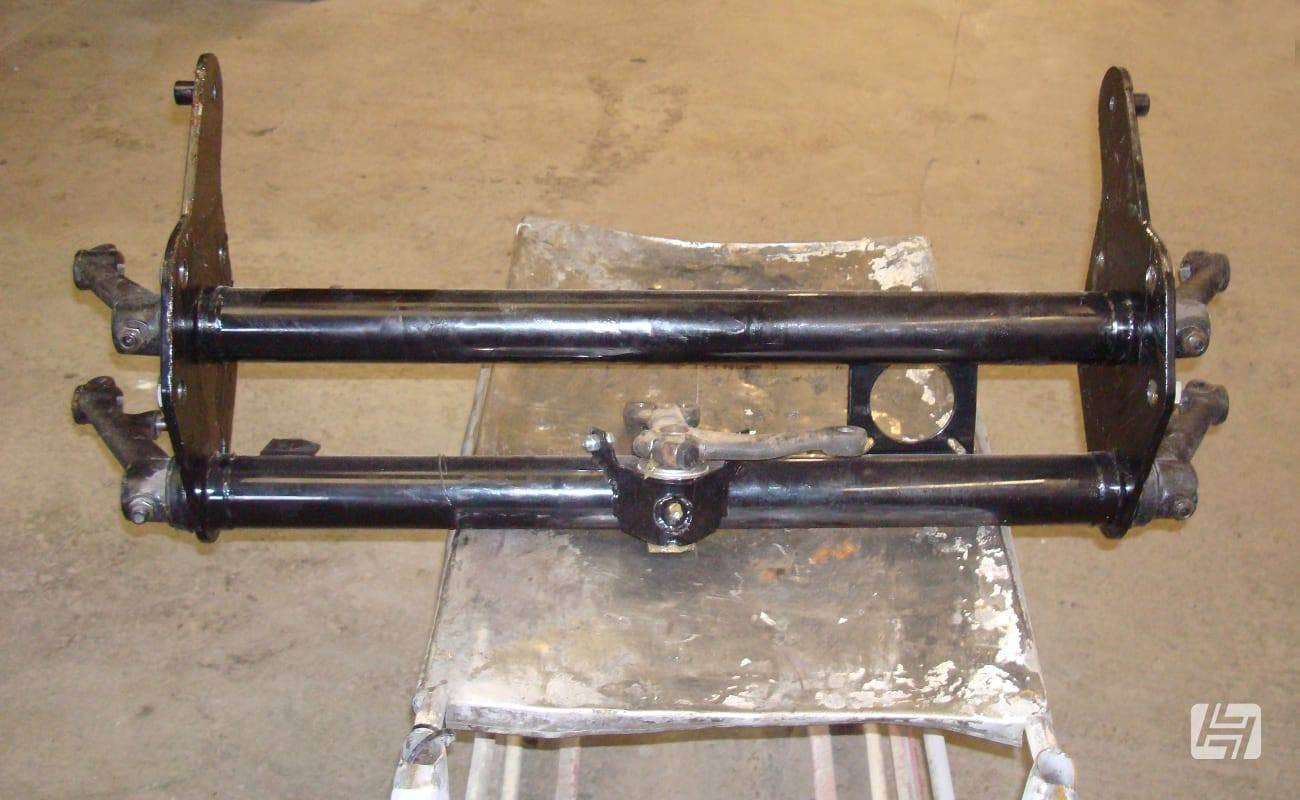
The best way to lower a Bus these days is to run an adjustable beam. By that, we mean one with adjuster bolts in the top and bottom tubes. You can install your own Type 2 beam adjusters by cutting out the centre sections and welding in a pair of adjusters. What this allows you to do, is to reposition the leaves in a lower or higher position and then lock them at that height.
If you don’t want to modify your existing beam or your original is too badly corroded, you can buy a brand-new replacement beam with the adjusters already fitted. If you’re going down that route you'll need to answer another question. Stock width or narrowed?
Why fit a narrowed front beam?
The trend these days is to fit a narrowed beam. You could argue it provides more clearance for things like wider alloy wheels and tyres and because after-market spindles and disc brake kits increase the track width, but there’s a ton of space under a Bus’s front arches so the reality is owners do this mostly for looks.
As we’ve already touched upon, link pin beams ride better than ball joint beams when a Bus has been lowered. Ball joints tend to bottom out and provide a bouncy ride, which is why a lot of Bay owners replace the later set up, but factor in the additional expense as you need replace things like the torsion arms as well.

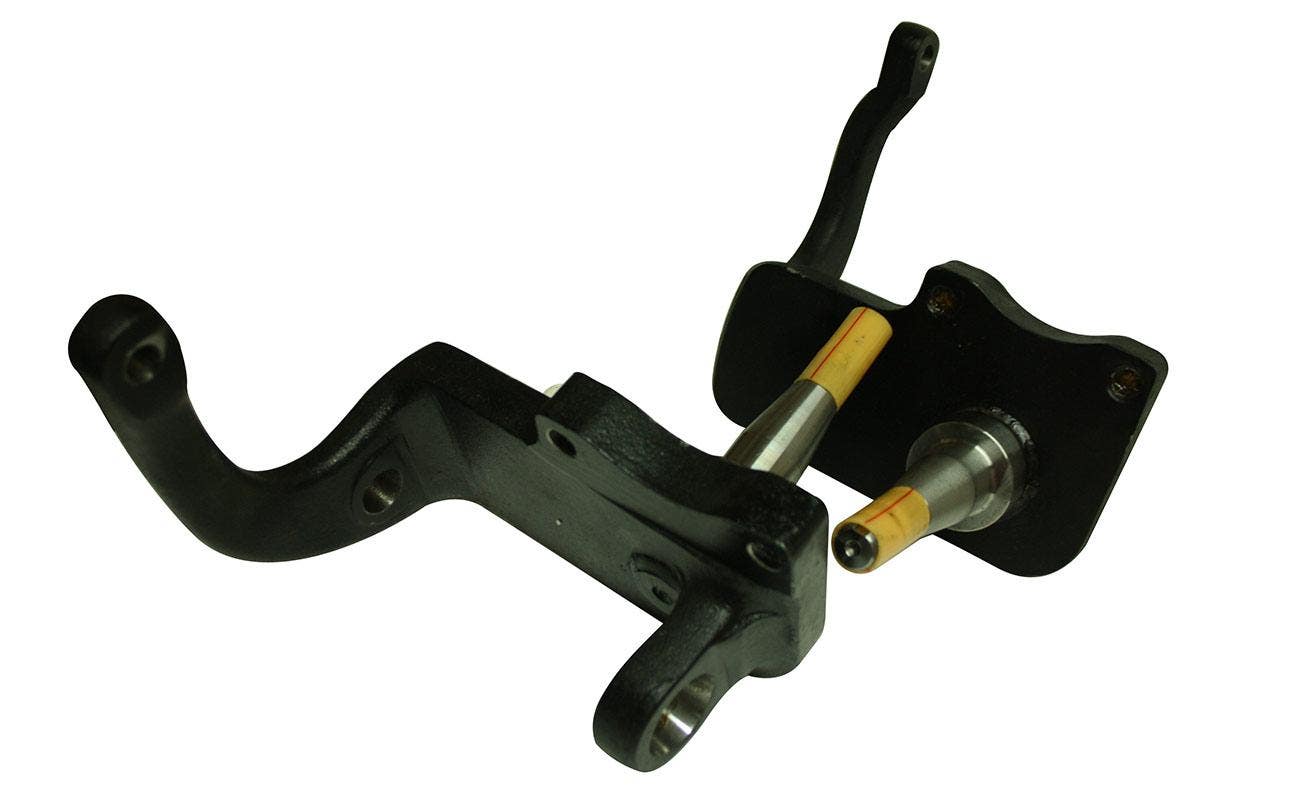
Why fit dropped spindles on a VW Bus?
Type 2 dropped spindles are an essential ingredient for creating a lowered Bus. The spindle is the piece the front drum or disc attaches to. Stock spindles have the spindle section in the middle. Dropped spindles have it located a couple of inches higher up, which raises the wheel on the suspension and drops the Bus.
The great thing about these is they have no negative impact on ride quality, and they still utilise the standard length shock absorbers. If anything, they will improve the handling as your Bus won’t wallow around as much. If you just want to eradicate some of that unsightly wheel arch gap or level out the front after upgrading the gearbox, dropped spindles are the answer.
There are a few constraints; the Baywindow dropped spindles we offer will fit all 68-79 models, but they are engineered for 73 onwards disc brakes. This will have a knock-on effect when it comes to wheel choice on an early (68-70) vehicle, as the stud pattern will change.
How to lower the rear of your VW Bus
Lowering the back of a VW Bus is pretty straightforward when you know-how. You simply pull the rear spring plates off the torsion bars and reindex them at the desired height.
You have to factor in things like the bump stops, or you’ll be in for a bumpy ride. Most people cut down or remove the rubber bump stops altogether and to avoid the upper stops you can cut a notch out of the top of the plate or buy an aftermarket set of adjustable spring plates that are a better shape and have an adjuster bolt to fine-tune the height. You also need to modify your handbrake cables too.
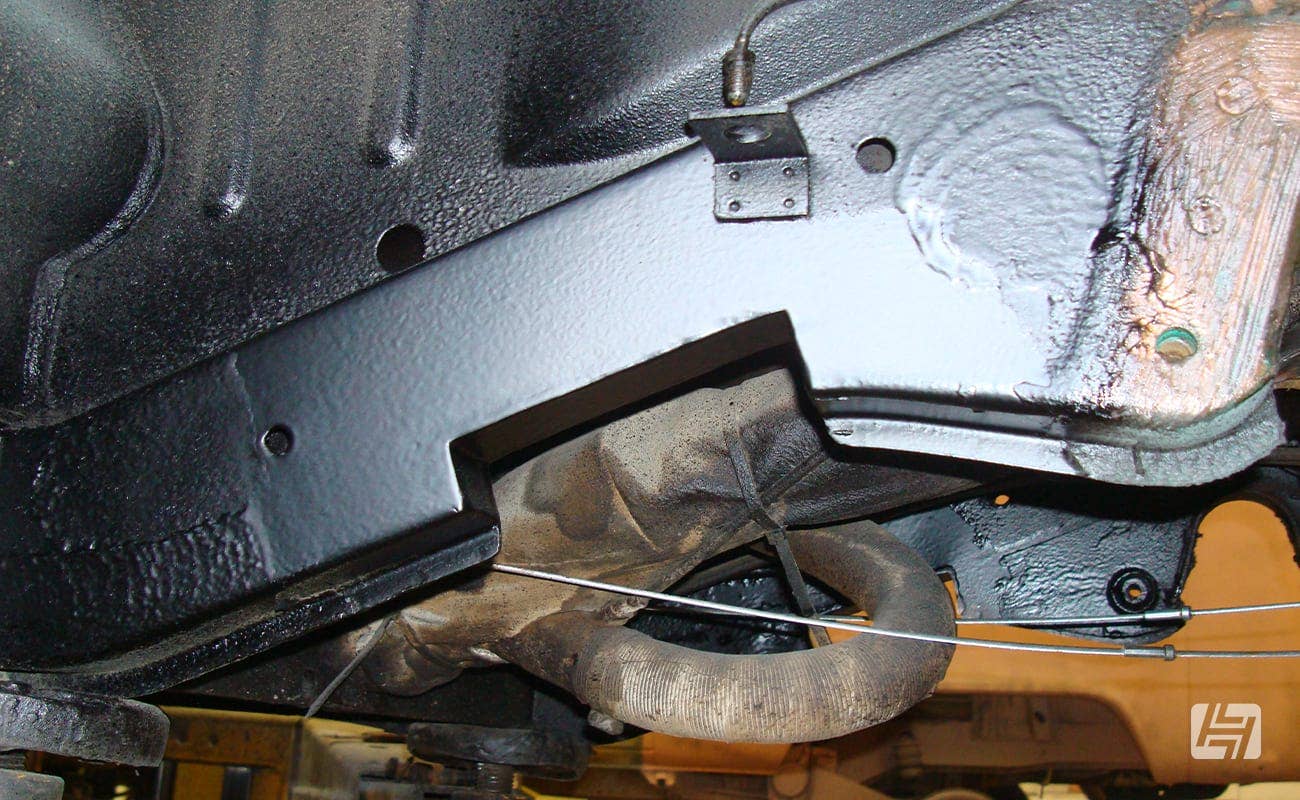
Go Low: Type 2 chassis modifications
Drop a Split or Bay a couple of inches and you’ll be fine. However, if you want something with a little more attitude and a lot less altitude, you’re going to run into clearance issues. For example, you can only go so low on a Bay window before you have to notch the chassis. If you don’t the steering arms will foul on the front and on the rear, the problem with be with the drive shafts. Type 2 driveshafts will also hit the heat exchangers on a low Bay. Some owners allow them to clearance themselves (as in, just let them smash into one another and generate their own clearance) or you can remove the heat exchangers and replace them with J-tubes. However, that'll leave you with no heating whatsoever.
Tyres can rub on the underside of the front arches on low Buses. This usually happens when you’re carrying extra weight for camping trips and/or you hit a bump on a country lane. The way to counter this is to 'tub the arches'. That means breaking out the welder to install some additional metal or premade arch tubs. This modification will affect the height of the seat and driving position in the cab, so factor that in as well especially if you are tall. You may also need to cut the seat bases down to put things back in the right place.
On lowered Splits, the steering box can smack the ground. Obviously, that’s less than ideal and the solution is to raise the steering box mounting point. You can buy a chassis section that you weld in to address this, but you’ll have to cut the steering column down as well or it will sit too high in the cab.
A quick word about shocks and wheels...
Other items to consider when readdressing your Bus ride height will be the shock absorbers and wheels. Good quality shocks can improve the ride no end and can even stop you bottoming out on the wheel arches, doing away with the need to tub the front end.
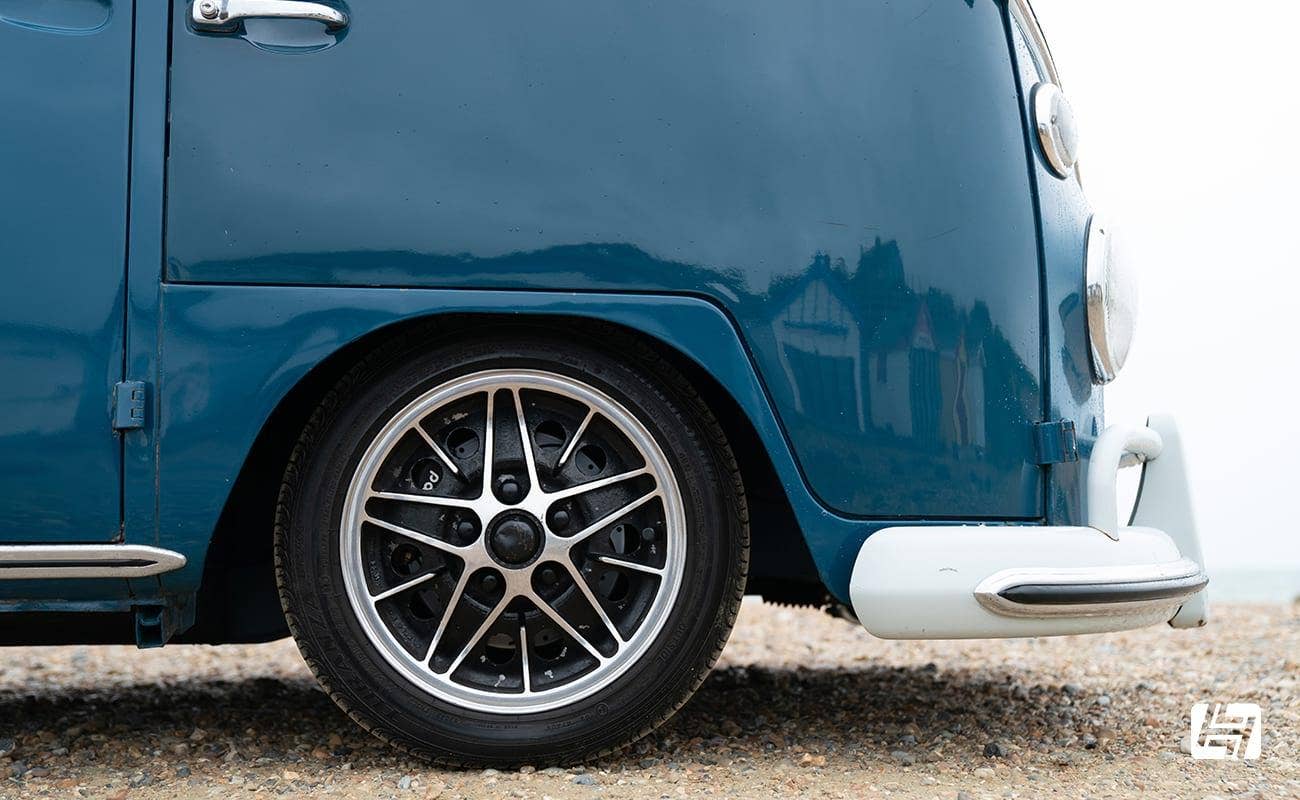
Wheels and tyres play a big part in the ride quality too. Aftermarket alloy wheels are fine, but if you fit smaller tyres with less sidewall to create more clearance, that will in turn stiffen up the ride and drop the vehicle closer to the floor.
So, should you lower your VW Bus?
The obvious positive to Type 2 lowering is that it looks cool. Your Bus should fit in any garage or multi-story car park, it will wallow less in corners and feel less boaty as it drives down the road. The things to consider carefully are that it costs a lot of money to lower a Bus properly, especially when you’re getting into chassis and body mods. Components can wear out quicker as they’re no longer running at their intended geometry but the thing you most need to consider is how you use your Bus.
If you use your Split or Bay for popping to the shops and looking good at shows, then slammed is fine. However, if you intend driving into Europe – where the roads can be terrible, or even just negotiating campsites loaded with all your gear, kids, dogs and beer, low might not be the way to go, or at least not with a static drop.
Think about it.
James Peene