


 Beetle
 Type 2 Bay
 Type 2 Split
 Type 25
 Transporter T4
 Transporter T5
 Golf Mk1
 Golf Mk2


 911
911
 996
996
 997
997
 986 Boxster
 987 Boxster
 912
912
 944
944
 924
924


 Defender
 Discovery Series 1
 Discovery 2
 Series 1, 2 & 3
 Freelander
 Freelander 2


Freelander 2 Engine Service Guide: 2.2 TD4 Diesel
The Freelander 2 was manufactured between 2006 and 2014, and powered in many cases by a 2179cc TD4 common rail twin-cam diesel engine. Despite being relatively new, the good news is an engine service is still well within the realms of the DIY mechanic and Rob Hawkins guides us through what’s involved in checking the fluids, draining the engine oil and changing a range of filters on a 2.2 TD4 Diesel Freelander 2.
How often should I service my Freelander 2?
We've itemised the recommended Land Rover Freelander 2 Td4 service schedule below.
- Every 1 year / 16,000 miles - Oil and oil filter, air and cabin filters.
- Every 2 years / 30,000 - Fuel filter change.
- Every 3 years - Brake fluid change.
- Every 10 years / 150,000 miles - Engine coolant and timing belt assembly, along with auxiliary drive belts, gearbox oil, differential and transfer box oil.
For further details please check your owner's manual or speak to your Land Rover specialist who will be able to advise in more detail.

A map of the Freelander engine bay
The Freelander’s engine bay can appear to be quite cramped when first looking at it. However, access to check all of the essential fluids is quite good. The only exception is the brake fluid reservoir, which is tucked under a plastic panel (we’ll explain more later).
There are a number of tools needed to service the TD4 engine for a Freelander 2. Aside from a drain tray to collect the old engine oil, you’ll need a Torx T25 bit to undo the lid of the air filter and a 6mm hex (Allen key) tool to access the fuel filter. Most people have a varied set of metric sockets and spanners, but check you have a 21mm socket to undo the sump drain plug and a larger 27mm socket to undo the oil filter housing.

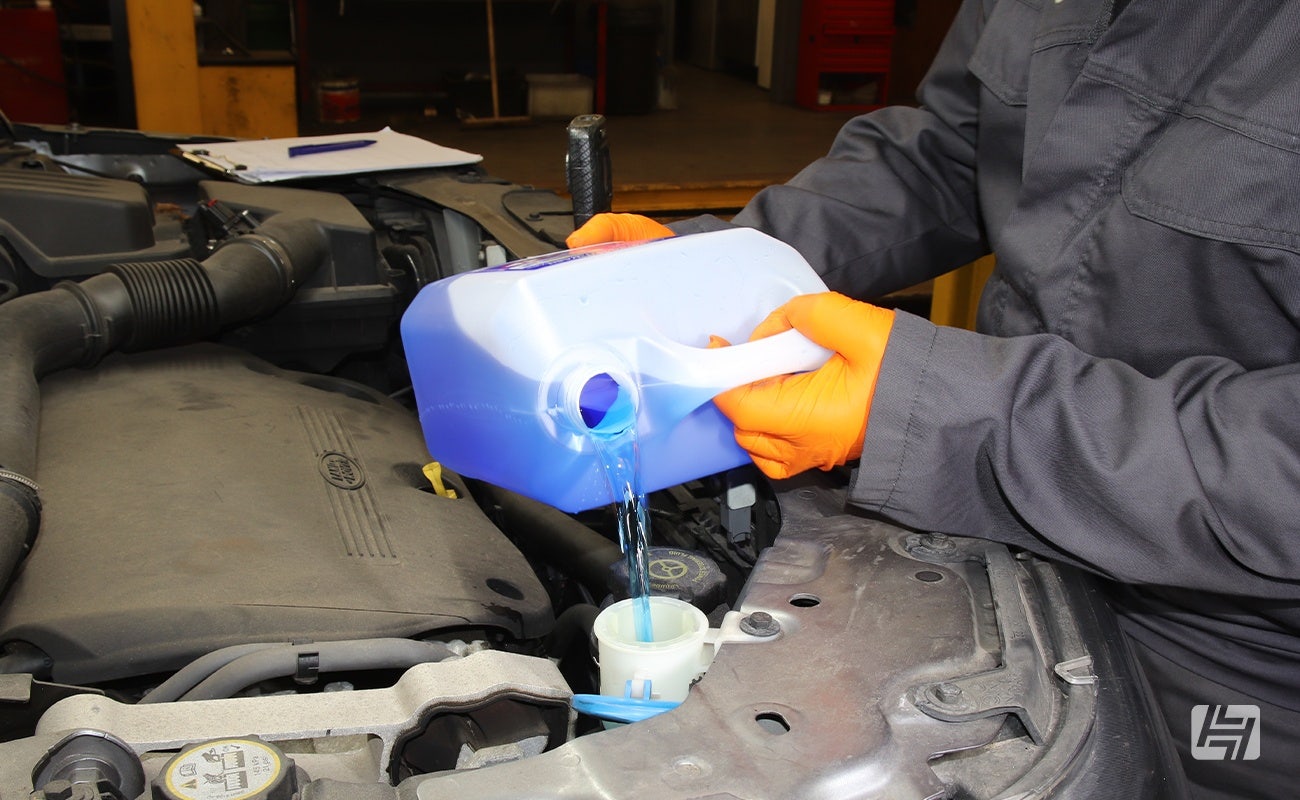
The quick checks
It’s always worthwhile starting with some of the easy checks in the engine bay. For instance, topping up the screenwash. Do use screenwash, not washing-up liquid as that can congeal and will make a mess! The reservoir is in the offside front corner of the engine bay with a blue lift-up cap and may have a small filter inside the filler neck, which can be extracted and cleaned if it contains dirt. Afterwards, operate the front and rear wipers and washers to check the spray jets are clear and working, and then check the wiper blades for splits in the rubber.
While you are there, the auxiliary drive belt can be checked by looking down the offside of the engine bay. Try to spot any cracks across the ribs or fraying. Once the engine undertray has been removed, you can inspect it further from underneath.
The 12-volt battery is on the near side of the engine bay and may need some plastic trim removed to see it clearly. Make sure all cables are fitted to the terminals tightly and that the battery is also secure. If you have a battery tester or multimeter, double check it’s producing more than 12 volts with the engine switched off.
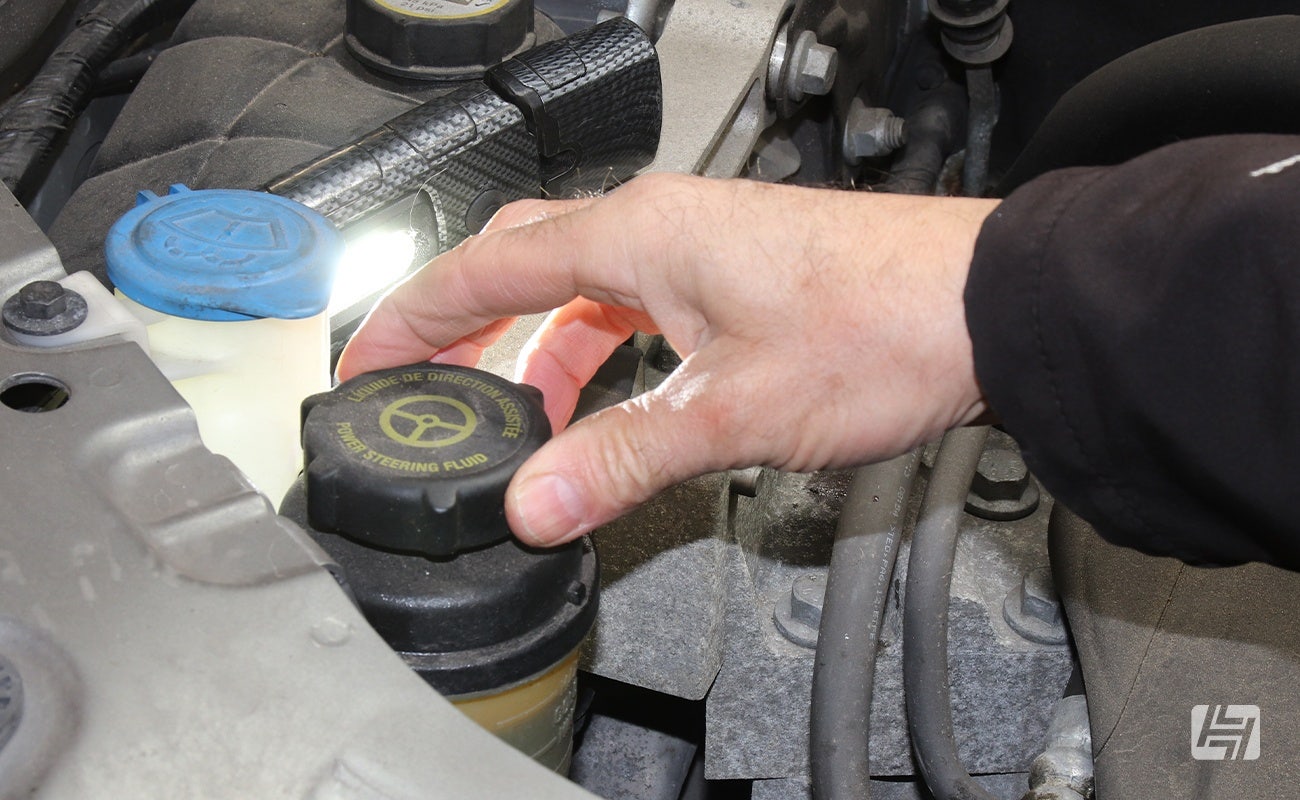
The power steering fluid reservoir is next to the filler neck for the screenwash. There are MIN and MAX markers on the side, so it may be possible to see the level without undoing the cap – shine a torch on the side to help illuminate the fluid inside. If it’s low, top back up with the recommended CHF 202 fluid, and make a note to check it again in a few weeks' time, to see if you have a leak.
Providing the engine is cold, the coolant can be tested using an antifreeze hydrometer. There’s an expansion tank in the offside front corner of the engine bay, but only release its cap if the coolant is cold.
The brake and clutch fluid can be checked via a reservoir that’s hidden under a plastic inspection panel in the offside rear corner of the engine bay. Release two plastic tags to remove the inspection panel, then shine a torch on the side of the reservoir to check the level inside. There should be a max marker on the side to help.
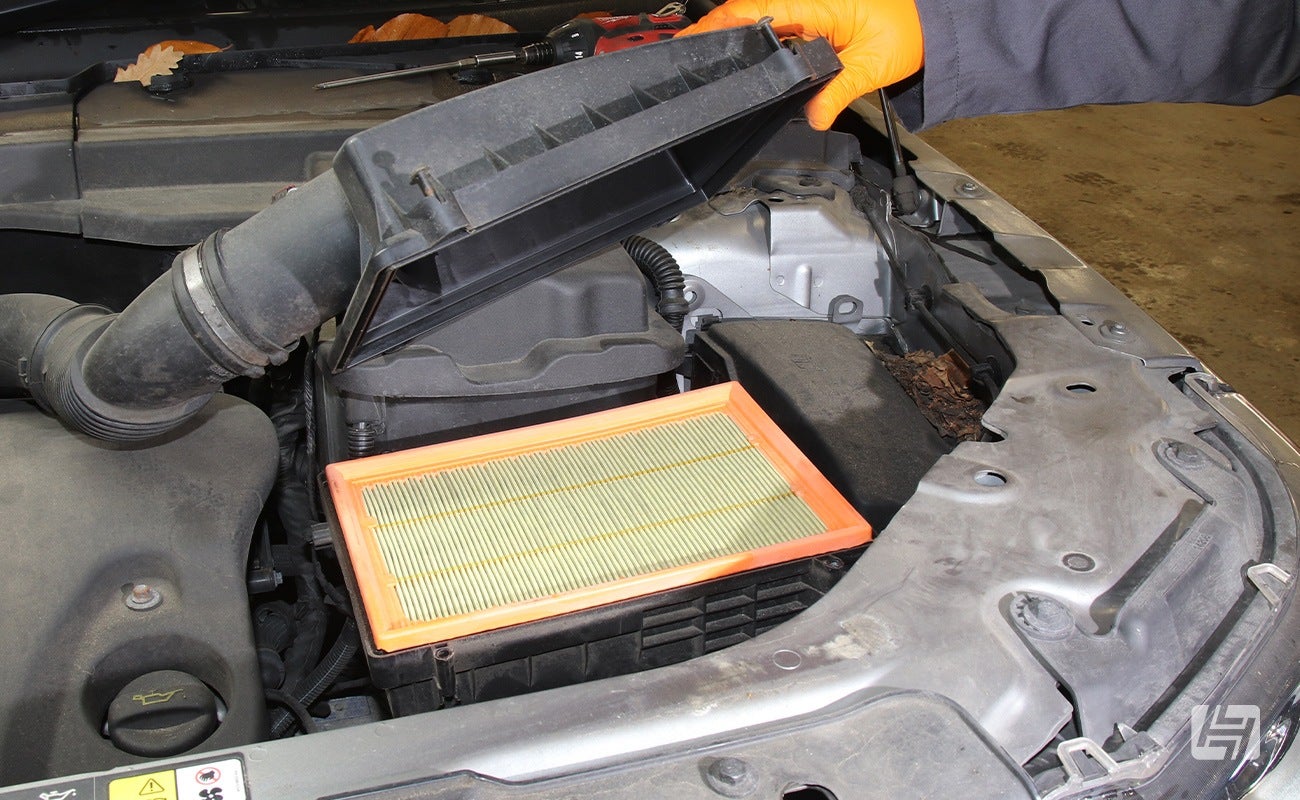
Changing the air filter on a Freelander 2
The air filter is contained inside a black plastic housing in the nearside front corner of the engine bay. The lid of the housing needs to be removed, which is secured with four Torx T25 screws, although they are sometimes crosshead (Phillips) screws instead. After undoing all four of them, they should not drop out, so leave them in situ, then lift the lid up to see the old air filter. There should be enough room to extract the air filter.
With it all open, clean inside the air filter housing to remove any dirt that will contaminate the new air filter. Make sure the new air filter is the same size and shape as the old one, then fit it. Check its rubber edges are correctly seated to avoid them being trapped by the lid. Refit the lid and tighten its screws.
Where is the fuel filter on a Freelander 2?
The TD4 engine’s fuel filter is hidden underneath the upper engine cover, near the front of the engine bay. Here is how you access it.
- Remove the engine cover by undoing a couple of 8mm bolts and one 10mm nut (it secures the induction pipe), then prise the engine cover off its locating lugs to remove it.
- The fuel filter is now visible, but a metal cover will be in the way. Undo four 10mm nuts for this cover and move it aside to create more space to access the fuel filter. It may pay you to take a photograph at this stage to help with reassembly.
- Detach the electrical plug connector on the top of the fuel filter and remove the two fuel pipes on the offside of it.
- Once you have undone a further three 6mm hex bolts that hold the filter in position, you can lift the fuel filter up to make it easier to detach the remaining two fuel pipes.
- Detach the plug connector or drain plug on the base of the fuel filter. Once removed, you can lift the filter away from the engine bay.
Compare the new fuel filter to make sure it is the same as the old one and that you know where all the fuel pipes need to be connected. Fit the new one in position and refit everything that has been removed, with reference to the previously mentioned photograph, if required.

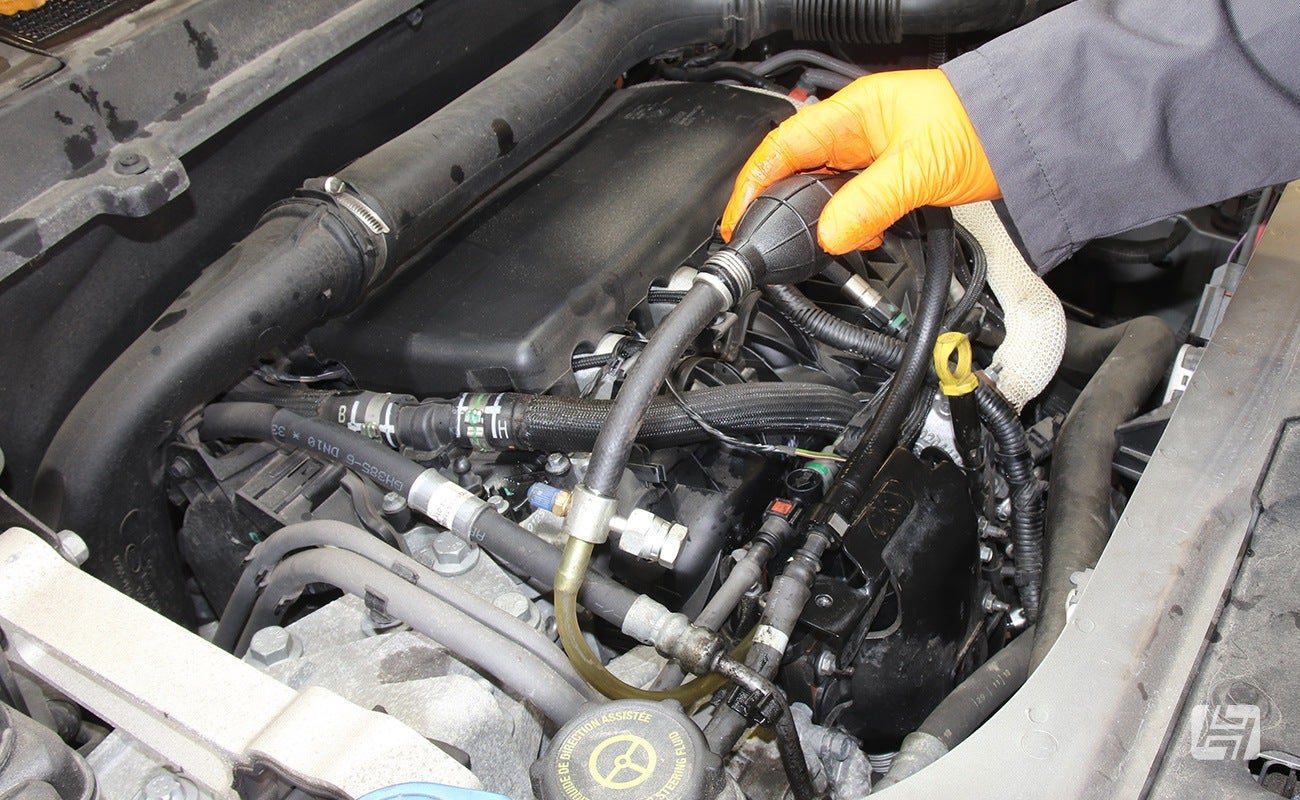
How to prime a new fuel filter
To help avoid any air locks in the fuel system, the fuel filter will need to be primed, which will fill it with fuel before the engine is switched on. You’ll need a manual primer, which is usually called a fuel primer bulb. Attach it to the outlet and its fuel pipe shown here and ensure that all the other fuel pipes are connected to the fuel filter. Pump the bulb until it becomes hard, which indicates that fuel has been drawn through. Refit the fuel pipe, mounting bolts and cover, then start the engine.
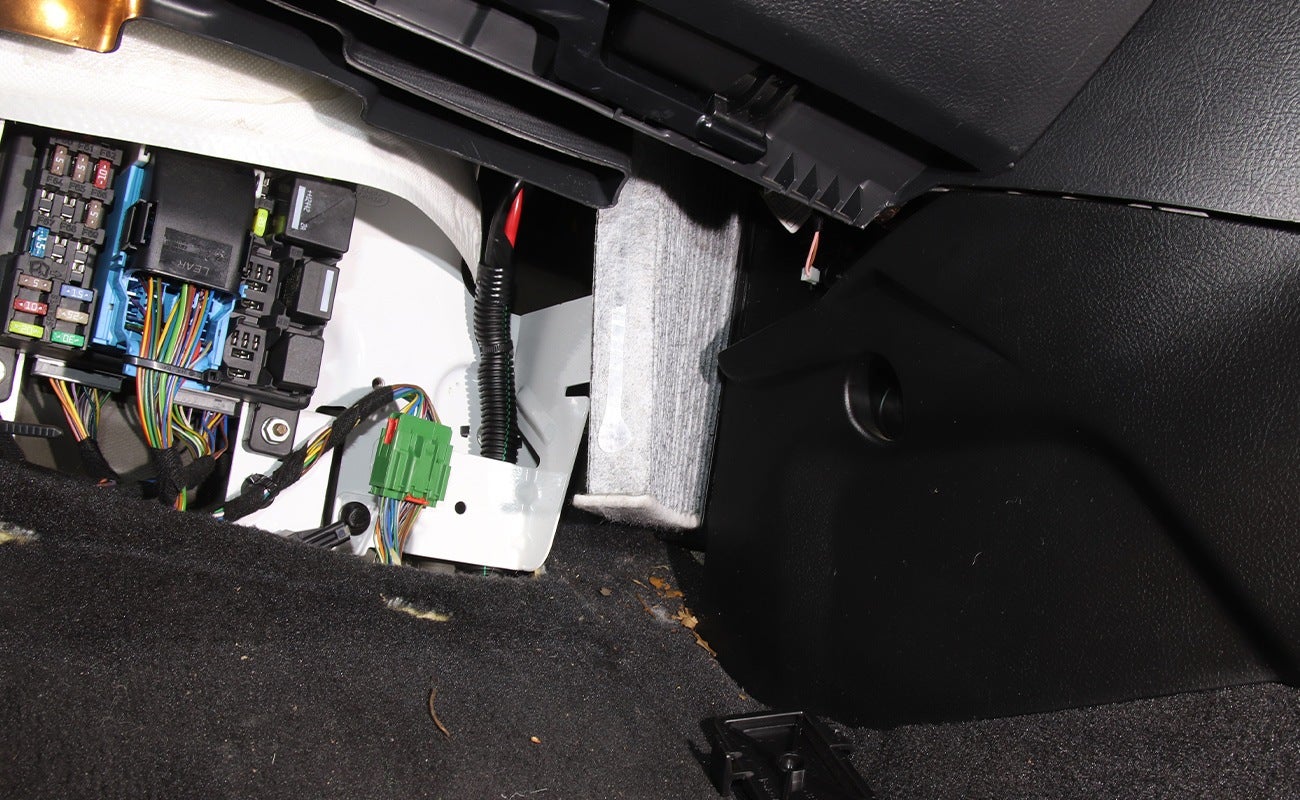
Where is the cabin filter on a Freelander TD4?
You'll find the cabin filter located inside the passenger side footwell, behind the centre console; you may want to grab a torch to help you see it! First, release a plastic trim panel at the back of the passenger footwell to see a bank of fuses. Look to the right of them for an oblong-shaped plastic panel. Unclip this panel and remove it to now see the side of the cabin filter. Carefully pull it out. If it hasn’t been changed for several years, it may be full of dirt.
Check the new cabin filter is the same shape and size as the old one before fitting it. Make sure the airflow arrows on the side of it (if present) are pointing to the rear of the Freelander. Refit all remaining parts in the order you removed them and enjoy breathing in some nice fresh air again!
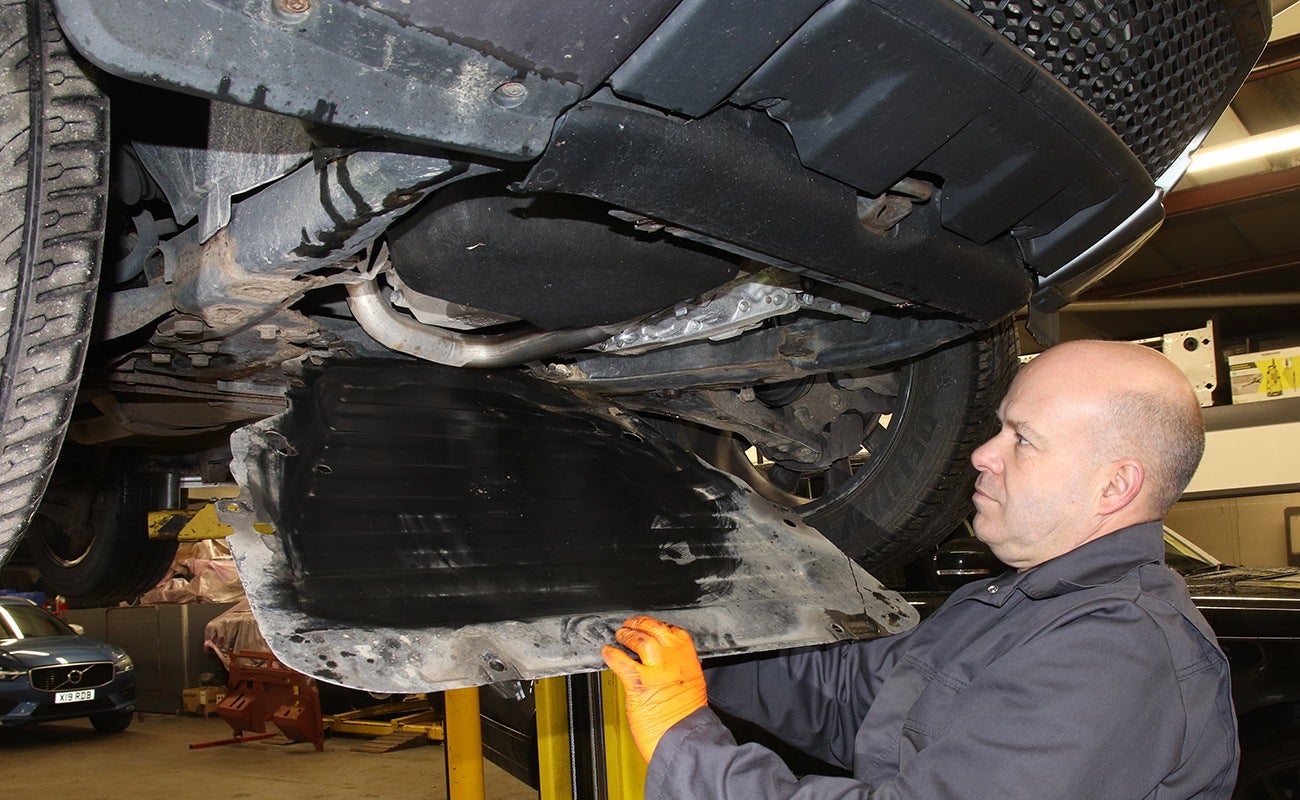
Draining the oil
If you have a shallow oil drain tray and don’t mind laying on the floor, then the engine oil can be drained without the use of a lift or car ramps. You will need to make sure the vehicle is on level ground with the wheels chocked, the handbrake on and the engine switched off. If you do decide to lift the front for easier access, then lift the rear to match to ensure the old oil fully drains out the sump.
The engine undertray will need to be removed, which is secured with six 13mm bolts. These bolts may be heavily corroded, so spray penetrating fluid over them first and if they are particularly rusty, replace them.
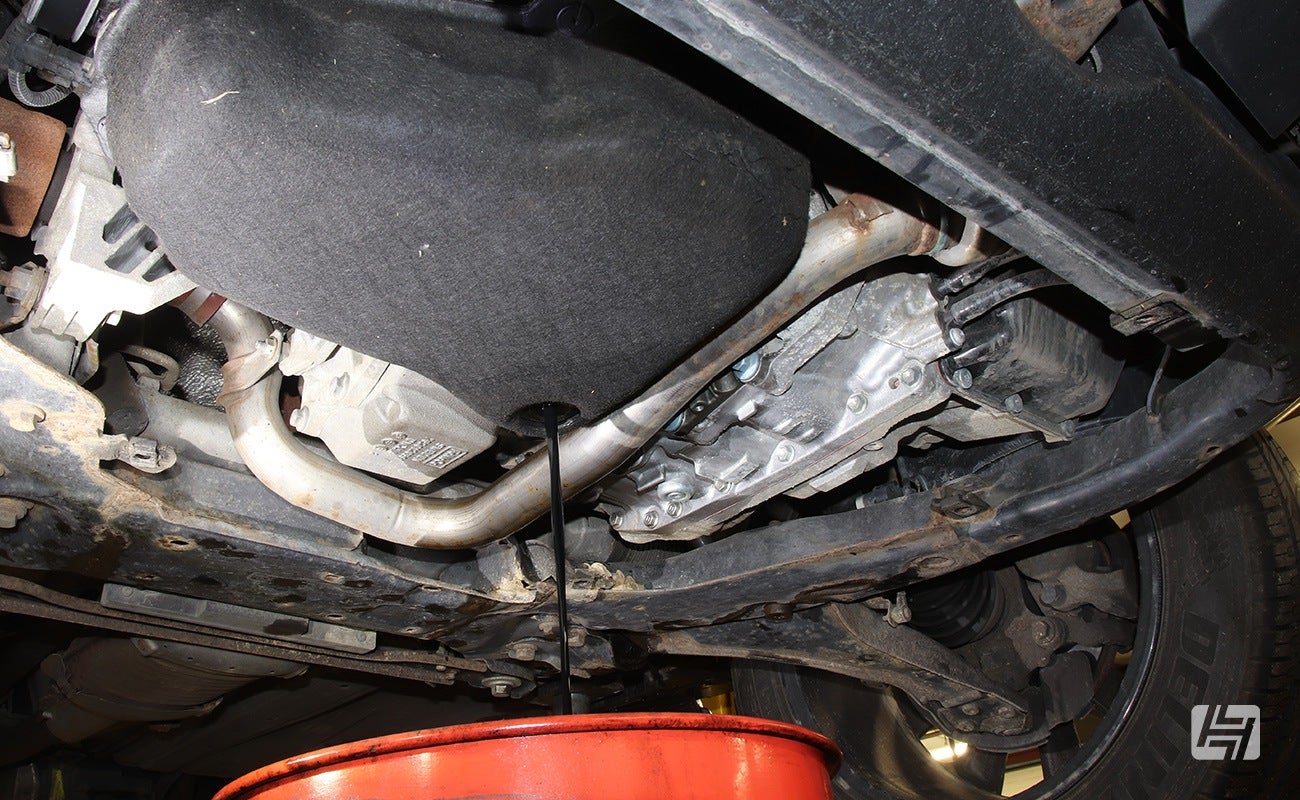
There should be almost six litres of engine oil to drain, so make sure you have a suitably sized drain tray ready. Undo the 21mm drain plug using a socket and ratchet or a spanner, then leave the oil to drain for several minutes. It’s worthwhile removing the oil filter to help with draining the engine oil and then refitting the drain plug later.
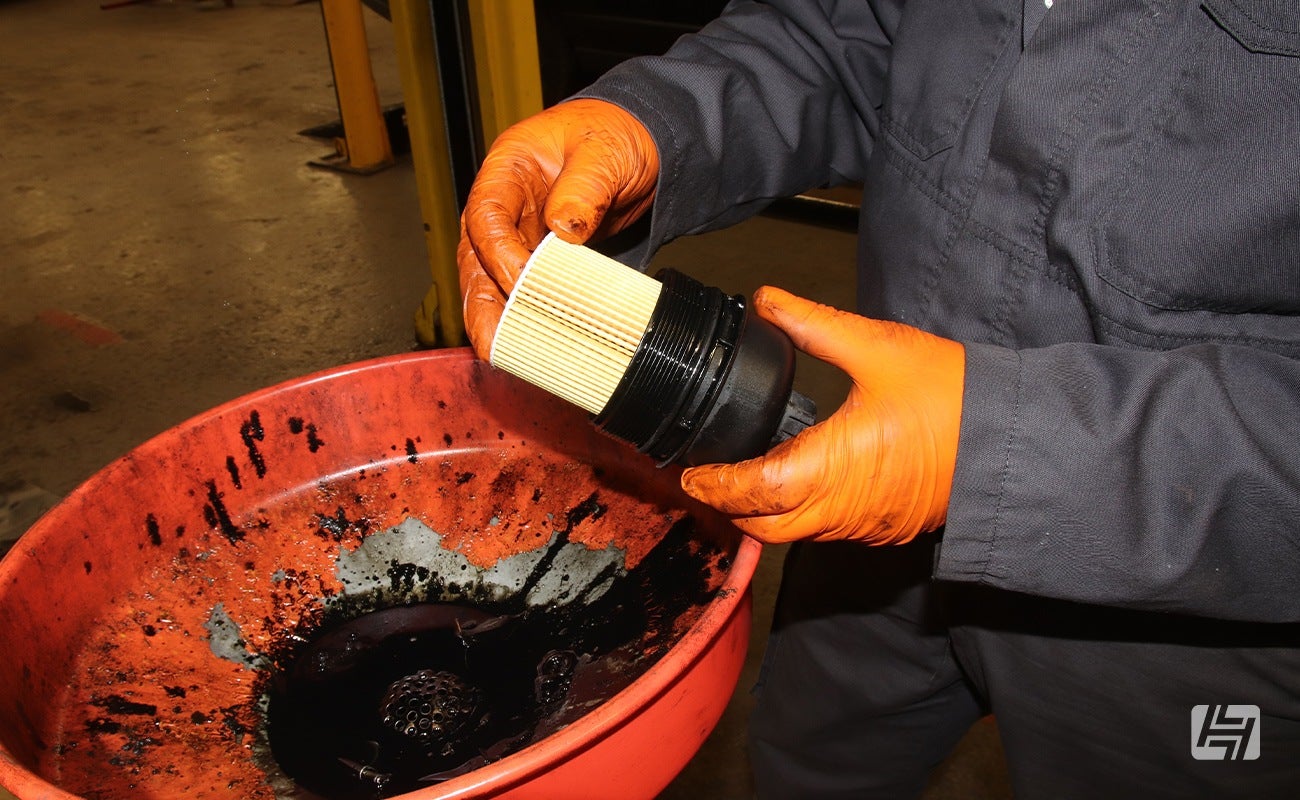
Changing the Freelander TD4 oil filter
Whilst the oil is draining from the sump, find the oil filter housing which is tucked away at the front underside of the engine bay. It’s awkward to see and access, but there is space to manoeuvre a 27mm socket with extension bars onto it to undo the top of the housing. Oil may drip out, so have some rags and a tray at the ready. Leave the oil to drain for a minute or two.
After removing the top of the oil filter housing with the oil filter attached, replace the filter along with the rubber O-ring around the thread of the housing top. Add a smear of oil to this new O-ring to reduce the risk of it dragging and tearing when refitting the housing top.
Refit the oil filter housing top back onto the engine with its new filter and O-ring. Use a torque wrench to tighten it to 25Nm.
Next, fit a new drain plug to the sump and tighten it to 20Nm.
How much oil does my Freelander 2 need?
The 2.2 TD4 diesel engine requires 5.9 litres of 5W-30 fully synthetic engine oil. One of the best ways to refill the engine with oil is to use a clean measuring jug to ensure you pour in the correct amount. If you don’t have one but have bought a five-litre container of oil and a separate one-litre container, pour the five litres in first, then check the level on the dipstick, topping up with half of the one-litre bottle before checking the level again.
Once you are happy with the level on the dipstick, which should be roughly halfway between the minimum and maximum markers, refit the filler cap and dipstick, run the engine, check for leaks, then switch off and recheck the level on the dipstick. The oil filter will now be full, so an additional top up might be required.

And that's all there is to it. If you own a set of spanners and have a few hours free you could probably carry out a routine engine service on your Land Rover Freelander 2 without too much hassle. Our thanks to Four Plus 4 in Leeds for the advice and use of their workshop whilst compiling this guide.
Rob