


 Beetle
 Type 2 Bay
 Type 2 Split
 Type 25
 Transporter T4
 Transporter T5
 Golf Mk1
 Golf Mk2


 911
911
 996
996
 997
997
 986 Boxster
 987 Boxster
 912
912
 944
944
 924
924


Land Rover Defender Steering and Suspension Guide
There are many common problems that can arise on a Land Rover Defender’s steering and suspension. Rob Hawkins guides us through what to look for and how to diagnose those knocks, creaks and bangs.
Defender suspension overview
The Land Rover Defender’s steering and suspension has pretty much adopted the same design throughout the vehicle’s lifespan. It all started in around 1982 when the leaf-sprung Series III moved on to the coil-sprung suspension, even though the Defender name didn’t appear until 1990. From then until 2016, the Defender, in its range of guises, was equipped with live axles at the front and rear which were each supported with coil springs, telescopic dampers and radius arms. In some cases, additional items were introduced, such as anti-roll bars, a Panhard rod and a top link above the rear axle (also known as an A-frame).
The steering comprising a steering box with linkage remained unchanged, although power steering was eventually adopted as standard.

Visual suspension checks
A visual check of the coil springs is a worthwhile starting point if you are checking a Defender’s suspension. Don’t touch the springs in case you trap your fingers and should the spring break when your fingers are in place, then you could be injured. Instead, look for corrosion of the springs by shining a torch over them.
The extent of the corrosion in the coil springs may be difficult to determine. Surface corrosion is to be expected, but if it gets worse it can result in the spring fracturing. Look at the ends of the springs to see if they have broken off (the remains may still be lodged in place). If you are at all concerned about the condition of a coil spring, replace it.
The bottom of each coil spring can become excessively worn if there’s grit and dirt around where it sits. Shine a torch inside this area to inspect it. If it needs to be cleaned out, don’t stick your fingers inside the coil spring to pick out the grit and dirt. Instead, use a soft brush, such as a decorator’s brush, to sweep it out. Or if you have an air compressor, connect a blower to remove the debris.
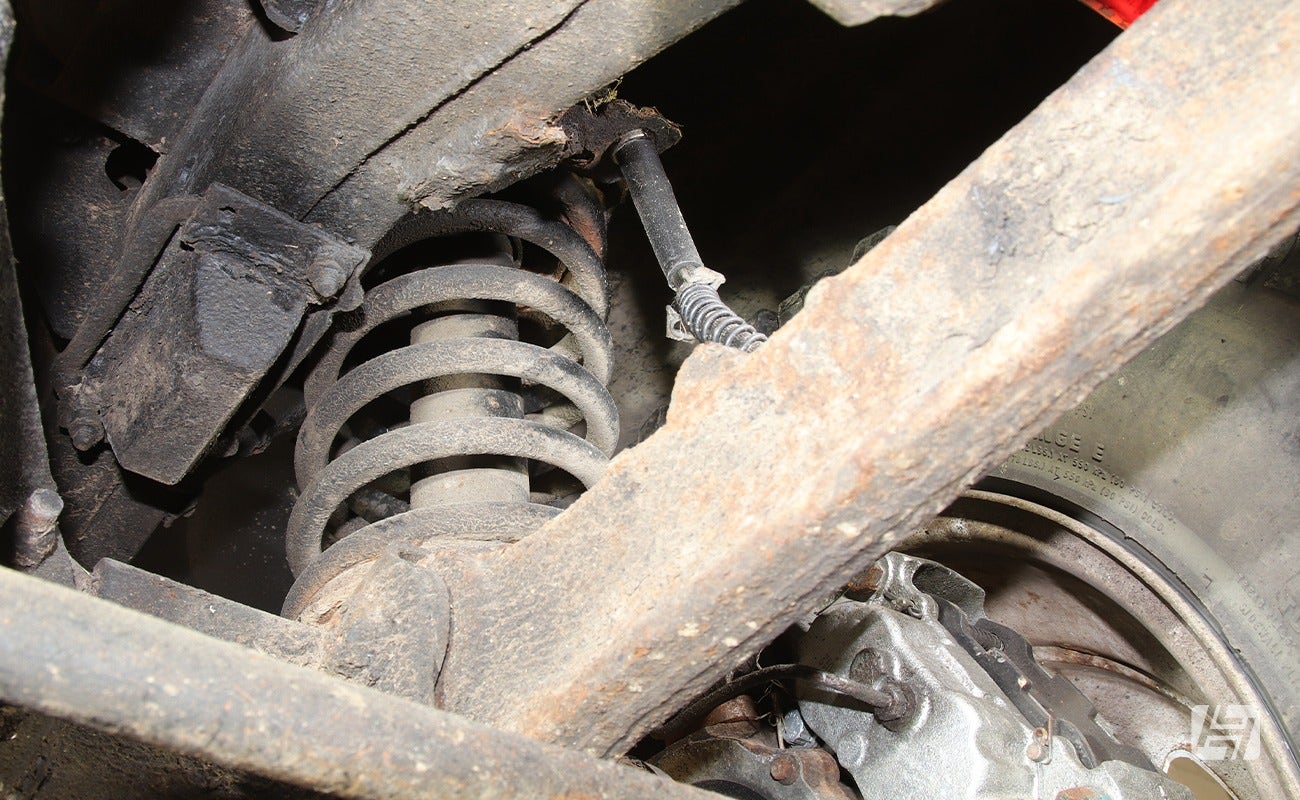
Telescopic damper checks
The telescopic dampers can also be inspected visually. Expect them to be coated in a layer of dirt, but if that dirt looks and feels greasy, then it’s possible the damper is leaking and that grease (misting) is its oil escaping.
Check the condition of each telescopic damper’s body and its top and bottom fixings. These can corrode excessively, meaning it may not be so straightforward to remove the damper. Visually inspect the rubber bushes on the very end of each telescopic damper, especially the lower ones, which can perish. Cracks in these rubber mounting bushes won’t mean the telescopic damper is insecure, but it could result in unwanted movement of the damper and potentially an annoying knocking noise.
It may be possible to lever a pry bar against the upper and lower mounting points for the telescopic dampers to help check the condition of the bushes. They are known to wear, so it’s worthwhile checking them as they are cheap to replace.
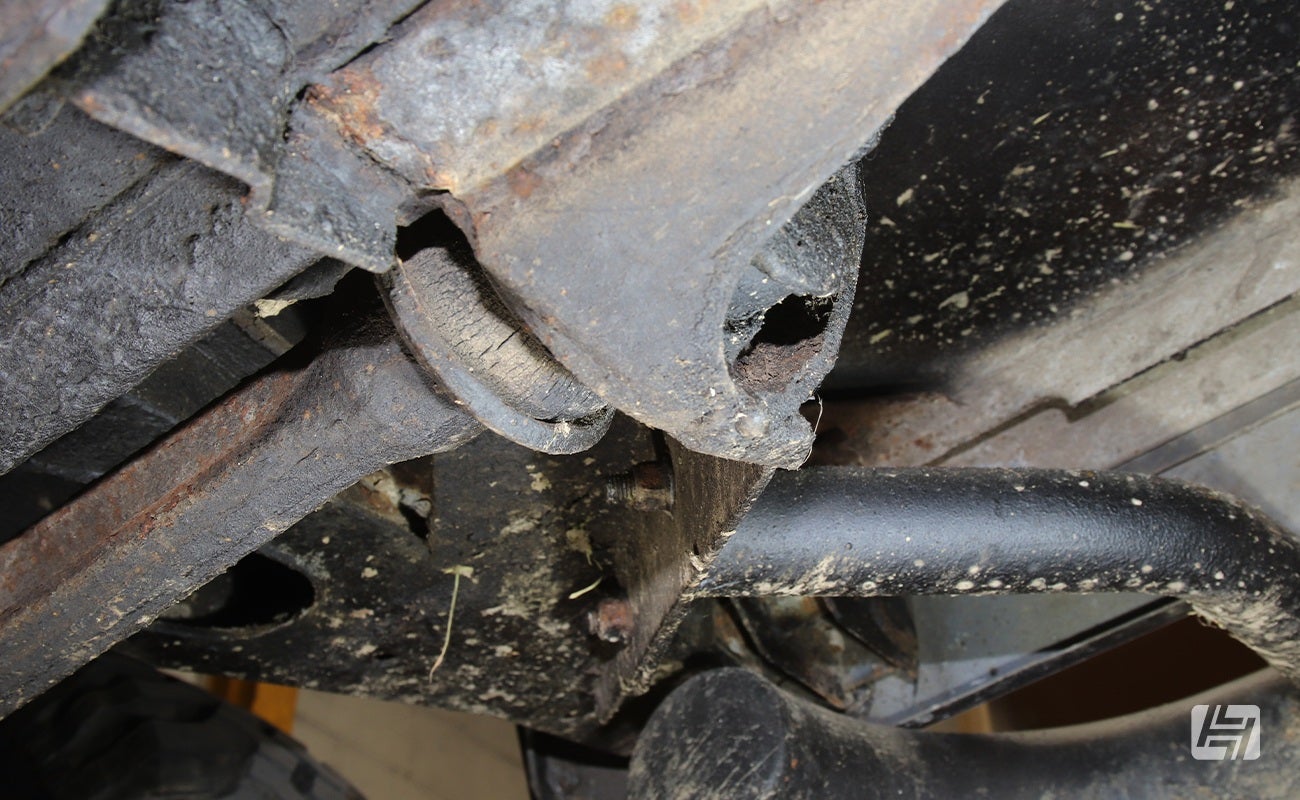
Perished rubber bushes
There’s a lot to check on a Land Rover Defender’s suspension, so it’s worthwhile having a plan, especially when it comes to checking all of the rubber bushes. For instance, start with an overall visual inspection of every rubber bush you can find. Look for perishing and cracks in the rubber, which could result in unwanted suspension movement and poor handling. However, at this stage, stick with looking at every rubber bush you can find.
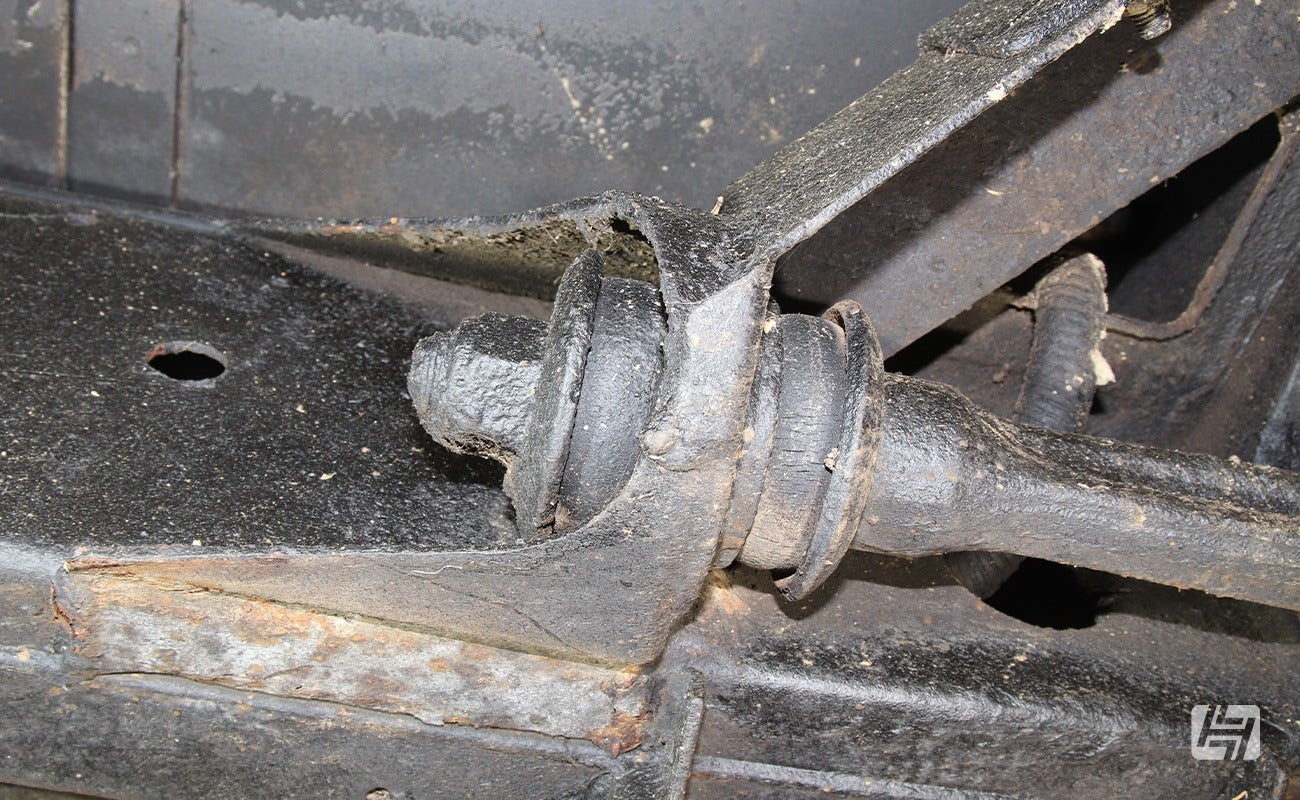
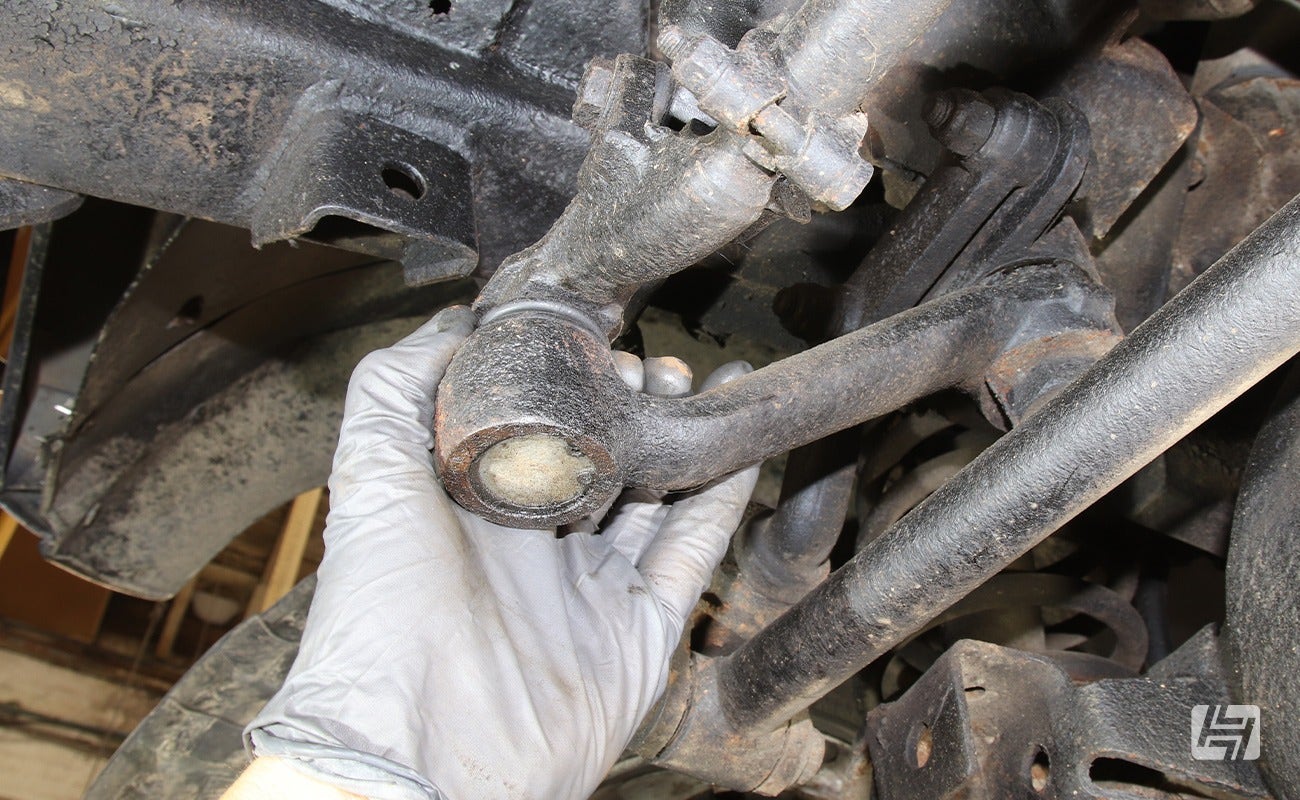
Perished dust covers
The rubber dust covers around any ball-joints for the steering linkage and Panhard rod should be visually checked for splits and/or any escaping grease. Pinch these covers to open up any cracks and identify them. The trouble with a cracked rubber dust cover is the grease inside may escape, but also, dirt and water could get inside resulting in premature wear of the ball-joint. Any split covers should be replaced as a matter of priority, to save damage to the component it is protecting.

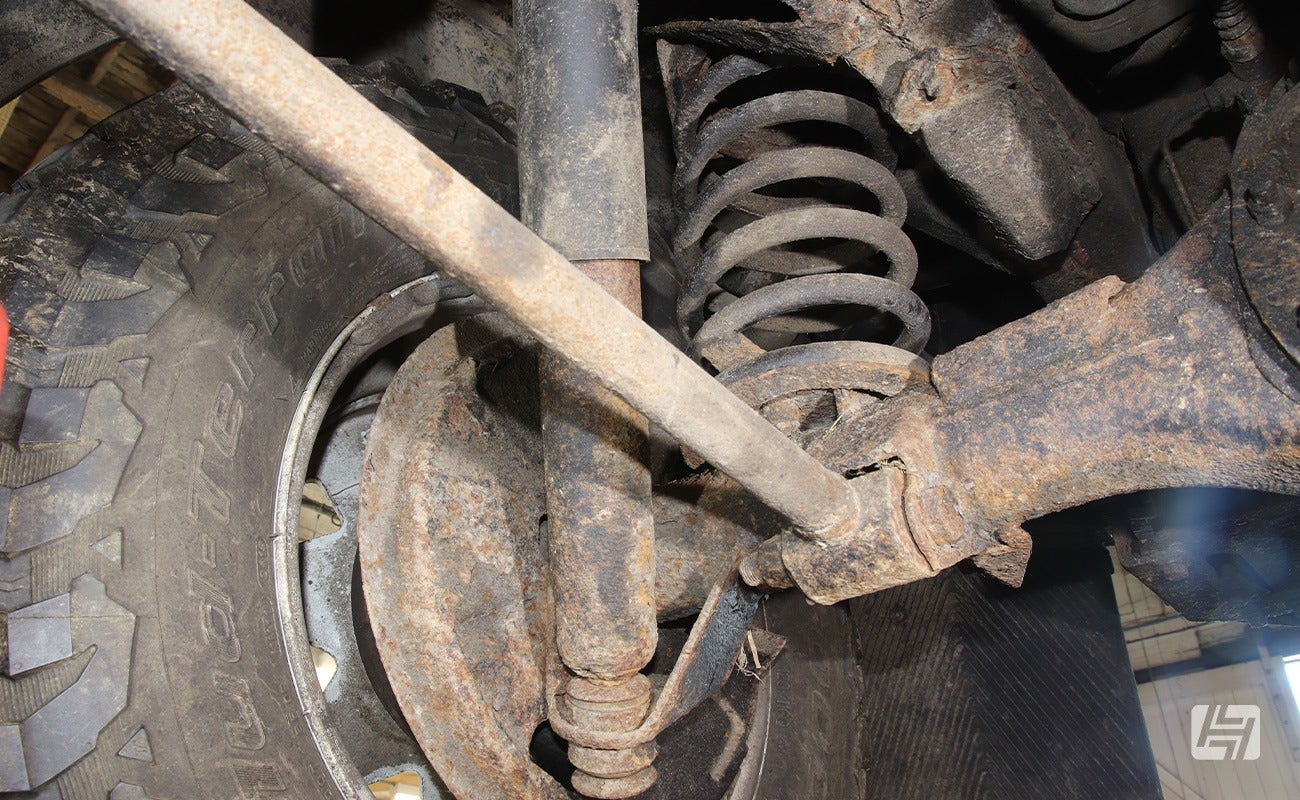
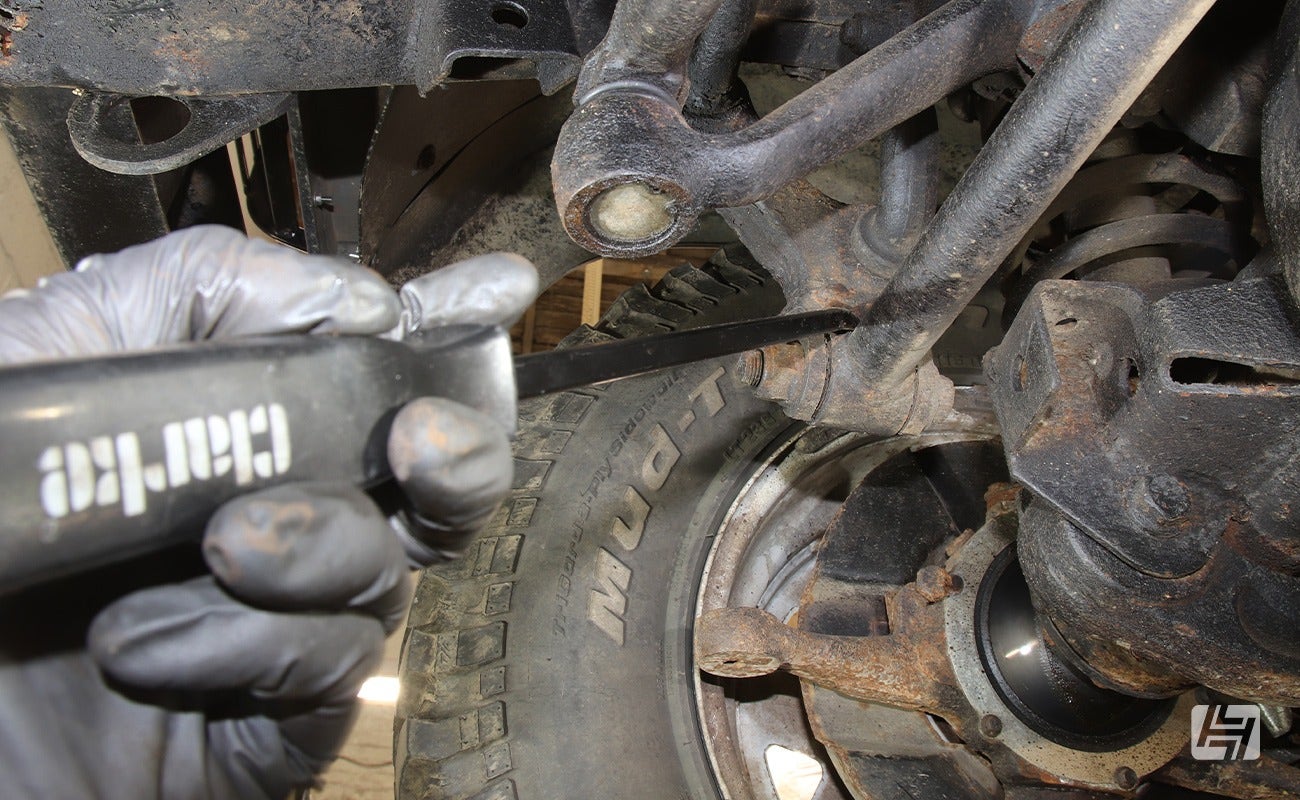
Inspecting the radius arms
A large pry bar will help with checking the condition of the mounting points for the radius arms. These radius arms are attached to the front and rear axles and their bushes can wear, resulting in handling issues. Levering against the mounting points with a pry bar will help to look for excessive movement. You may have already noticed problems with some bushes if they are perished, so checking these with a pry bar will help to further identify whether they are worn and are causing handling problems.
Radius arm bushes are readily available, but make sure you buy the right size as they differ depending on the model year of the vehicle.

Panhard rod and ARBs
The Panhard rod is a round metal bar fitted between the axle and a point on the chassis, and when fitted, it helps to reduce the sideways movement of the axle. Bushes are fitted at each mounting point, so they can be checked with a pry bar to test for excessive movement. If necessary, the bushes can be replaced.
If an anti-roll bar is fitted, again, use a pry bar to lever against its two mounting points, which incorporate a D-shaped bush that can become worn. If there’s excessive movement, this may result in a rattling noise when driving the vehicle. Similarly, if the ball joints for the drop links on the ends of the anti-roll bar are worn, this may also cause a rattle when driving. Shaking the ends of the anti-roll bar may help to identify whether a drop link is worn, although each drop link is usually very short, so it may be easier to lever against it with a pry bar and feel for movement.
The mounting bushes and ball joint on the top link or A-frame fitted over the rear axle should also be checked with a pry bar.
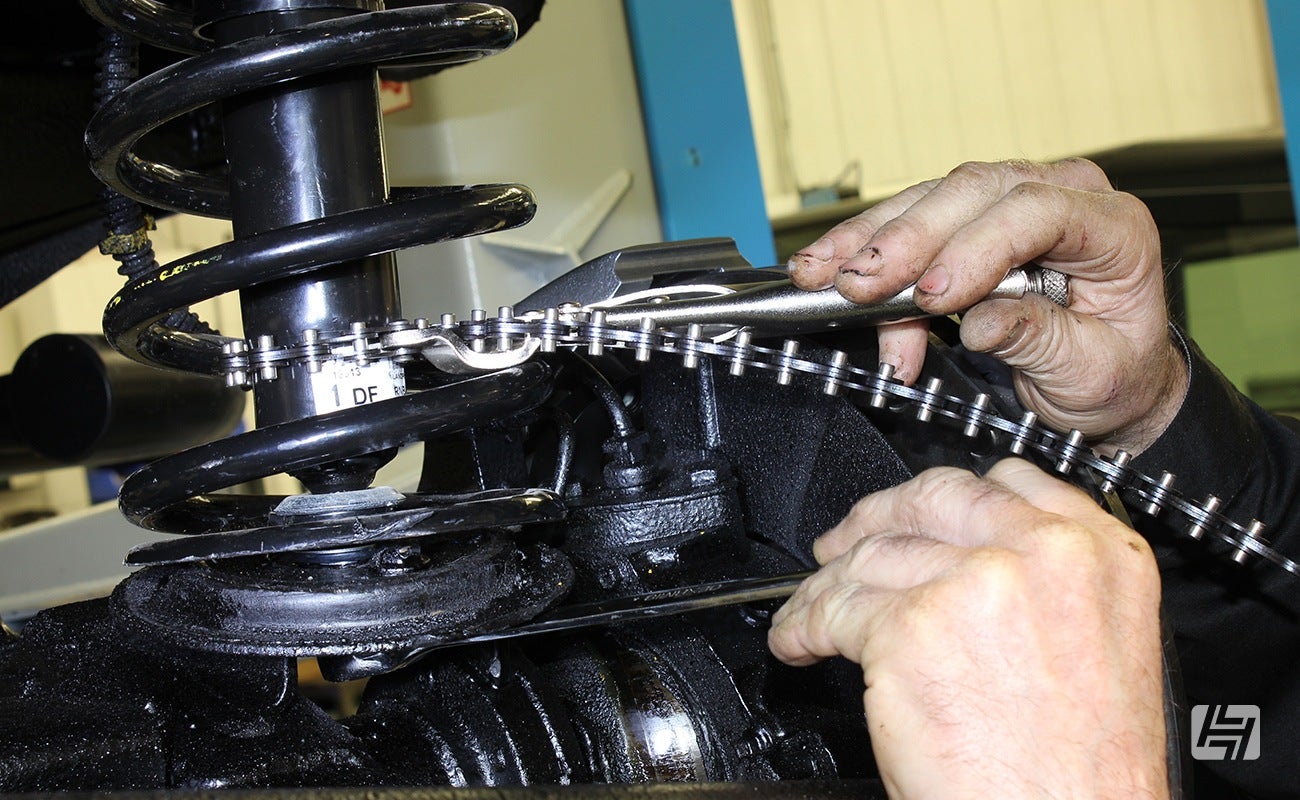
Replacing LR Defender suspension components
Removing and replacing suspension components on a Defender varies in difficulty and potential problems. Rust is nearly always inevitable, so a spray can of penetrating fluid is essential along with a wire brush to remove dirt and corrosion from threads and fastenings.
Old telescopic dampers may rotate when you try to undo a mounting nut, so find a safe means of gripping the body of the damper, especially if it’s sitting in the middle of the coil spring.
Applying heat can help to loosen fastenings, but be careful not to set fire to the rubber bushes as the gases emitted are toxic, and of course, keep the heat away from any fuel lines and other components. Sometimes, it can help to rapidly warm up and then cool a fastening to loosen it.
Understanding Defender steering
The Land Rover Defender’s steering consists of a steering box with an assortment of linkages and a telescopic damper. Hydraulic power steering was initially an optional extra, but proved popular, so most models have it fitted (manual steering is rare to find).
Where power steering is fitted, start by checking the fluid level in the reservoir. This is located in the engine bay, often in the offside front corner. Wipe over the cap before unscrewing it. There’s a dipstick attached to the underside of the cap, so wipe it clean, then reinsert and extract it again to check the level. Top up with whatever is stated in your workshop manual

Check steering column universal joints
From within the engine bay, look for the steering column that connects the steering wheel to the steering box. Check the condition of the universal joints, which can seize up, resulting in stiff steering. Spraying over them with light grease may help to keep them moving freely, but if they are already seized, it may be better to replace them.
Trace the end of the steering column to the steering box and if the vehicle has power steering, look around it for leaks. Whilst seal kits are available from the specialists we spoke to, fitting a reconditioned or new steering box is a simpler solution.
The hydraulic pipes for the power steering and even the pump can also leak, so check around them for traces of fluid. If they are covered in what appears to be greasy dirt, then it could be a coating of power steering fluid. This also applies to the steering box, which if it’s leaking, may be coated in what looks like greasy dirt.
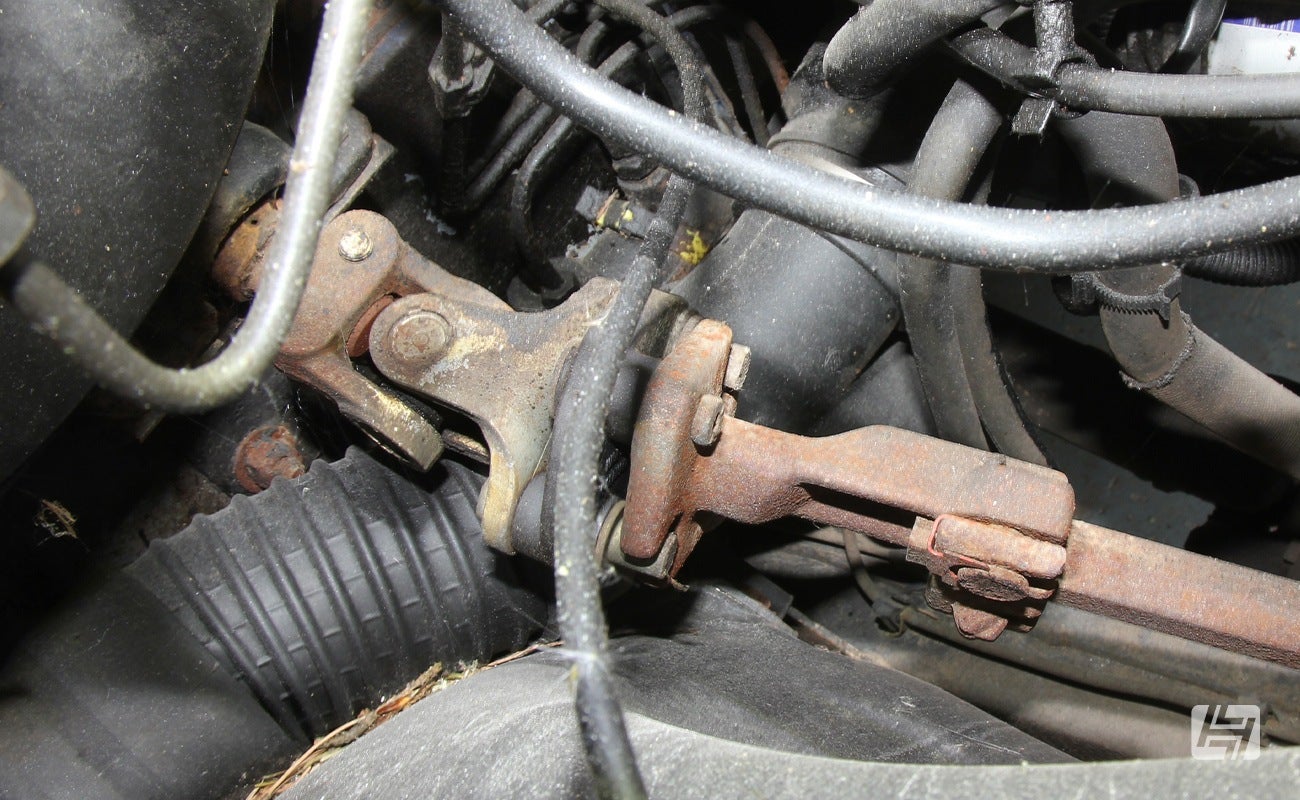
Inspecting the steering linkage
The steering linkage can be inspected from underneath the front of the vehicle. Shake all joints to look for loose connections. The drop arm, for instance, can become loose, especially if the steering box is leaking. If the drop arm does become worn, then the steering will feel vague. Also, check the drop arm’s ball joint, which on some early models can be a difficult job to replace.
There are a number of ball joints in the steering linkage to inspect. Check the dust covers are not split, which could allow water and dirt to get inside, resulting in premature wear. Where possible, use a pry bar to lever against a joint or connection to check for excessive movement.
Steering damper
A steering damper is fitted to the steering linkage to help smooth out shocks and vibrations transmitted through the steering. Visually inspect it for leaks (misting) that could mean it’s coated in a layer of greasy dirt, and inspect the condition of its mounting points, making sure none of the rubber bushes are perished.

Routine servicing should always include a thorough check of a Land Rover Defender’s suspension and steering to help identify problems that can cause poor handling. The checks we’ve outlined should take around 20 minutes to complete, but could help you catch a bigger problem early, or make your drive a little more pleasant.
Rob
Thanks to Four Plus 4 of Leeds for their help and advice in compiling this guide.